Learning to Draw People Challenge – Day 13 (2024/03/03)

This was drawn March 03, but written March 04, 2024 as part of the 2024 Learning to Draw People Challenge

Credits: 1

Introduction

So, first and former, as explained in Learning to Draw People Challenge – Take Two, I am now taking my weekends off, but with the option to draw as a bonus credit if I want to, which I opted to do this Sunday (Hence the note that I have 1 Credit). The posting schedule will remain the same, Monday through Friday, so this Sunday drawing is coming out on Monday. And I can spend this bonus credit if I want/need to skip a day. However, I will still try to avoid using those whenever possible (I shouldn’t use one simply out of laziness!).

Unfortunately, while I did draw on Sunday, I did not manage to write the blog post on Sunday, instead writing it on Monday. Having forgotten a cable to transfer my drawing and video to my computer, I couldn’t fully write the post. Regardless, here’s how the session went.

Exercises

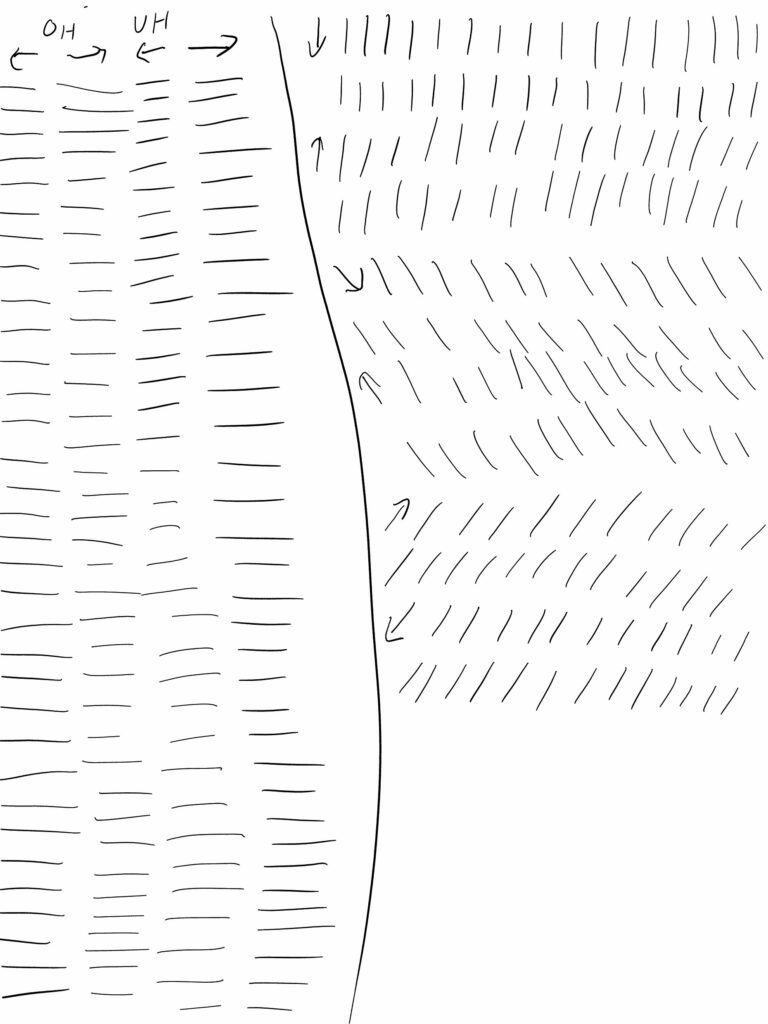
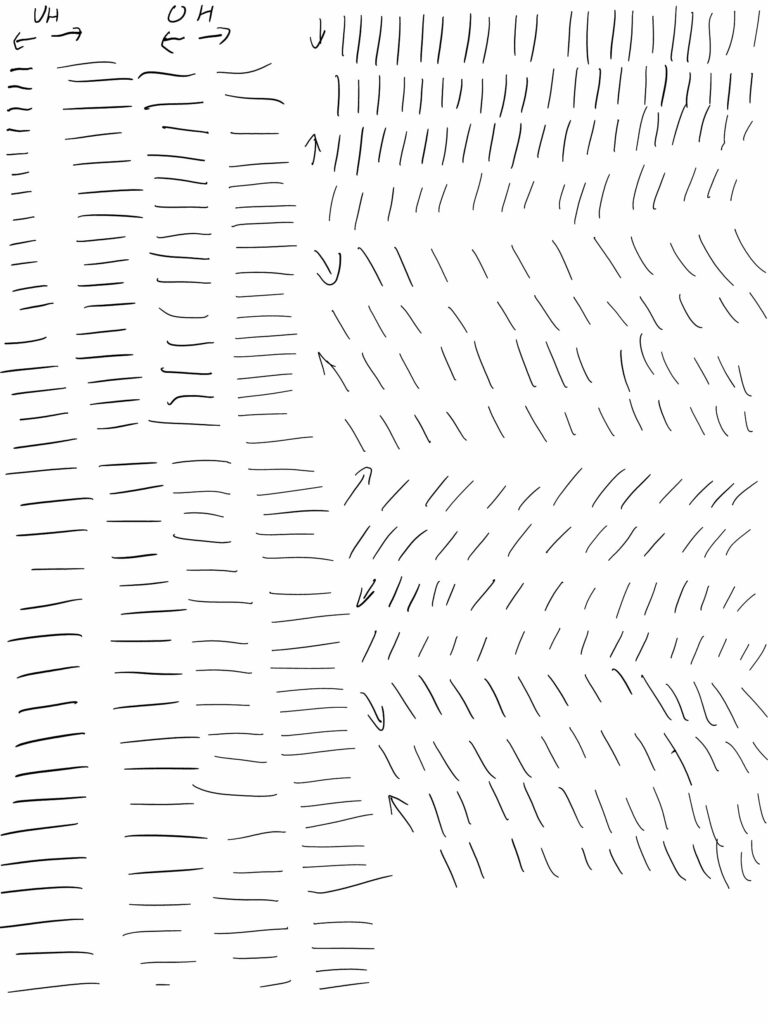
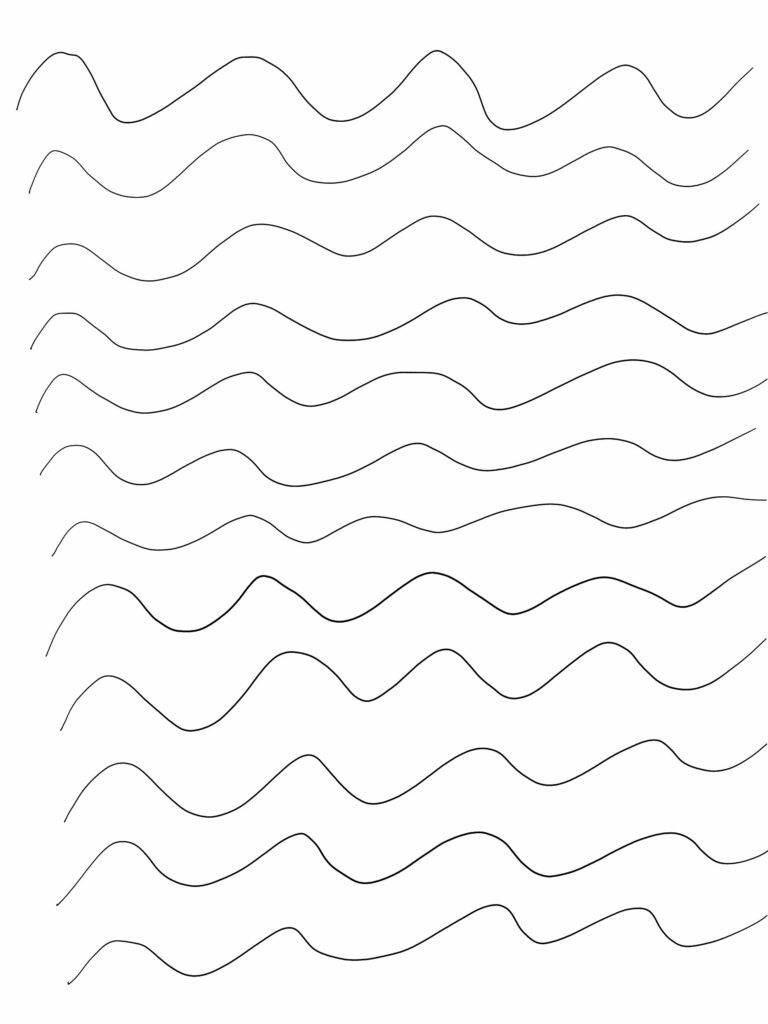
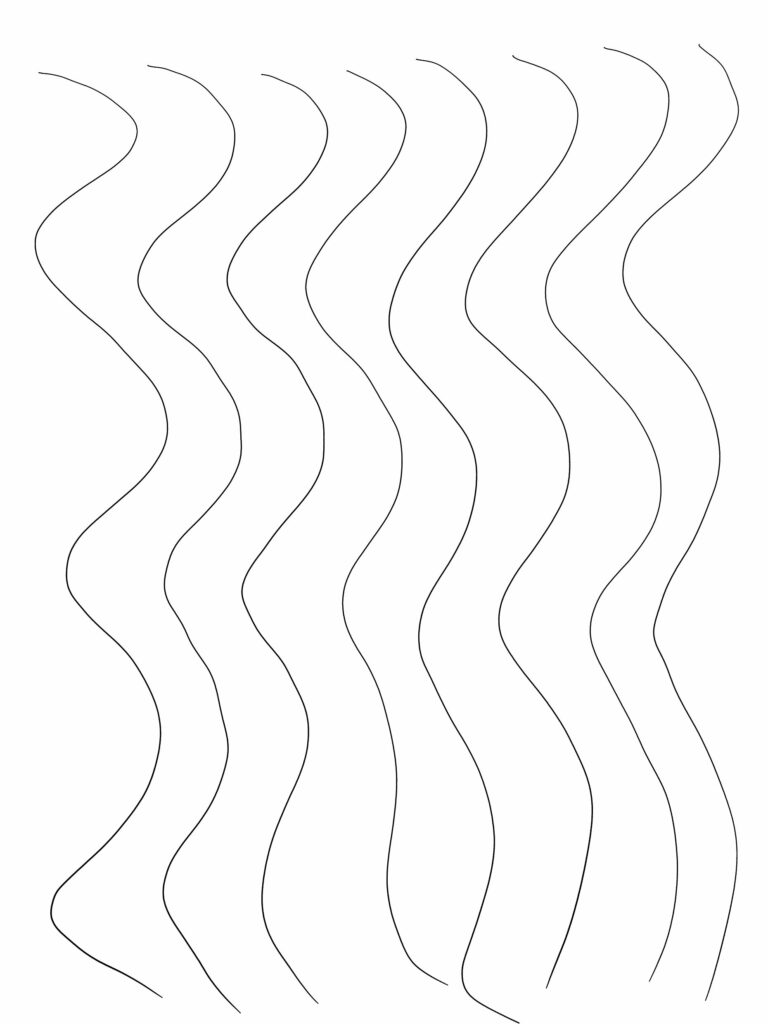
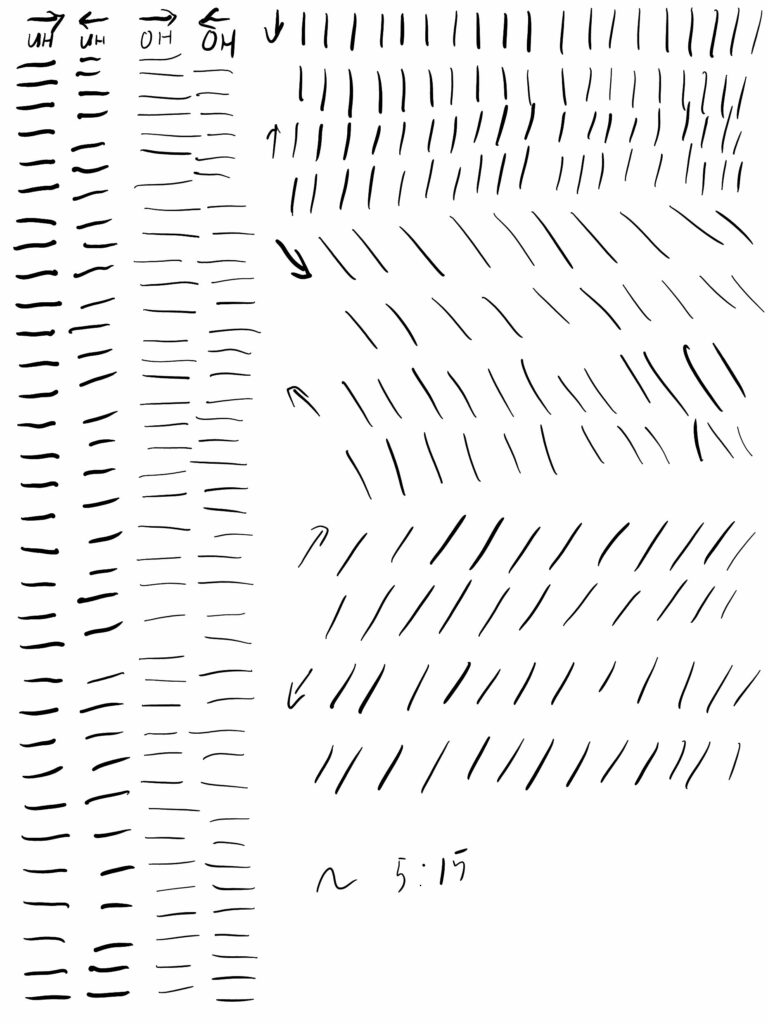
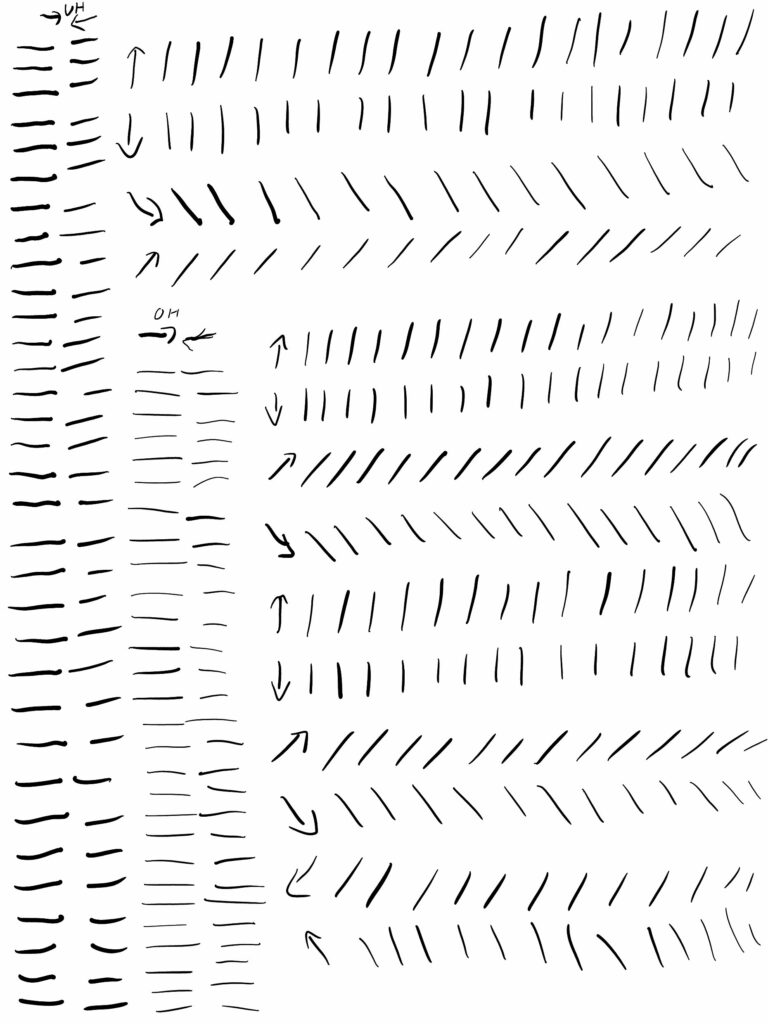
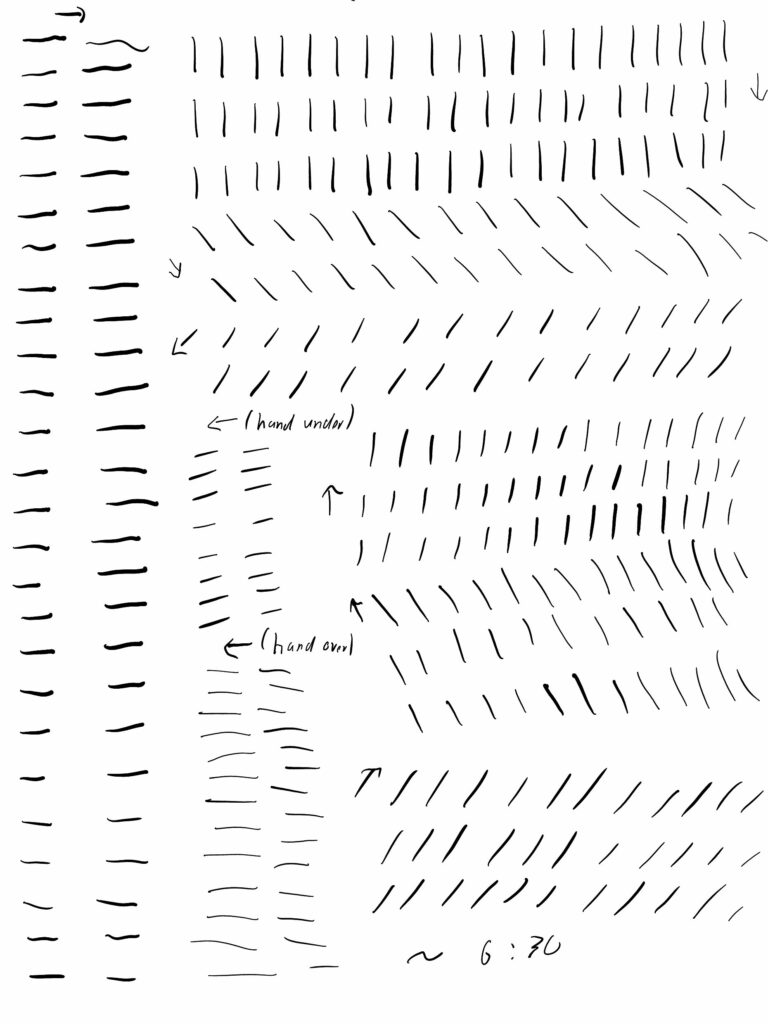
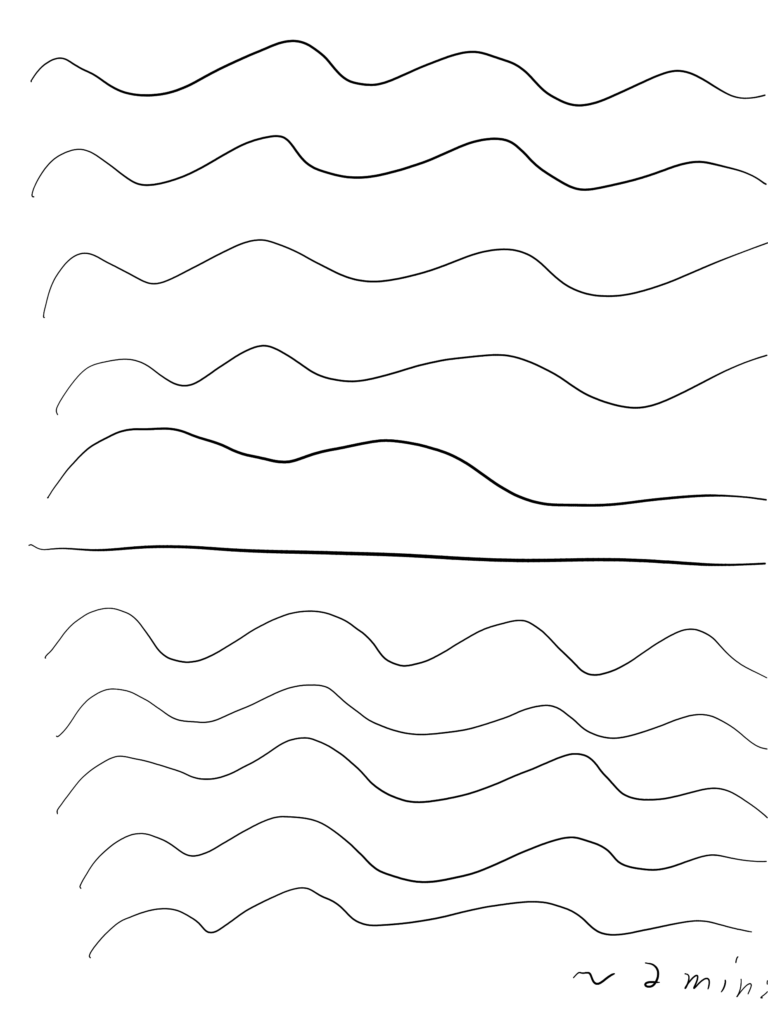
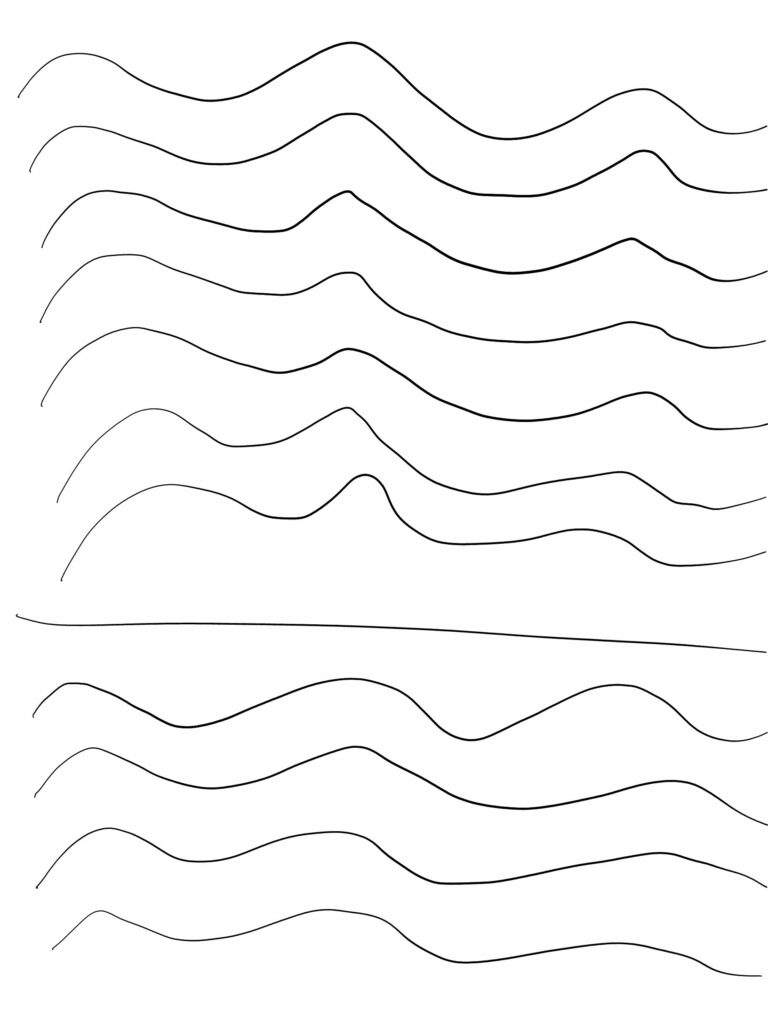
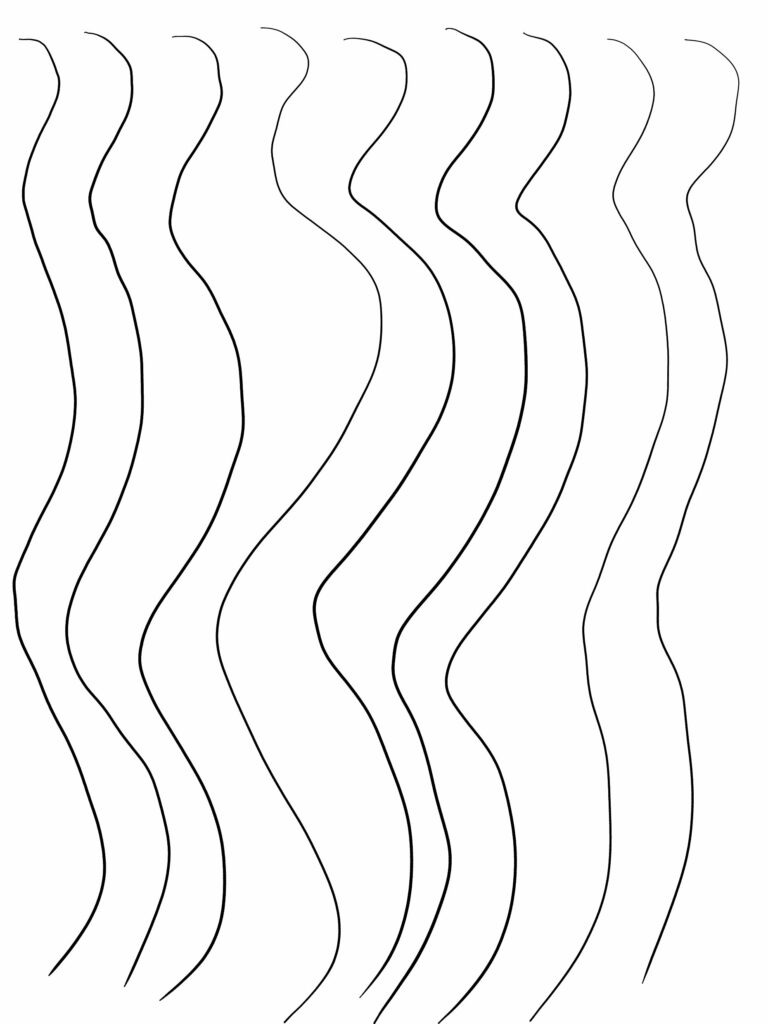
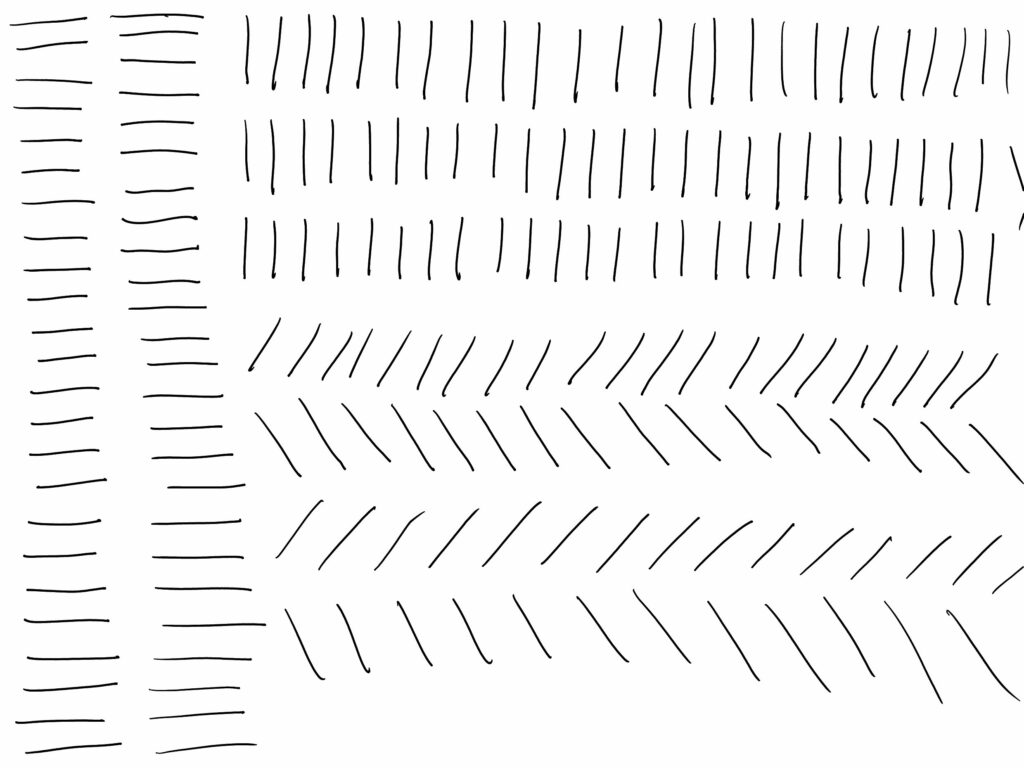
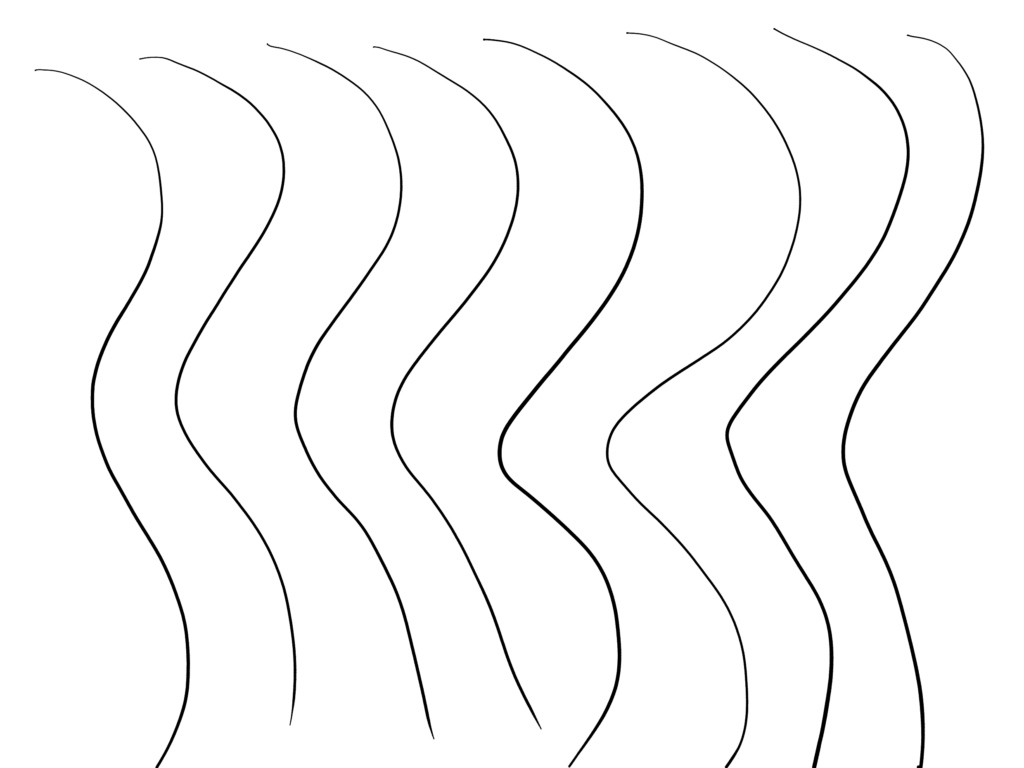
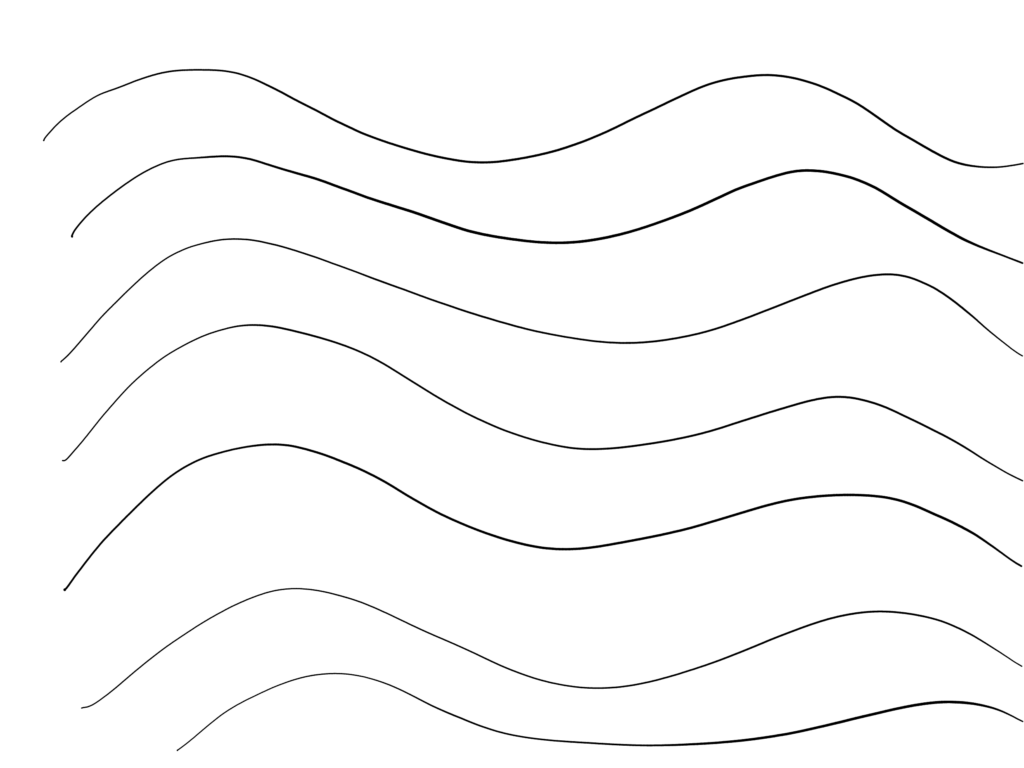
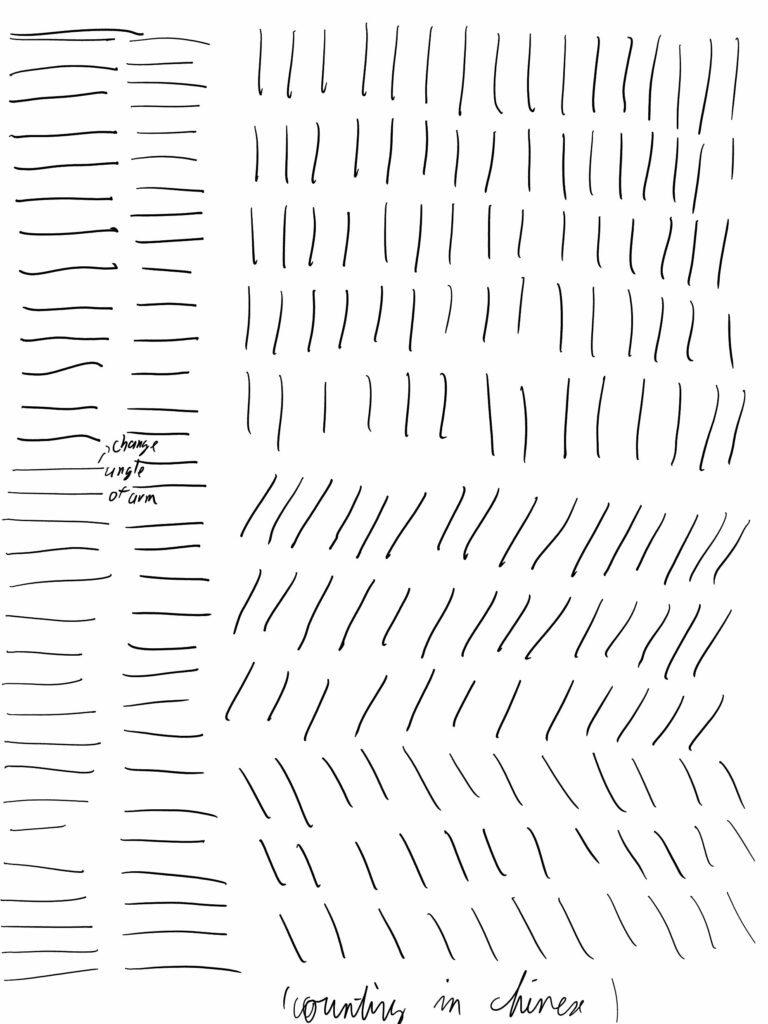
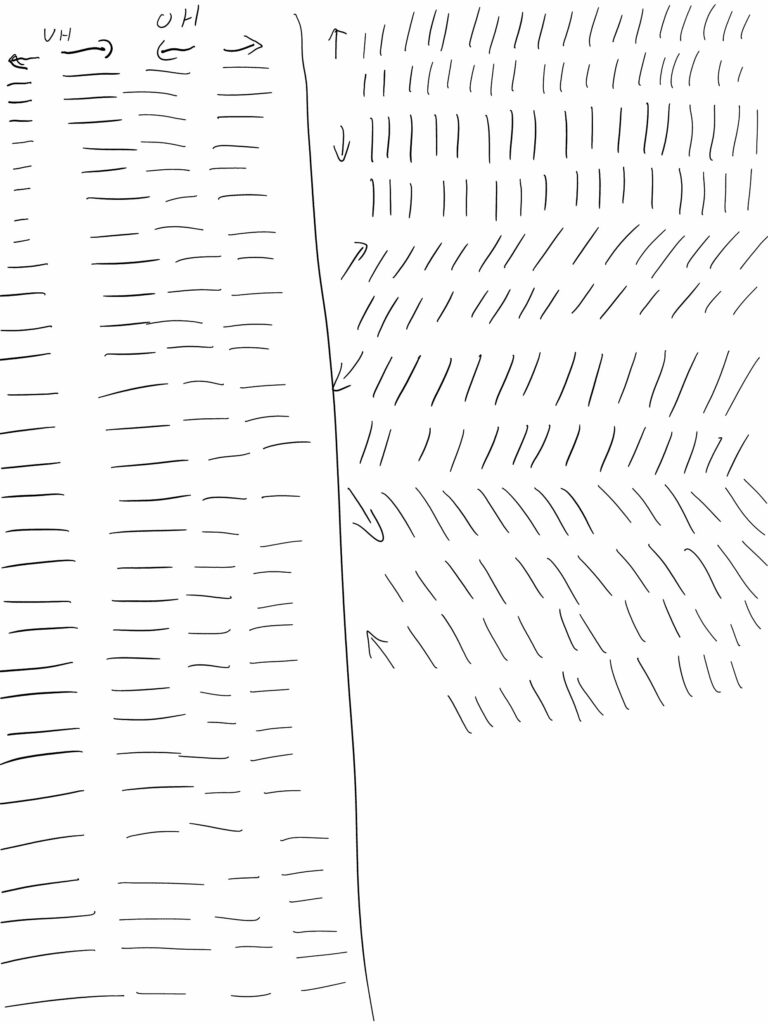
First of all, as usual, I started with the exercises. I don’t have a whole lot to say about them, but I do feel like I’ve been gaining more line confidence. It might be worth eventually seeing whether there is an appreciable difference. As for “technique”, I did start to reposition my hand between each strokes, and I think it does help with both result and hand comfort (avoiding hand cramps).

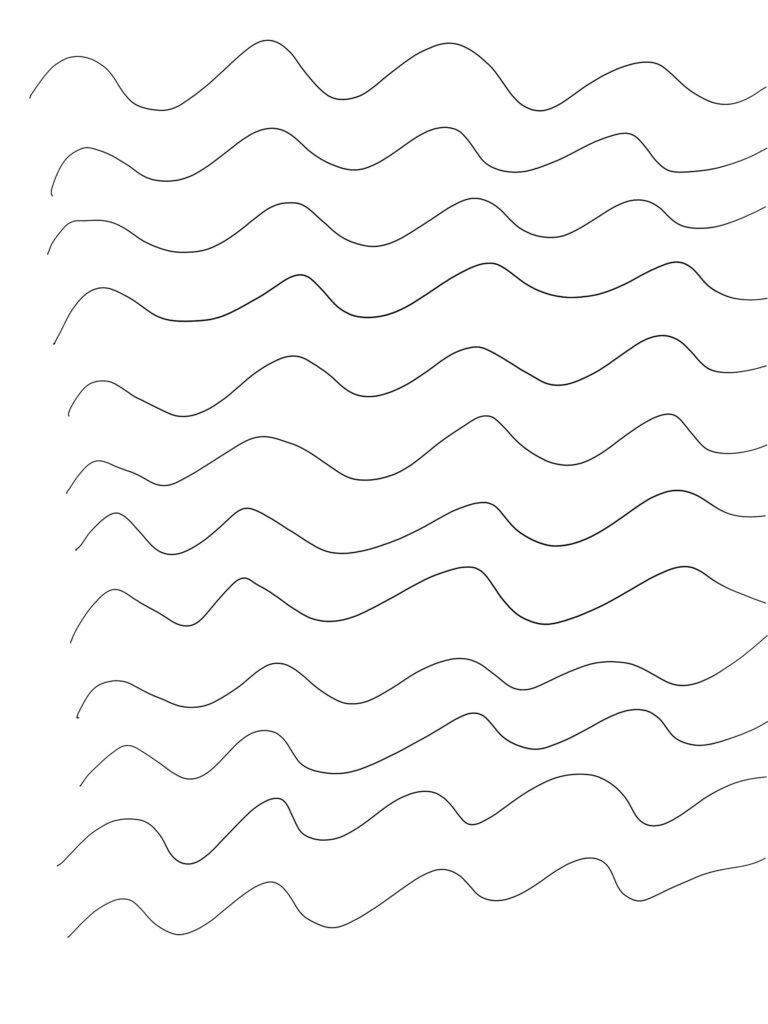
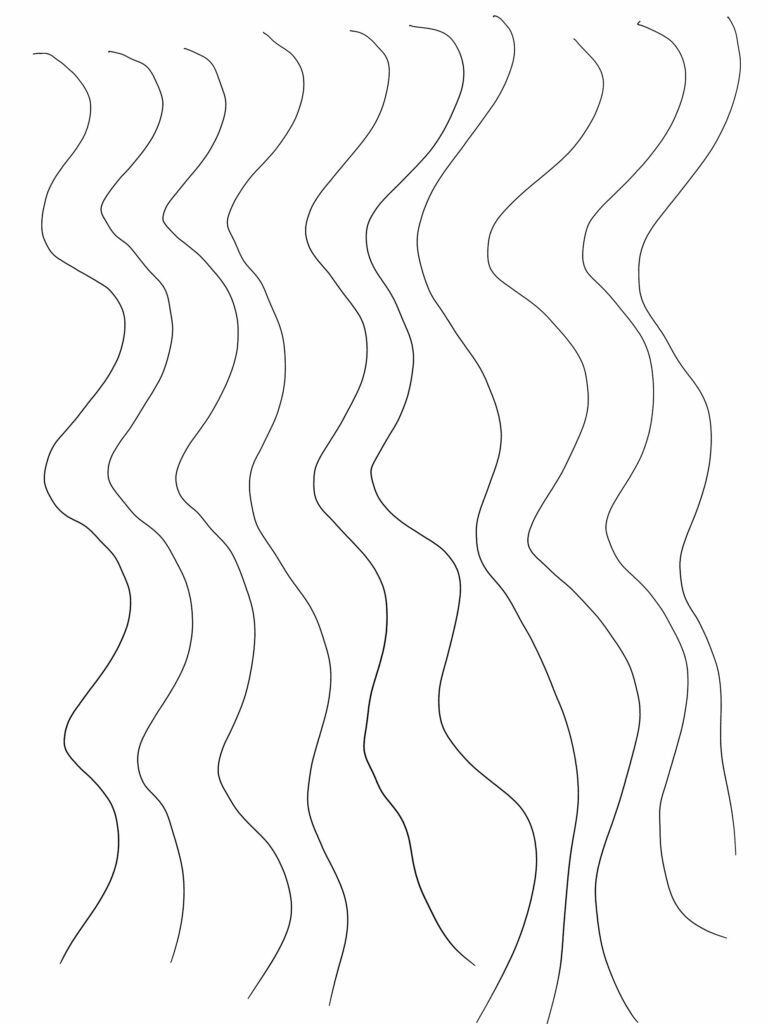
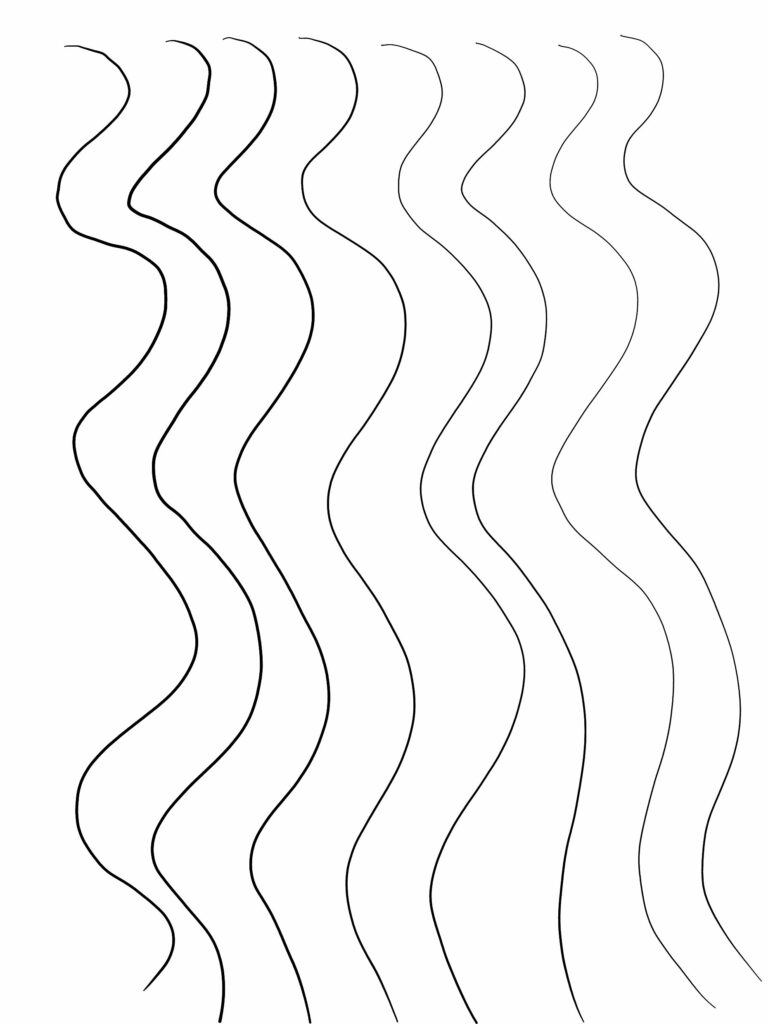
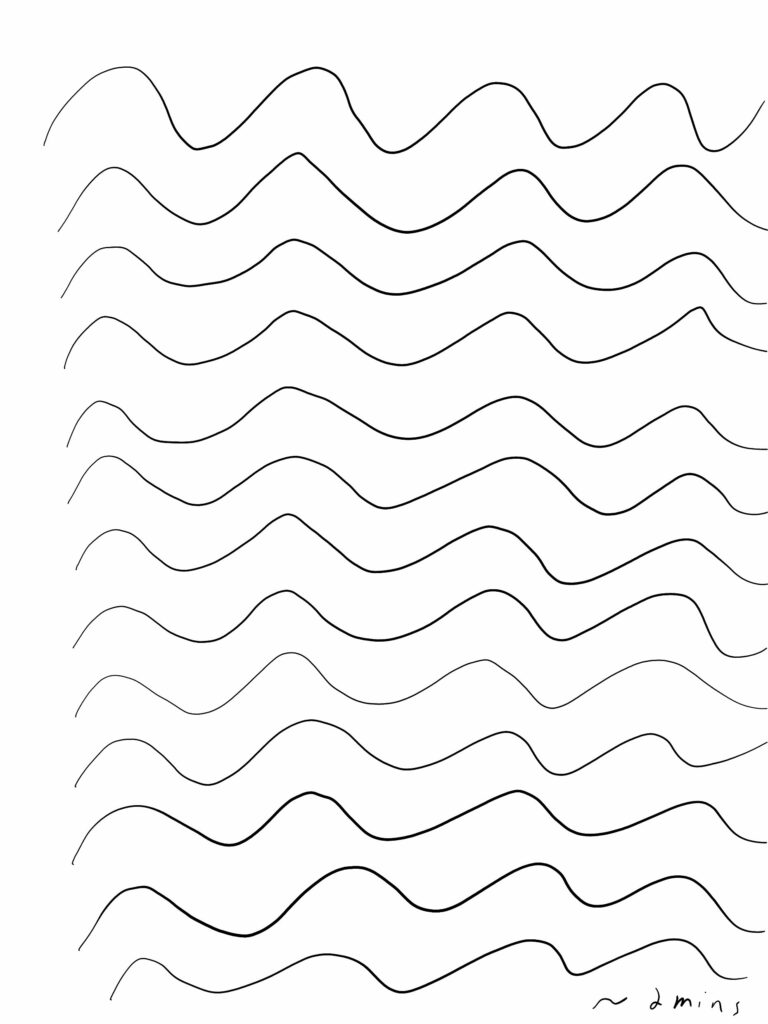
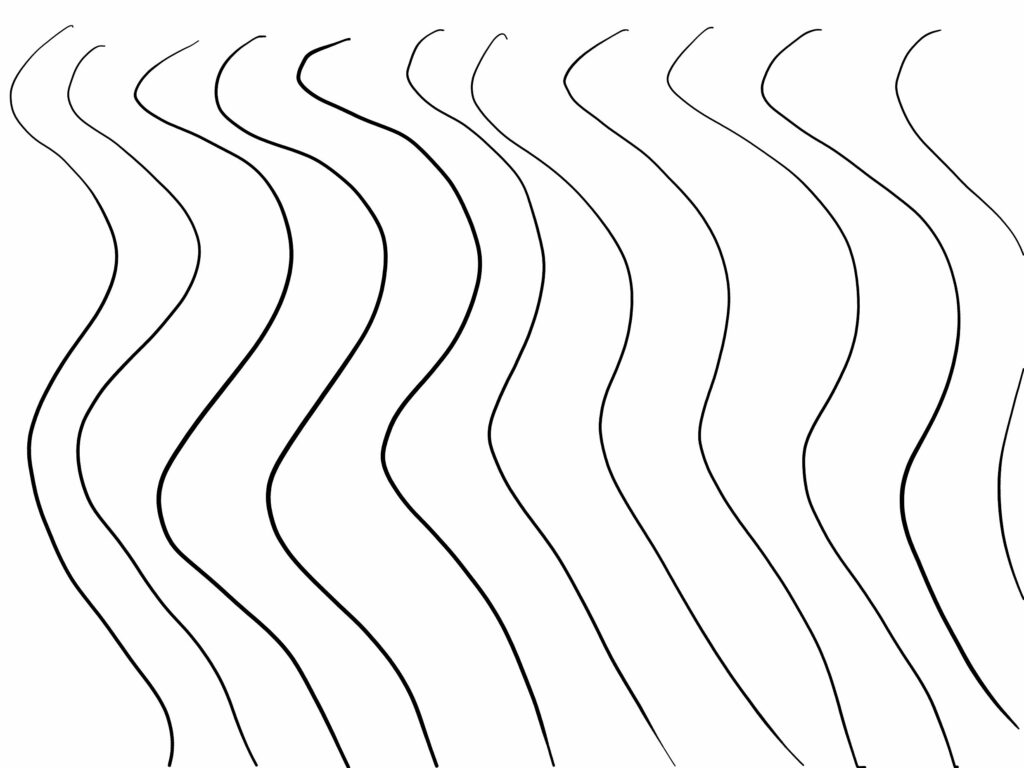
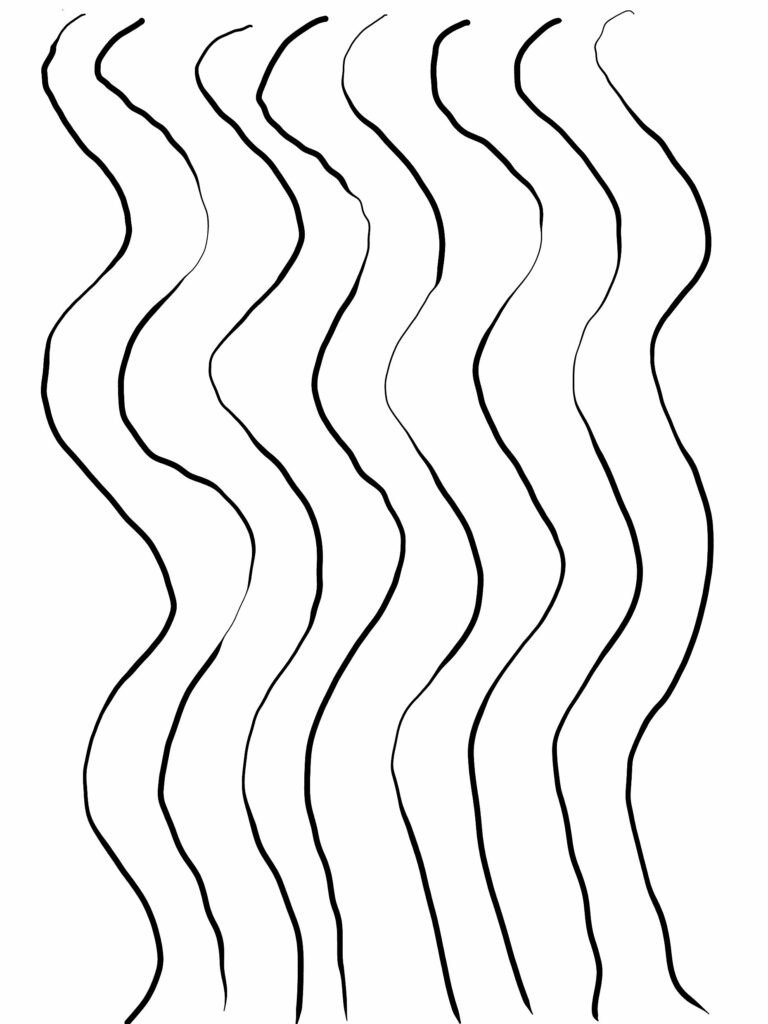
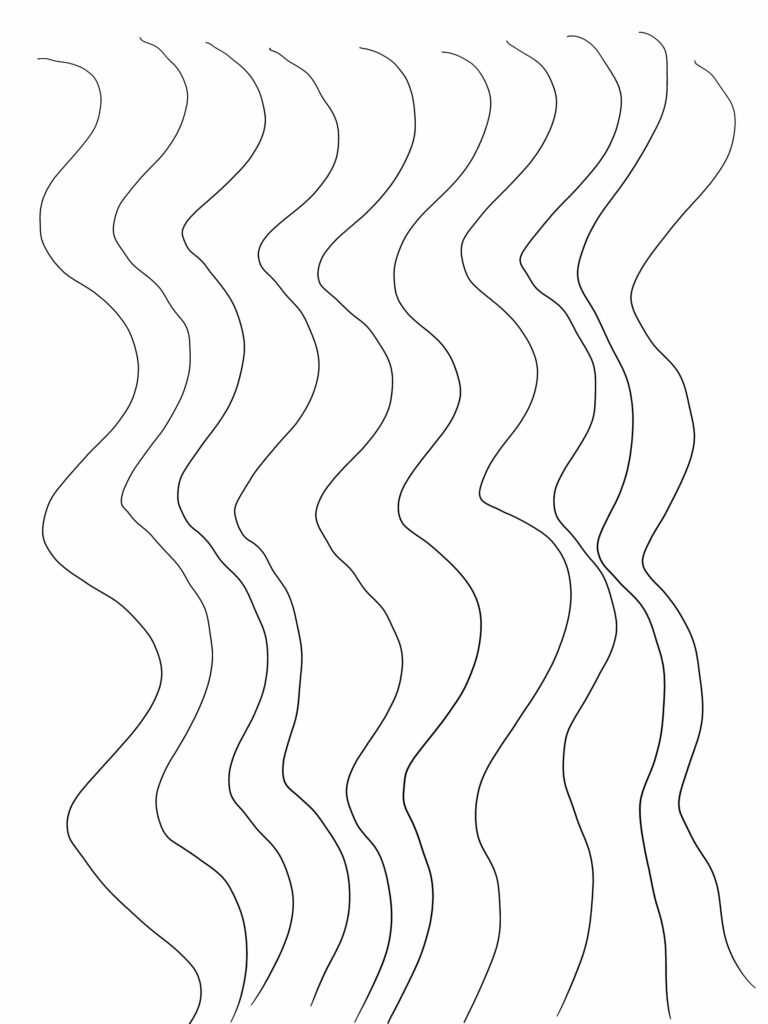
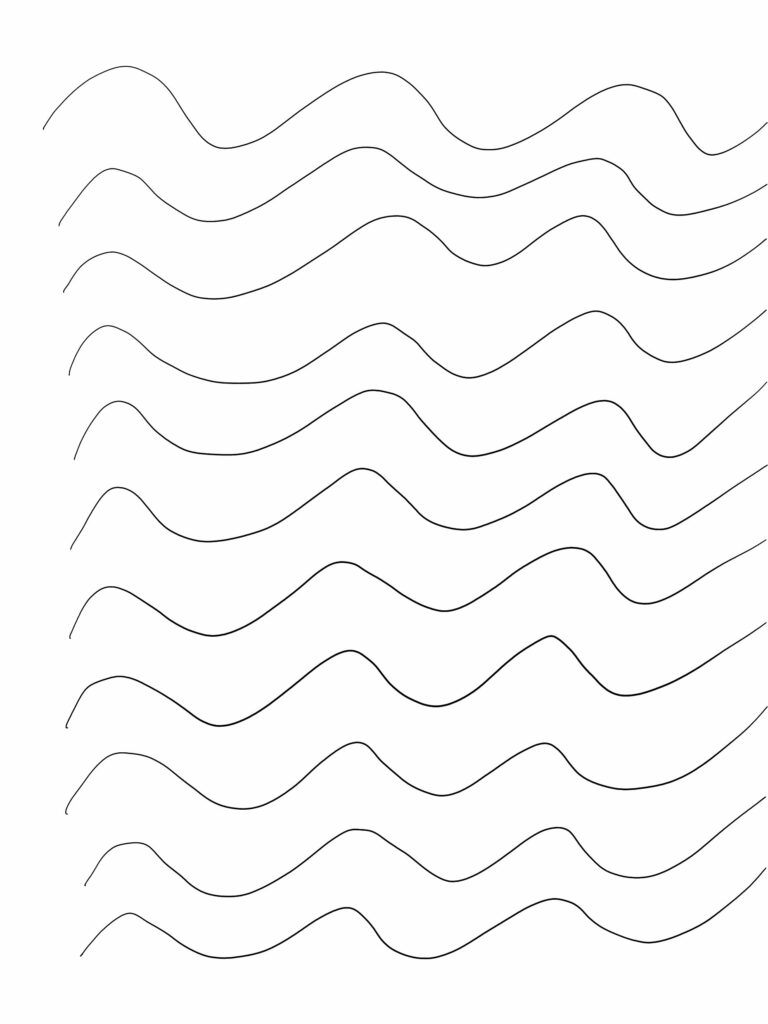
While I believe I’ve been improving with the wavy lines exercise, one major annoyance remains: the compounding effect of mistakes. They get amplified with each step, and each progressive line becomes harder to complete and more muddled. However, I think that might be a good thing in terms of practice, since it forces each line to be done more accurately in order to have a reasonable final result.

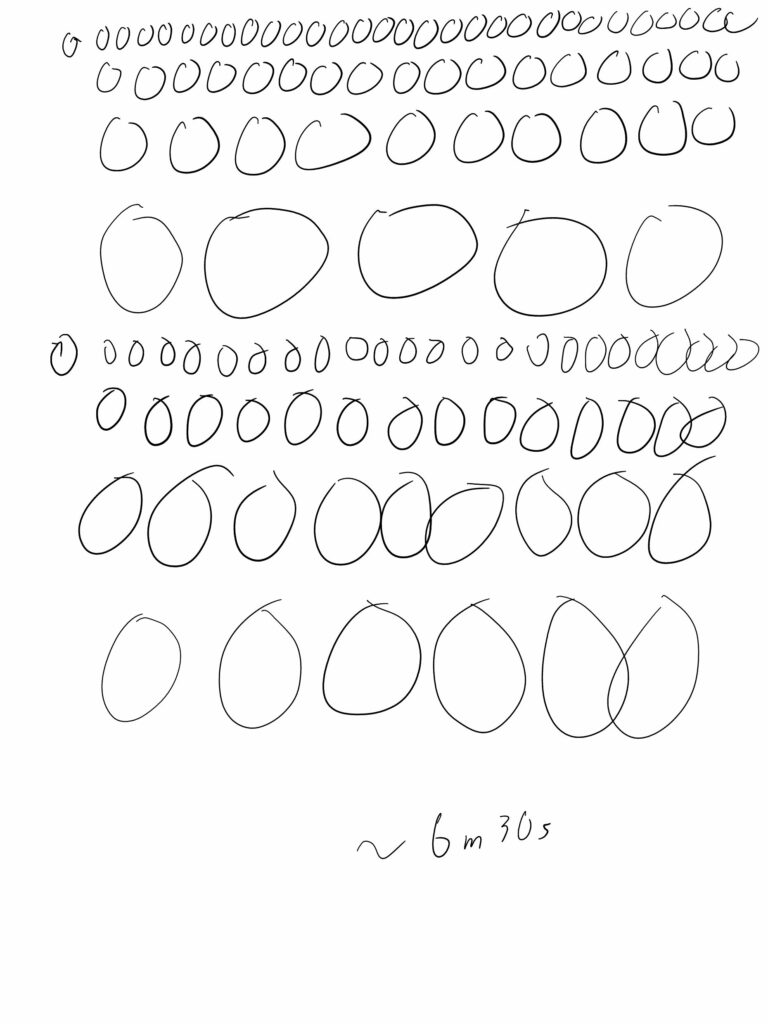
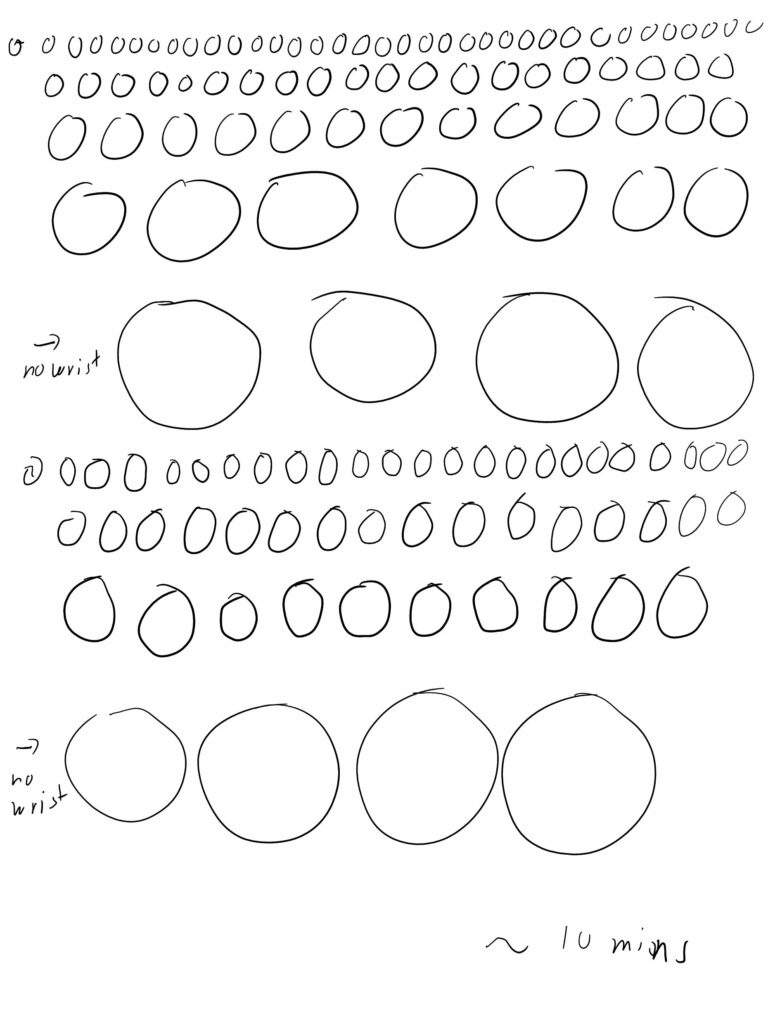
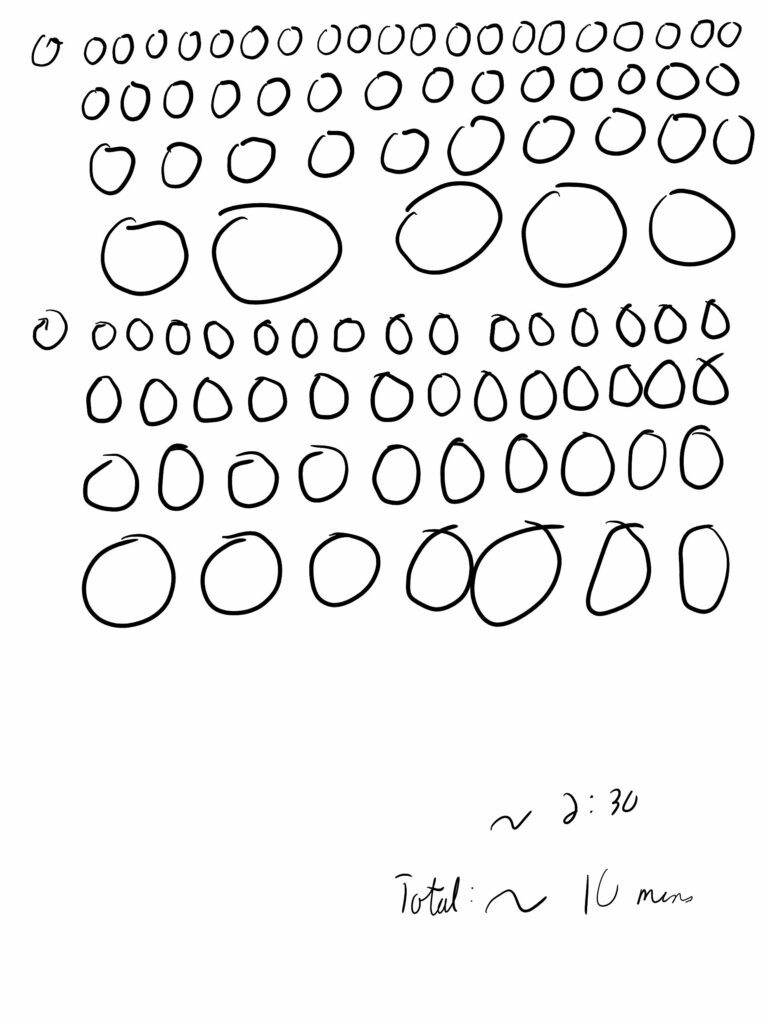
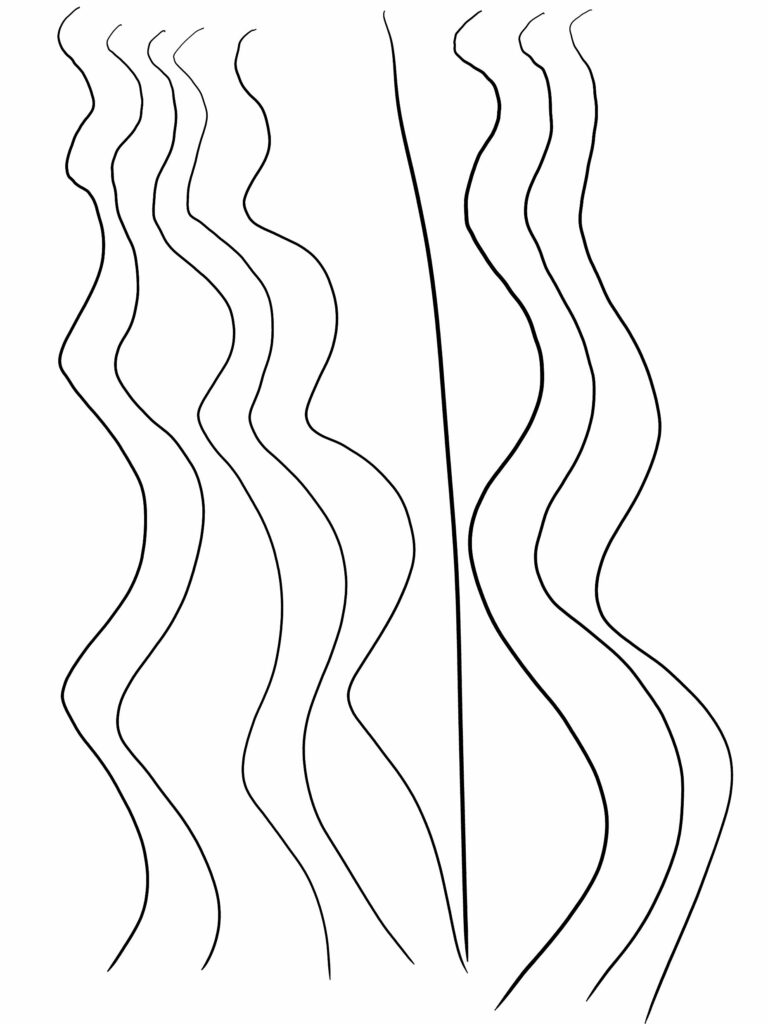
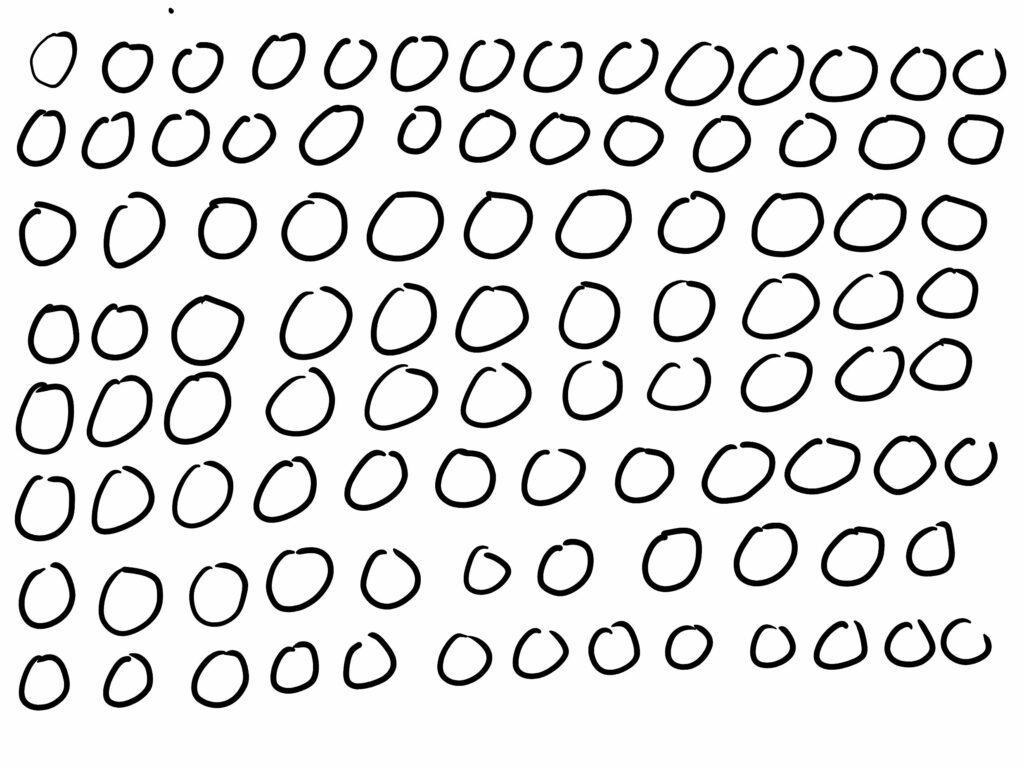
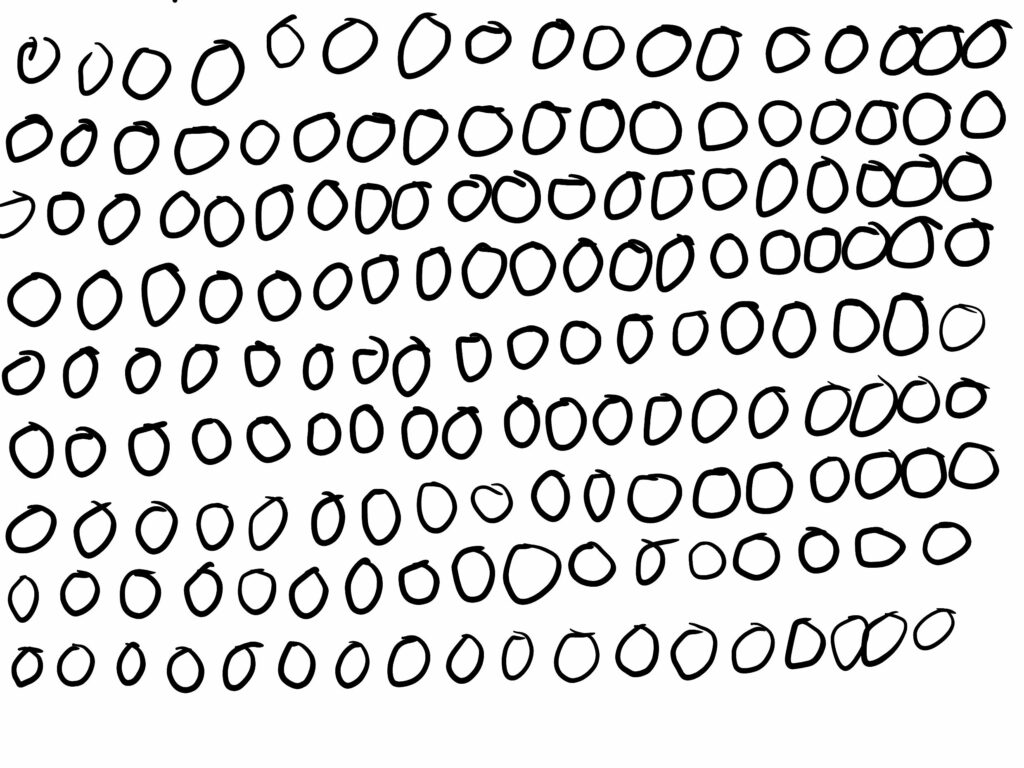
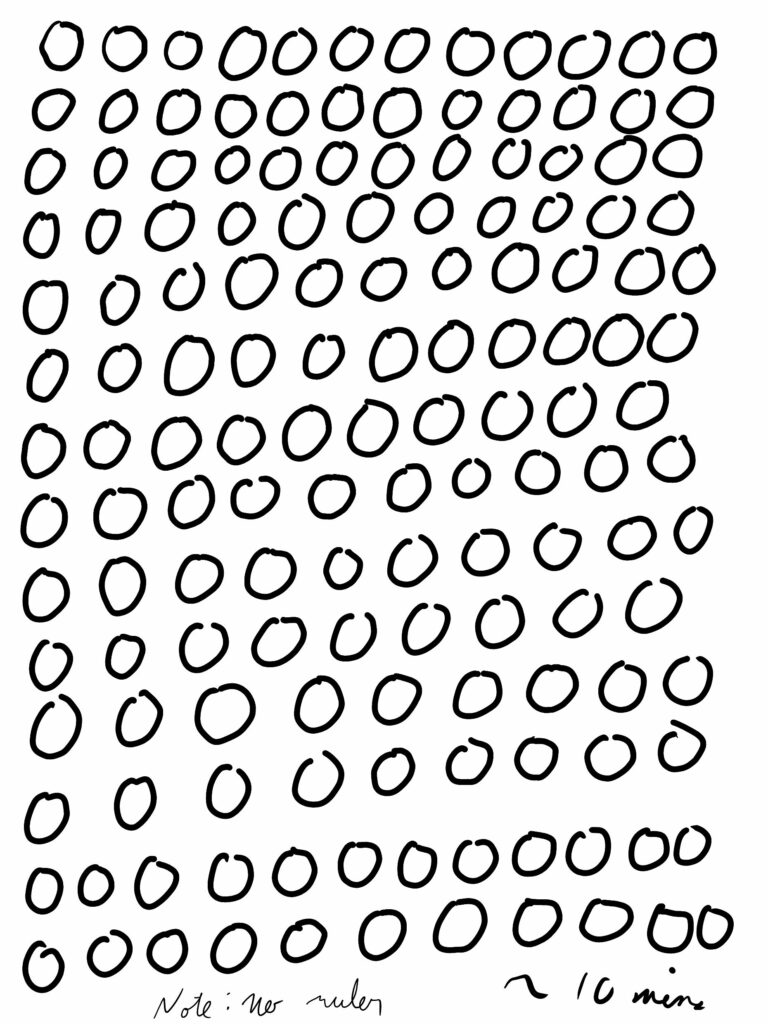
Finally, regarding the circles exercise, I feel like I’ve definitely improved when it comes to the clockwise orientation, which was basically alien to my hand at the very start. It’s by no means perfect, but it’s improving nonetheless.

Here are the results, which overall took me roughly 6m45s (They’re definitely less time consuming than they used to be):

Day 13 – Lines exercise
Day 13 – Wavy Lines exercise (Vertical)
Day 13 – Wavy Lines exercise (Horizontal)
Day 13 – Circles exercise

Drawing

Let us now get to the drawing portion. While I still have a lot of room for improvement when it comes to drawing heads and faces, I opted to practice a full-body sketch to change things up a bit. Thus, I turned to the body section of my book, and started going through the steps highlighted in the first exercise.

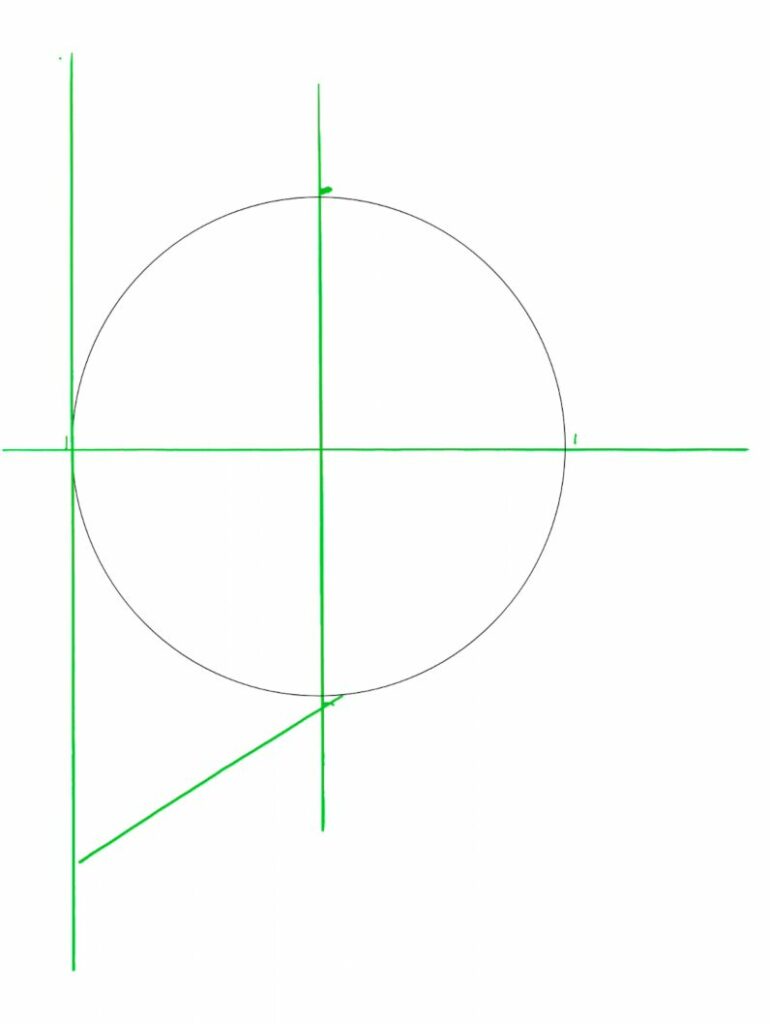
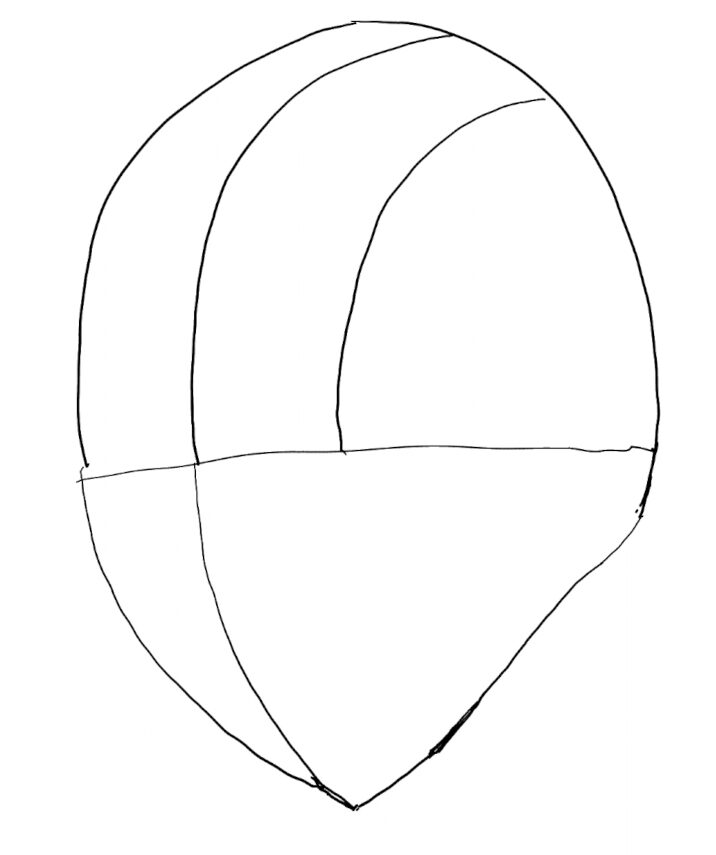
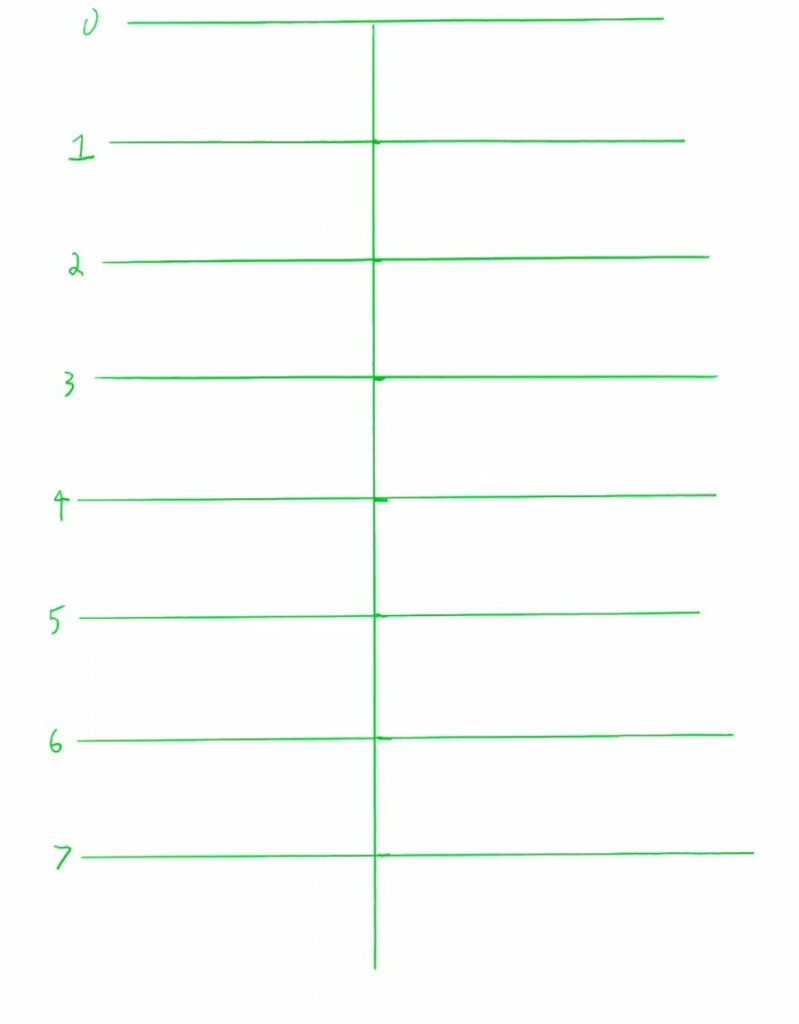
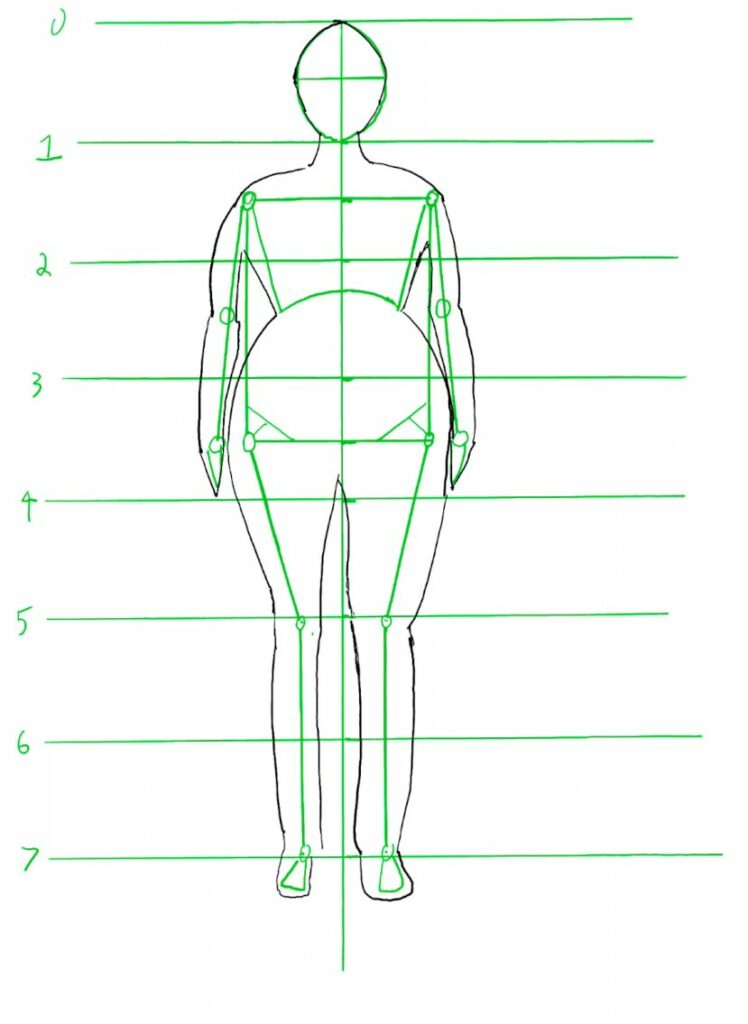
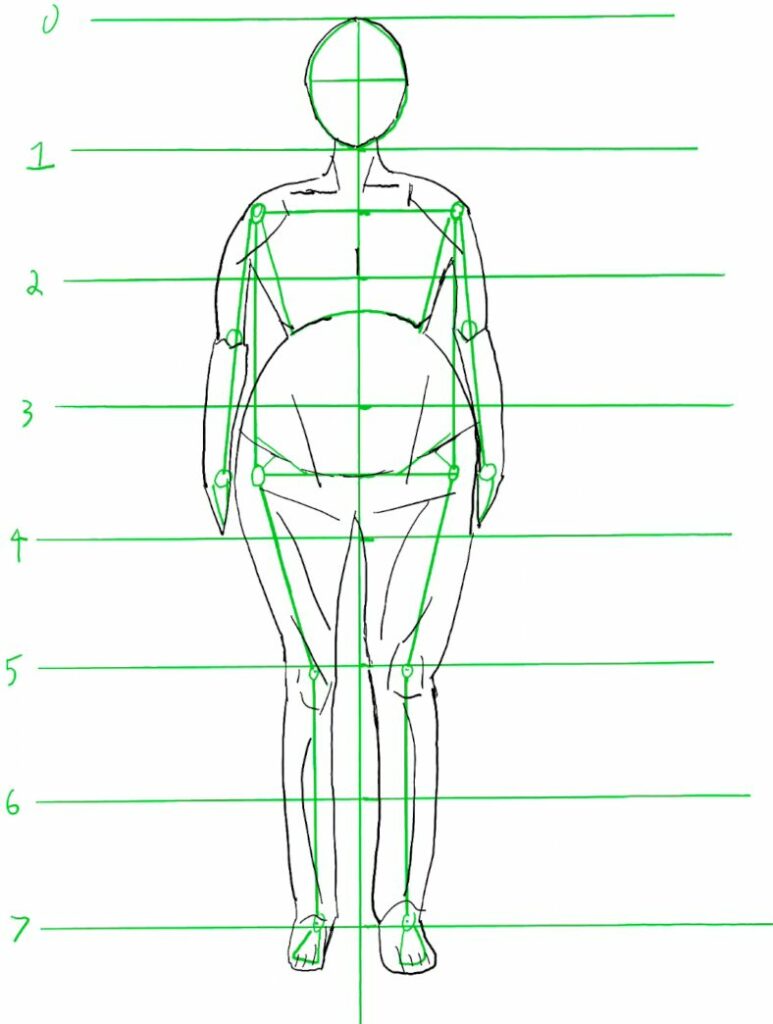
The first step was to create guidelines. 8 lines overall with equal distance between each successive one. Note that in the book, the vertical line stopped along the final horizontal line, but I figured it wasn’t necessary, since it would be discarded anyway (Which I still agree with). But I do regret not having the right implements to draw parallel lines (e.g.: two triangle protractors).

Day 13 – Drawing Guidelines

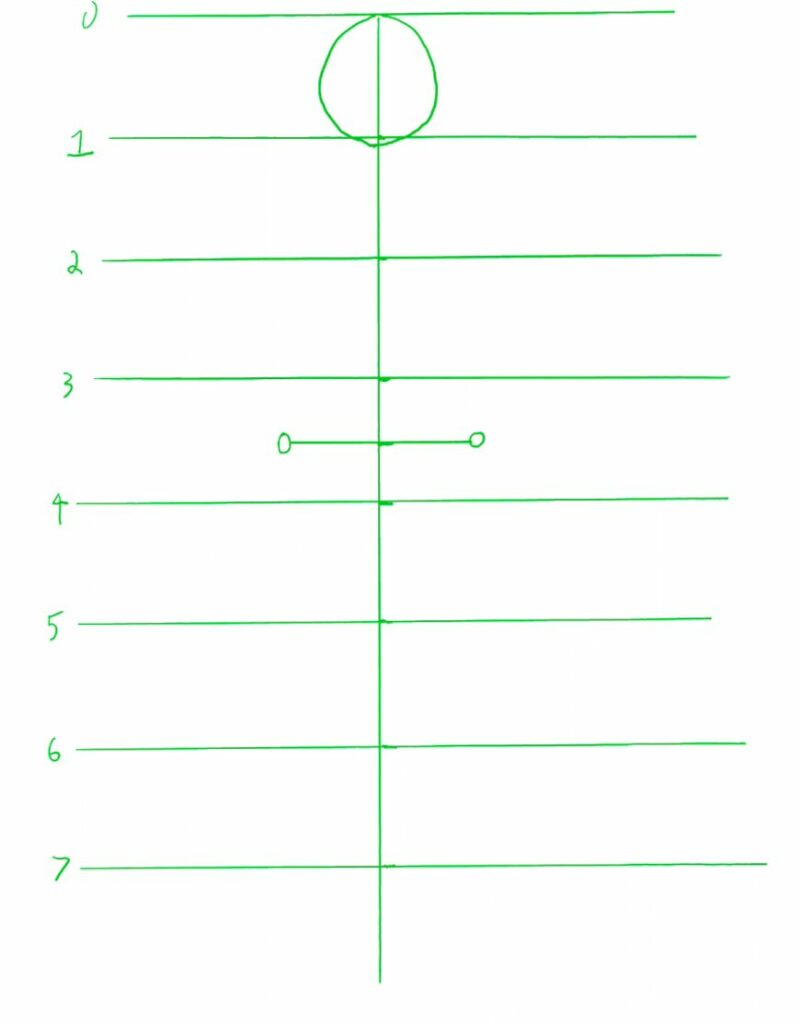
Next, I started to wire-frame the character with guidelines. Starting with an oval for the head and a horizontal line and two circles for the hips. This horizontal line goes at the very center of our reference lines, i.e.: between lines 3 and 4. I did try to eye-gauge the width of the hips, which ended up wider than on the reference model. However, I don’t consider that an issue (Although it did mean having to adapt different elements accordingly, and following the reference less faithfully). Though do keep in mind that if you’re taking measurements for each side, instead of for the entire length, any discrepancy will be doubled. so the proportions between the height and the width can change fairly quickly. (Thus, it might be preferable to attempt to get the desired length and try to adjust the center, instead of measuring from the center twice).

Day 13 – Head and hips guidelines

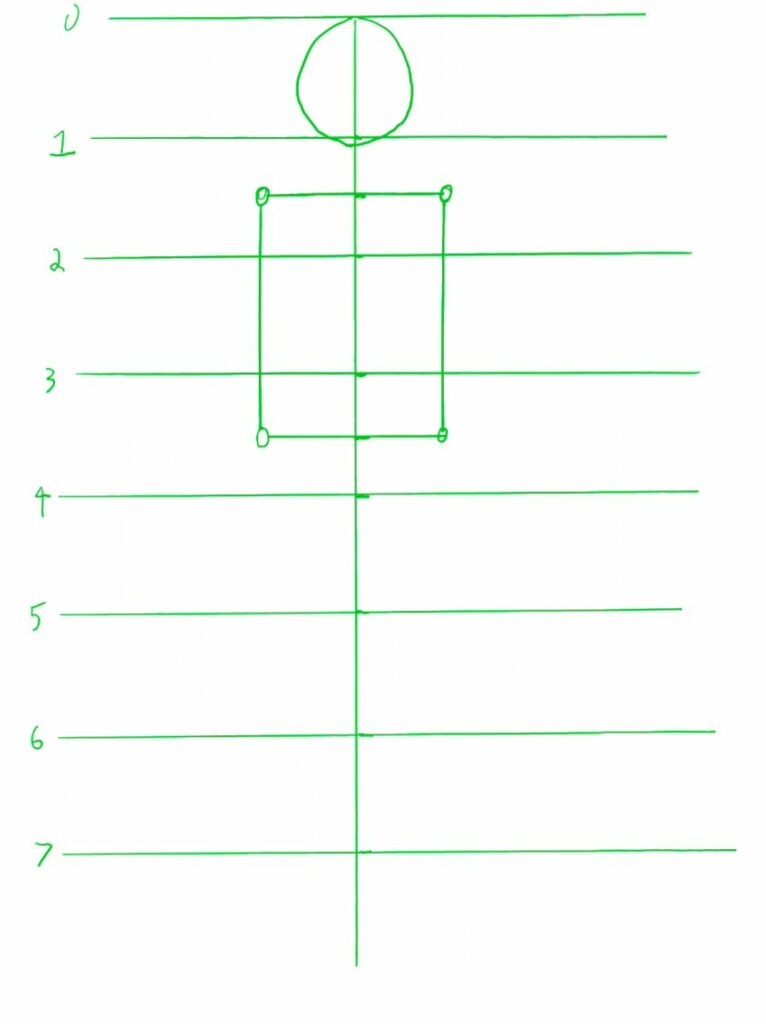
Once that was done, I finished the torso’s frame. I added an extra line at the correct height (halfway between lines 1 and 2), and made sure the circles for the shoulders lined up with the hips’, as per the reference. The female reference showed hips and shoulders aligning perfectly. (More on this on the next day, where I sketch the male model).

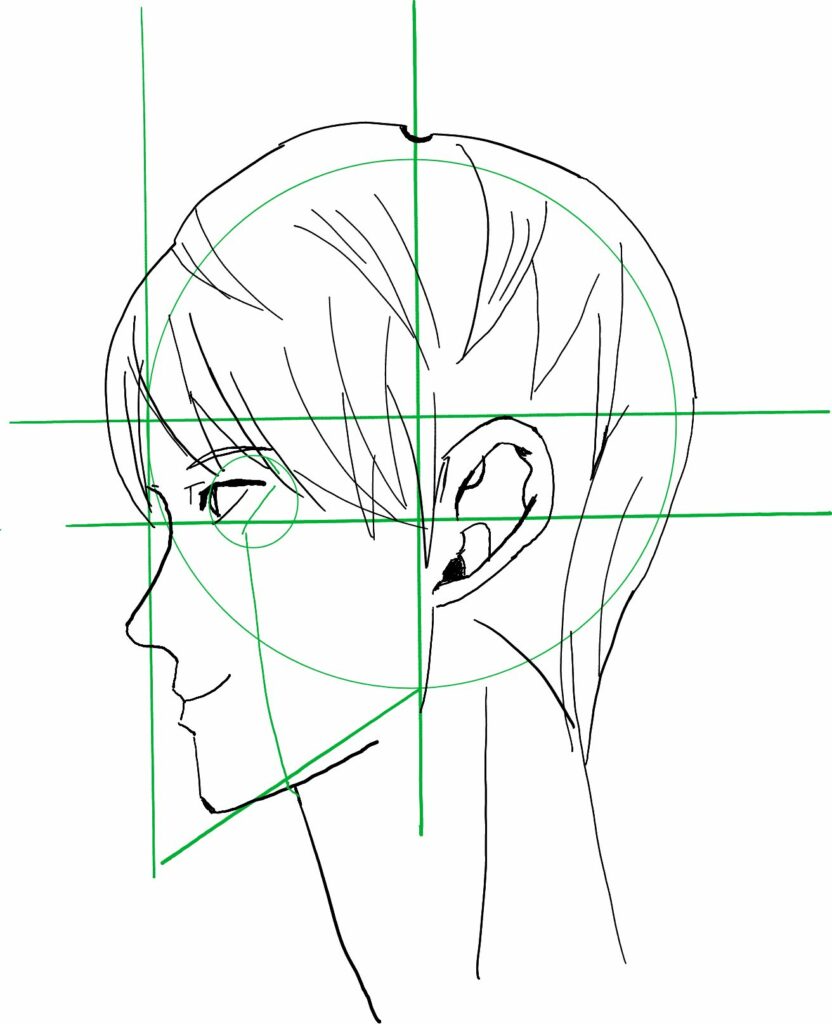
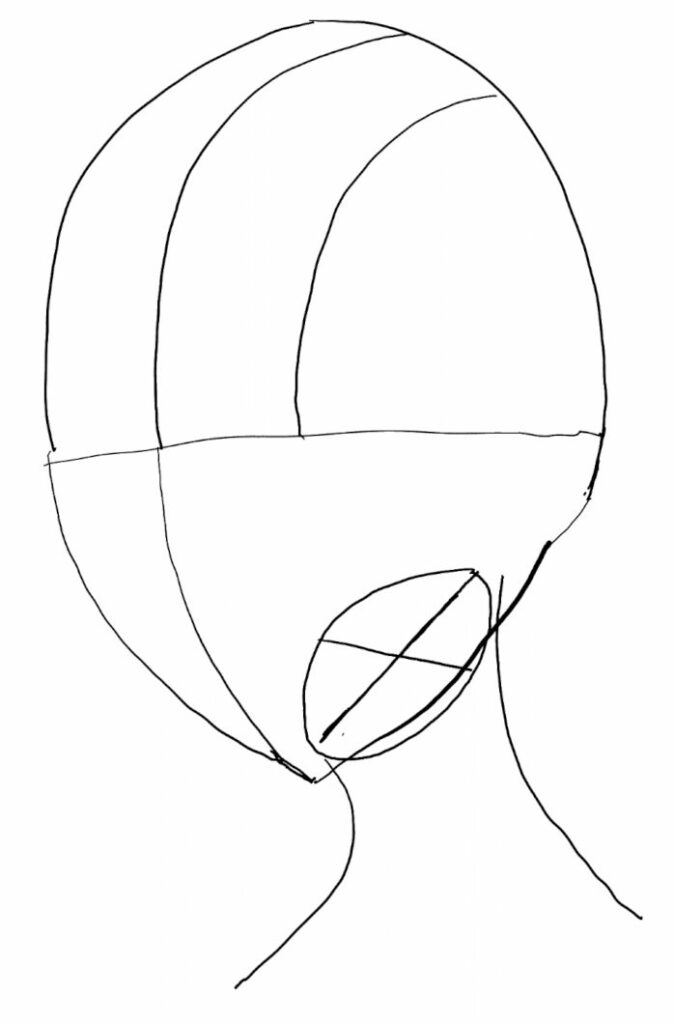
If you haven’t noticed yet, the circles on these drawings are meant to represent important “nodes”, to help align everything. These nodes are at the intersections of different members (e.g.: hips and thigh, upper arm and forearm, etc…), and thus joints will usually be represented.

Day 13 – Torso guidelines

Next up, it was time to add legs and arms. In this case, the arms are fully extended. To draw them, I aligned the wrist nodes to be slightly away from the hips, and then connected them to the shoulders. In contrast, the knees are further inwards, close to the center, with the ankles aligned directly below them. I also sketched some small feet.

It was at this stage that I truly noticed that the horizontal proportions were different from my reference model, presumably because there were enough elements present to intuit all the proportions at a glance.

Day 13 – Arms and legs guidelines

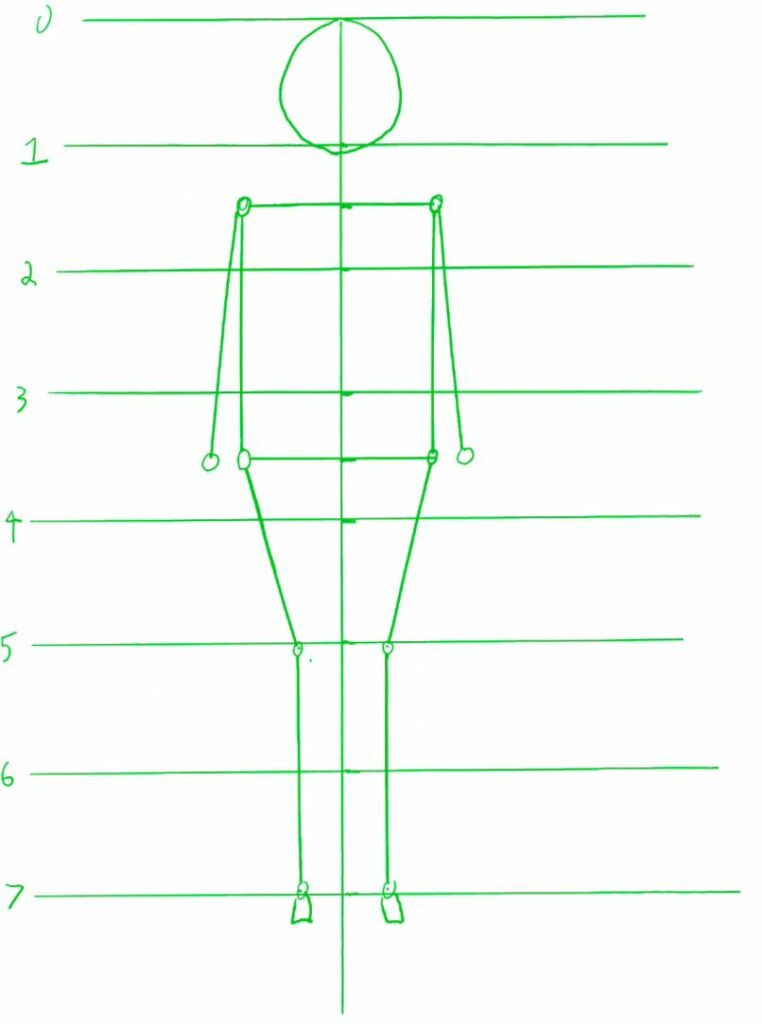
Finally, I added the last few components to the wire-frame guidelines. I added two circles for the elbows, lines for the chest proportions, and adapted the hips to better show leg alignment, and even sketched tiny hands. Also, discontented with the head’s outline, I redrew it. At this point, all proportions were gauged by eye.

I reached this step at roughly the 23mins mark (Which means after drawing for about 16 minutes). Overall, I think it’s not bad at all. (Especially when contrasted to writing this blog post, where it took me 42mins to reach this point, haha. Though admittedly, there are a lot of new elements I wanted to explain, and a few bottlenecks with my blogging process.)

Day 13 – Drawing final guidelines

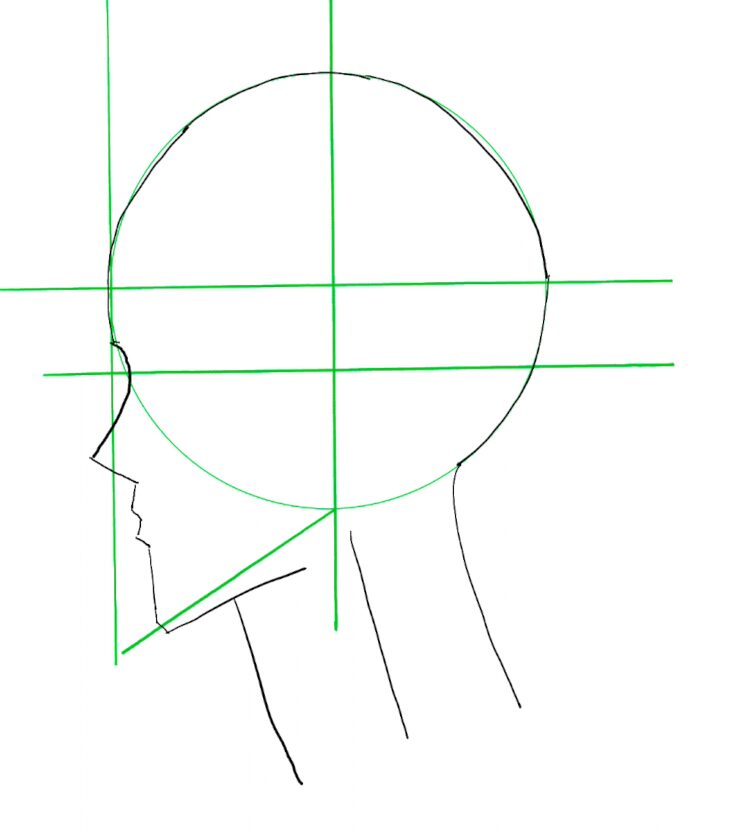
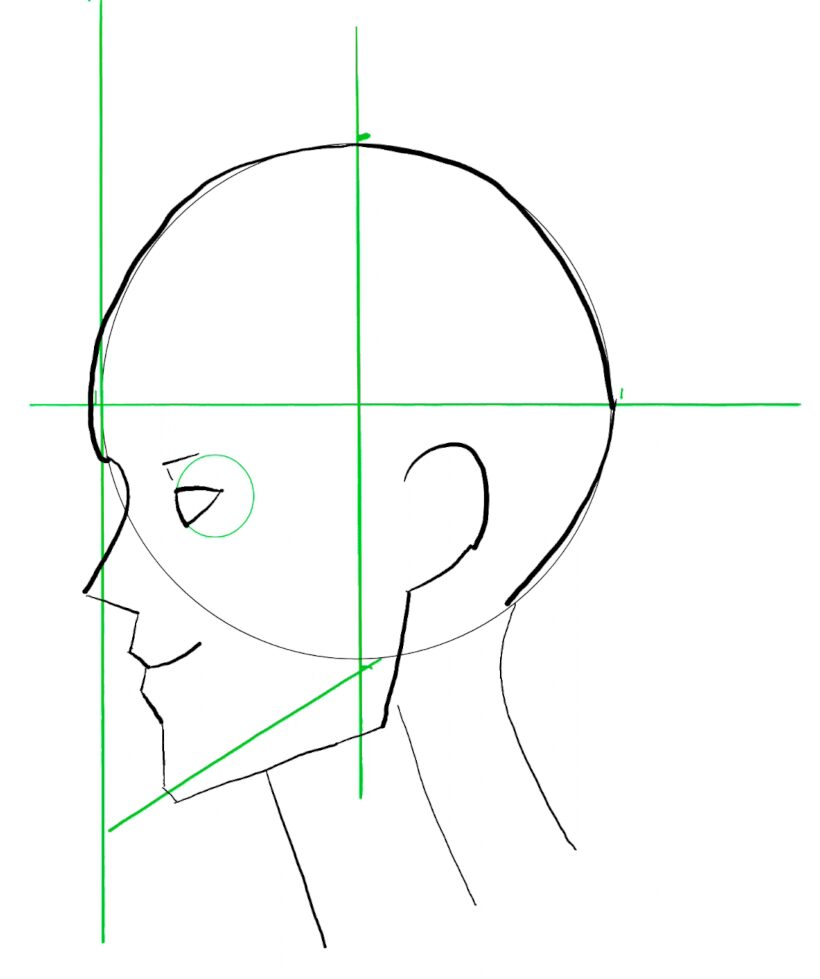
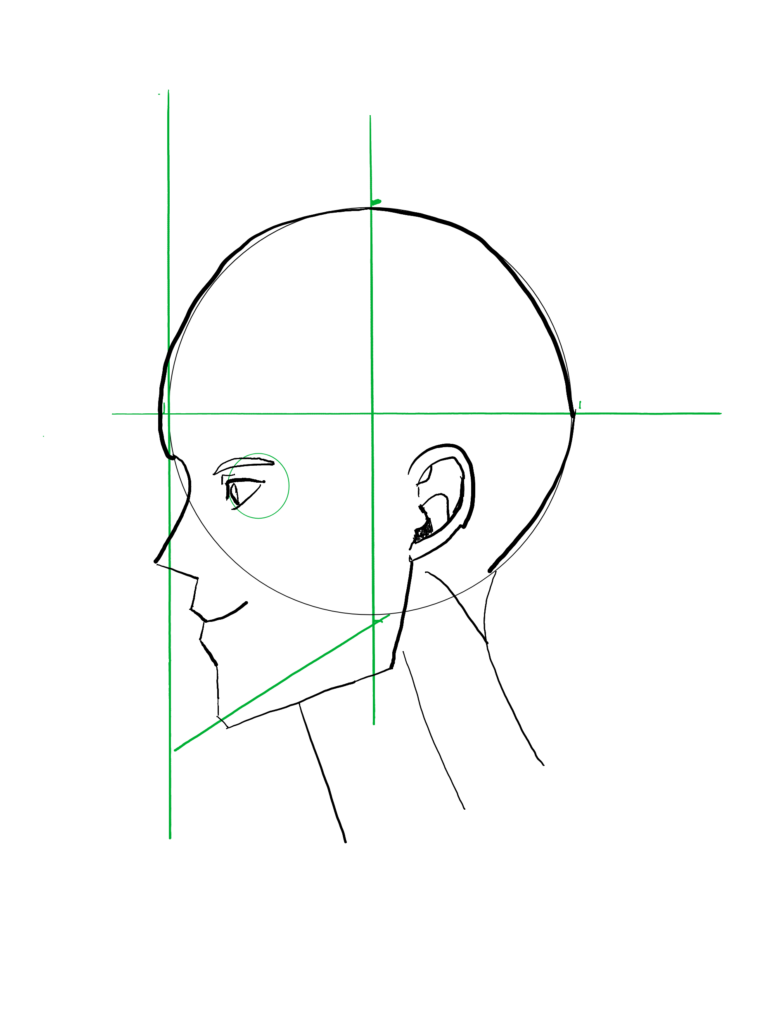
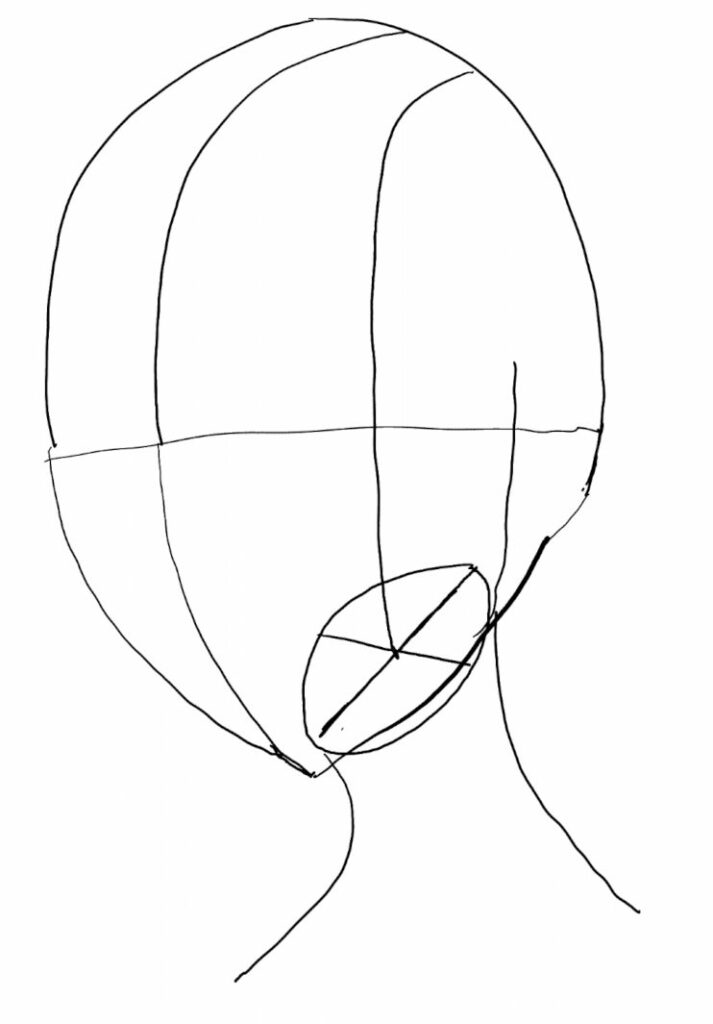
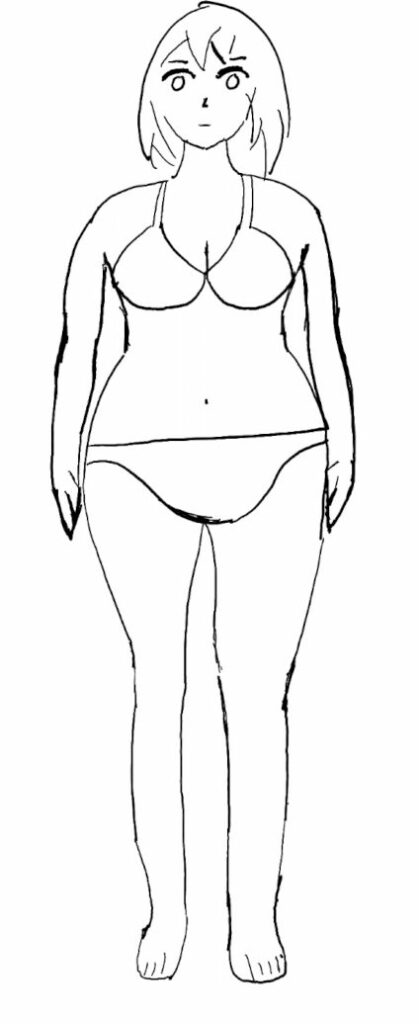
So, with the wire-frame guidelines, what’s next? To use those guidelines to sketch the profile of the person. For this purpose, I first created a new layer to my drawing and switched my pen color to black (instead of the green I use for guidelines). Unfortunately, with such involved guidelines, I noticed an issue with the colors chosen on my tablet. While the contrast between this green and black is reasonable on a computer, it wasn’t so on my e-ink tablet, and sometimes it was difficult to distinguish guidelines from drawing. But that’s simply something I’ll adjust in the future for quality of life.

In order to draw the actual outline, I simply connected things along the nodes. For the arm, I go from shoulder to elbow, elbow to wrist, etc.. One of the complications I had here was the torso area. First, this doesn’t actually follow the nodes anymore, but other guidelines instead. Moreover, I had trouble separating arm from torso, since they are in close proximity.

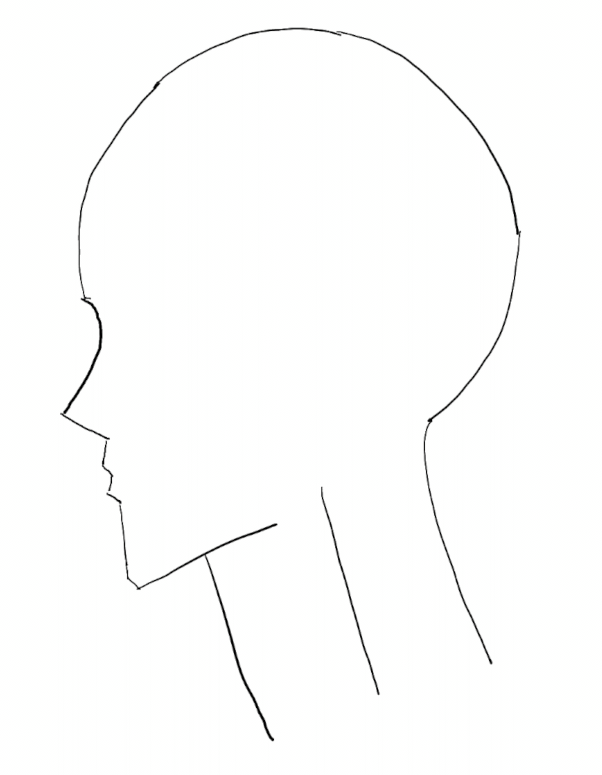
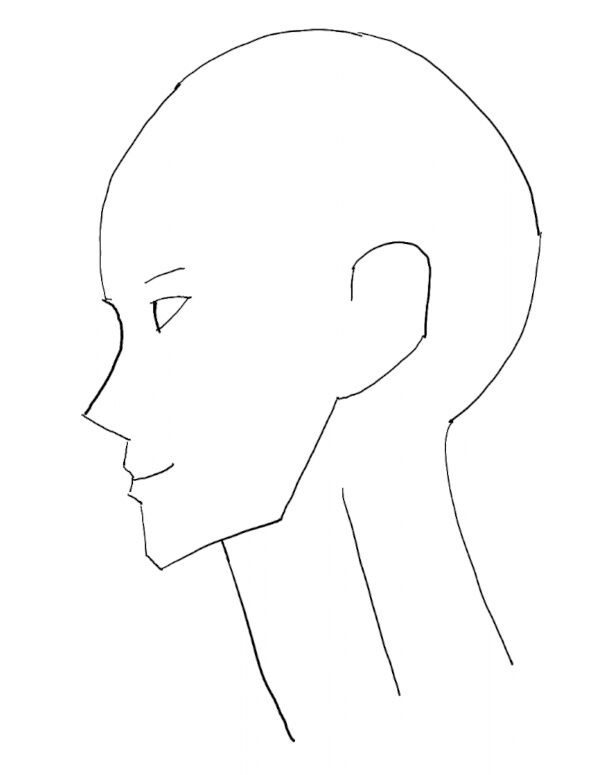
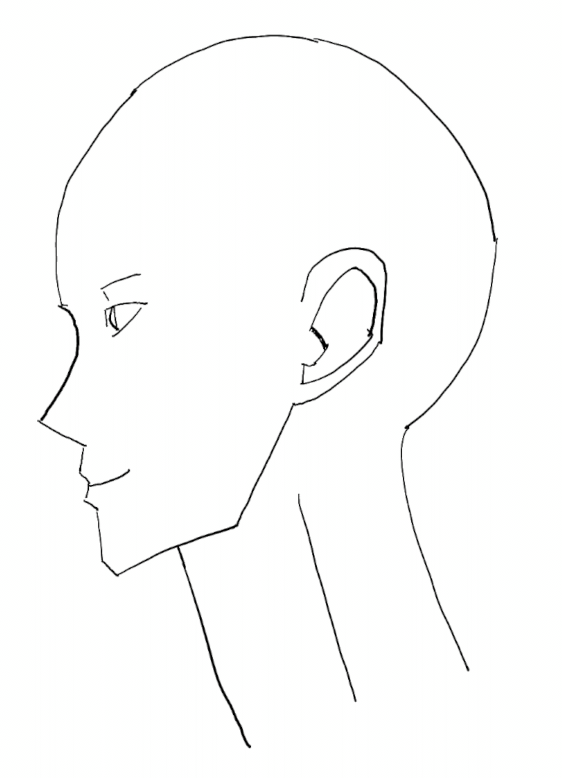
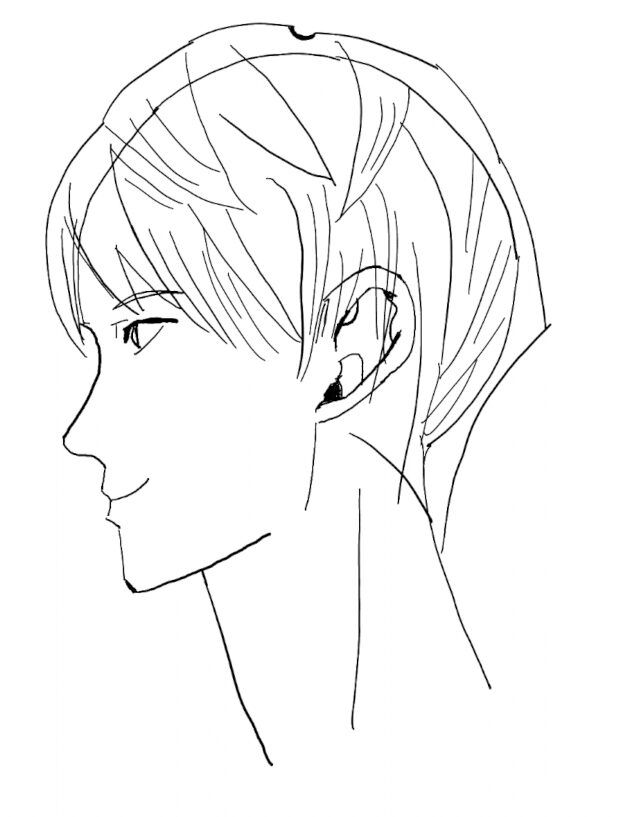
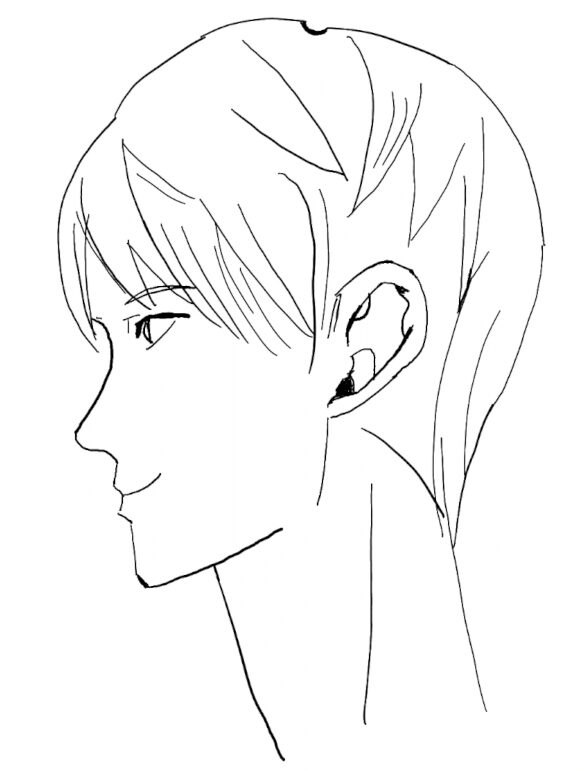
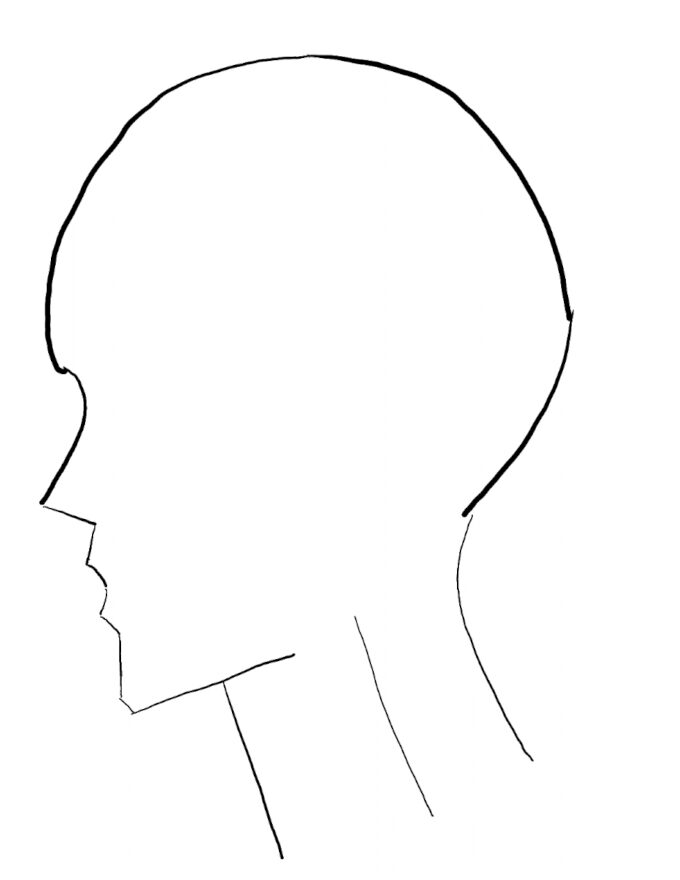
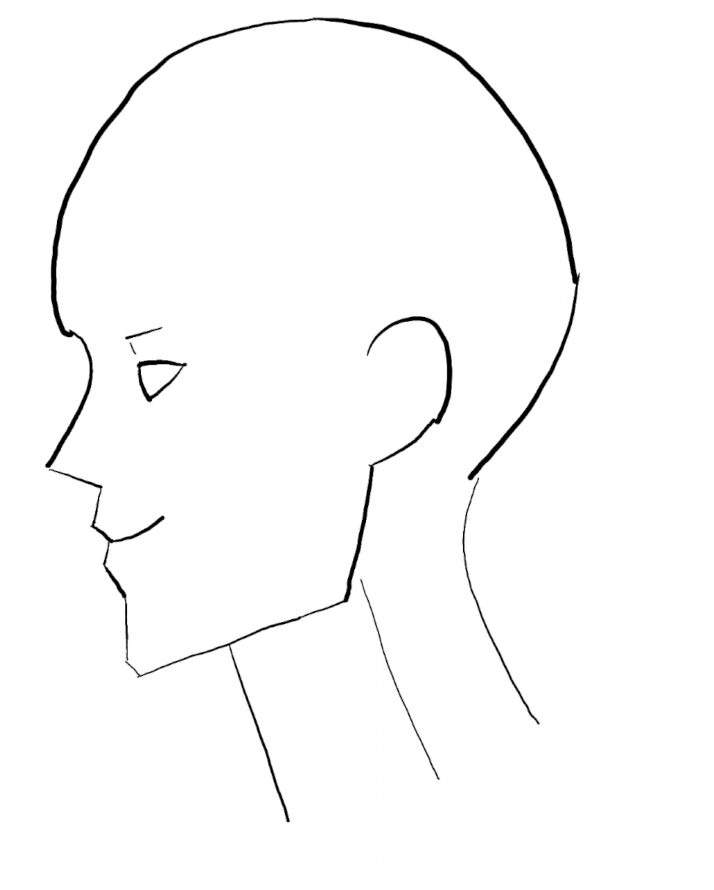
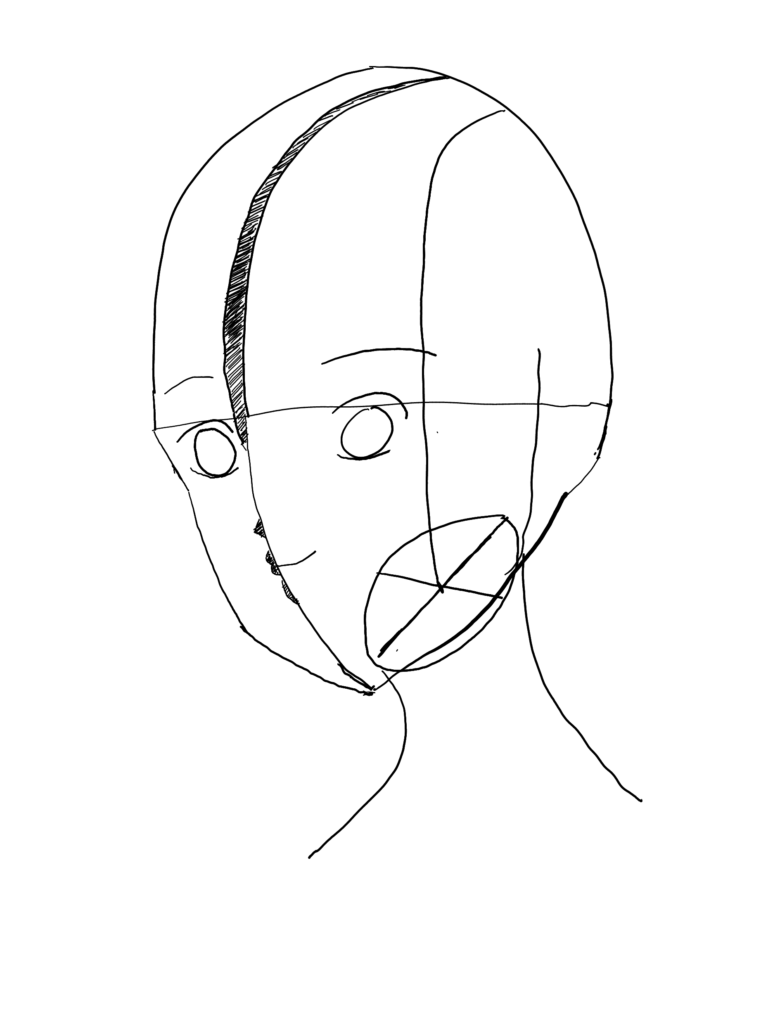
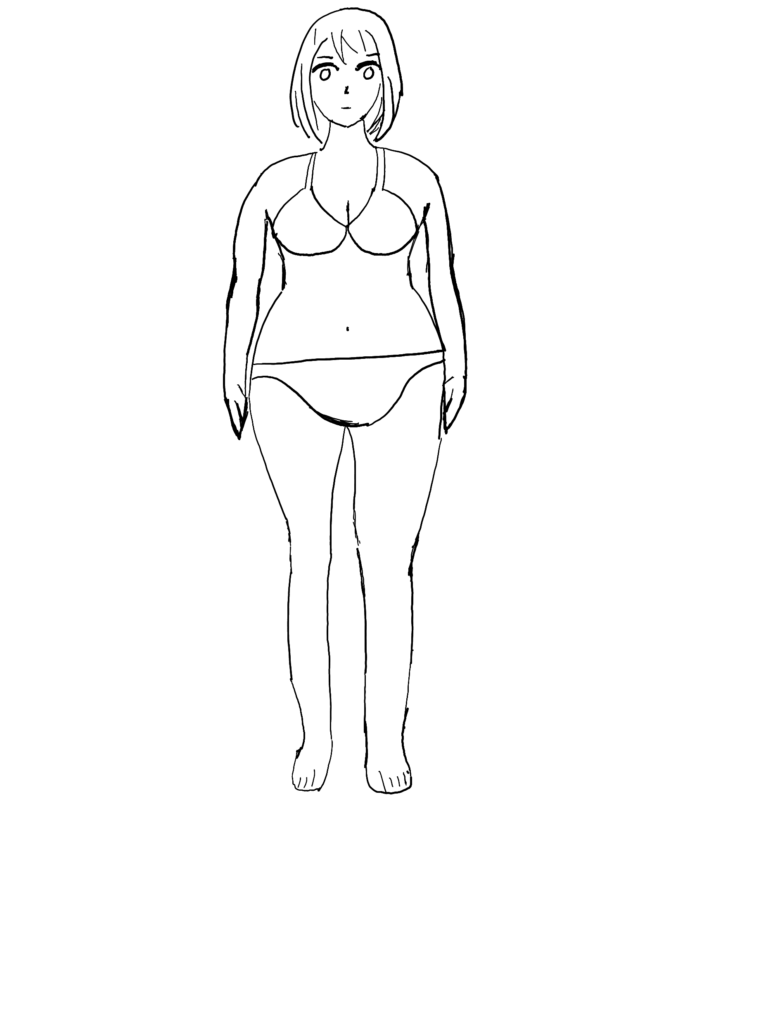
The legs were also a little harder to handle, and the way I drew them gives the illusion that one is behind the other (Which I leaned into later on, or more accurately, tried to respect). For some reasons, I also struggled a bit with the head’s outline. More practice will definitely be warranted in order to gradually build my intuition. Here is the outline with and without the guidelines at this step:

Day 13 – Outline (With guidelines)
Day 13 – Outline (No guidelines)

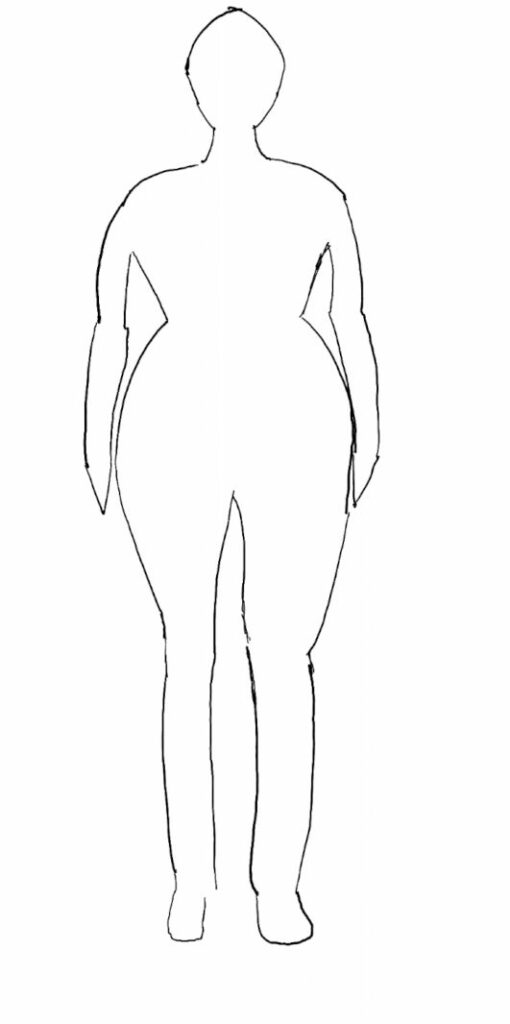
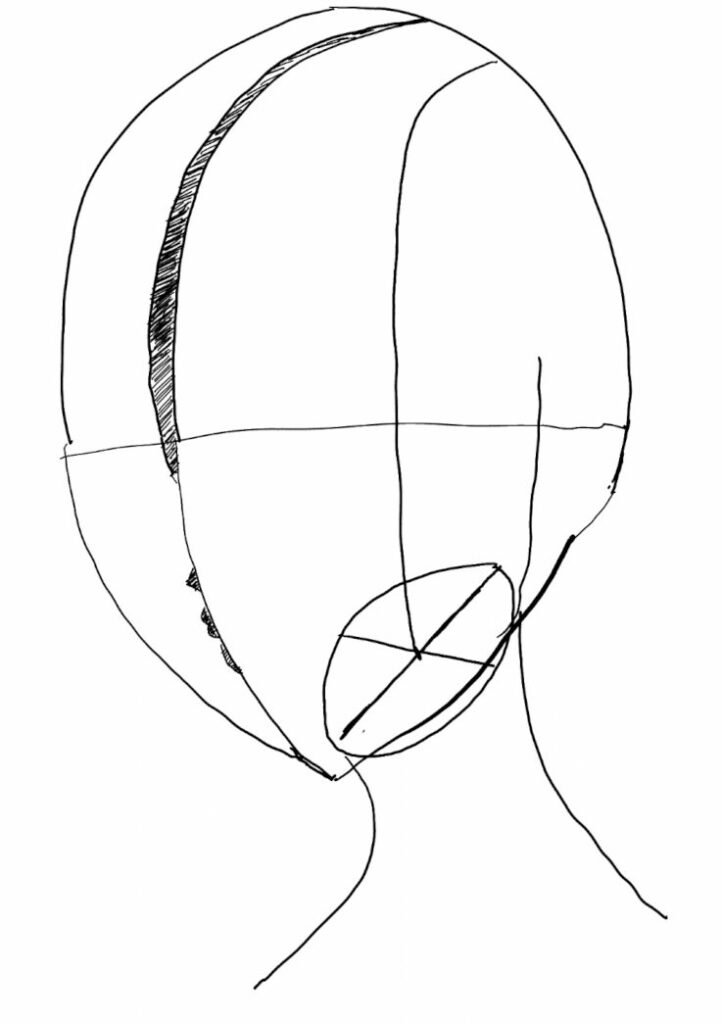
Once the outline was in place, I first tried to sketch the breasts, as shown in the reference model. However, I was struggling with it, and it somehow felt a little wrong, so I opted to revisit it later. Thus, I tried to sketch some lines for joints and muscles. Conceptually, this was not that easy for me, and I’ll need to analyze this to better understand the necessary proportions and alignments.

Day 13 – Muscles and joints

I then added some hair and initial details to the face, along with a wrist and thumb. At this stage, the character is starting to come together, but multiple elements still feel off. (My apologies, I didn’t have a version of this without guidelines).

Day 13 – Face details and hair added

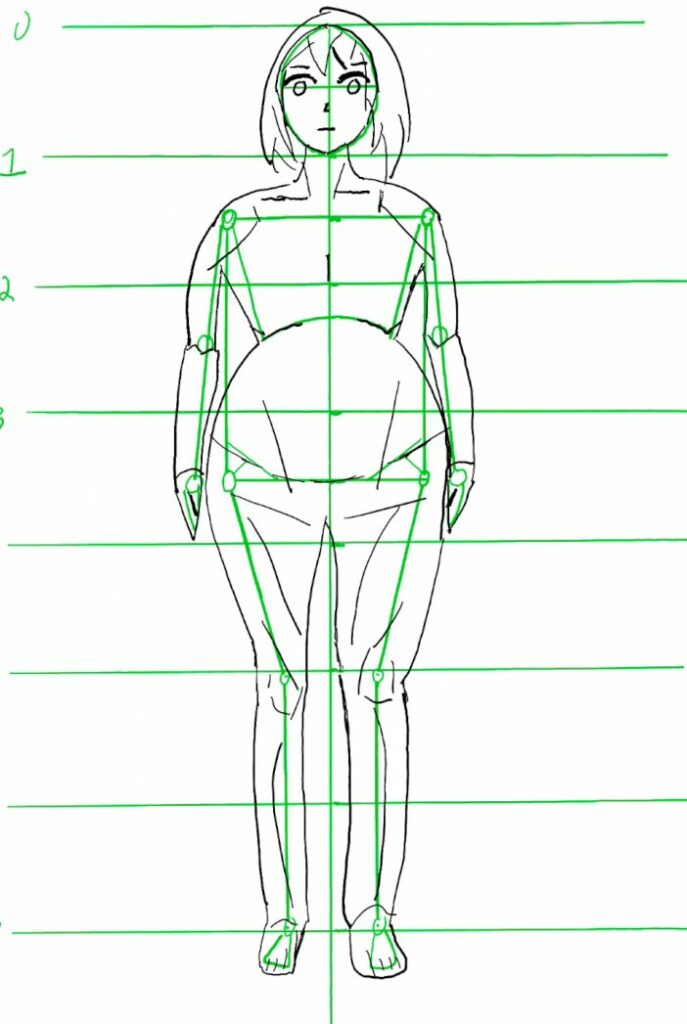
Once done, I revisited the breasts, sketching their outline. (While this is a little irrational, this made me feel really uncomfortable, especially while drawing in a Cafe). I also smoothed out the torso/hips area, and changed a few lines along the body.

Day 13 – Breasts sketched

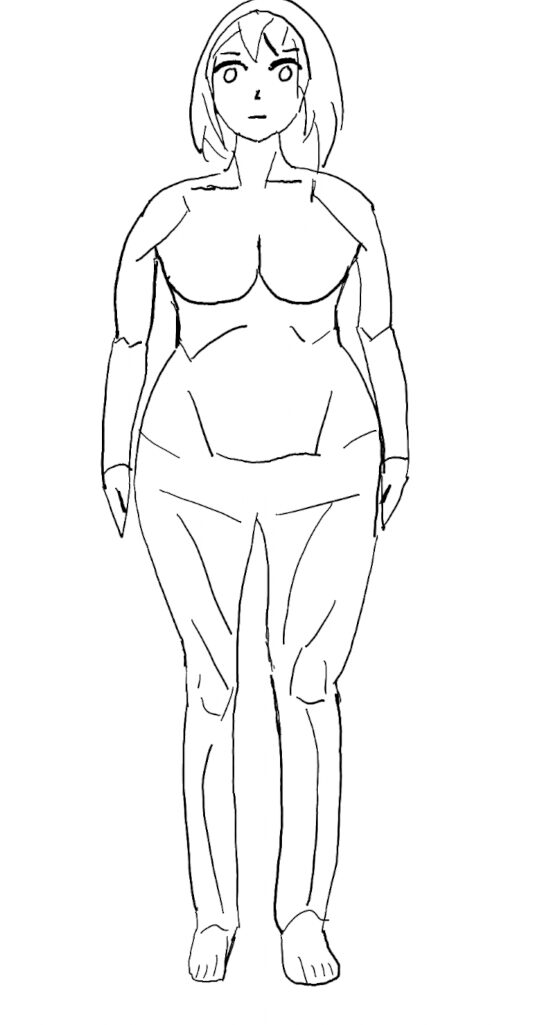
Finally, we’re reaching the final stretch. I completed the swimsuit and reworked a few elements (such as the arms, legs, and parts of the face). I also removed the muscles/joints lines, as per the reference. (I’m not sure why they were added before being removed, but will definitely need to read/translate that section to better understand. I’m guessing it’s to help understand the anatomy and the placement of different components along the outline).

Day 13 – Final stretch before completion

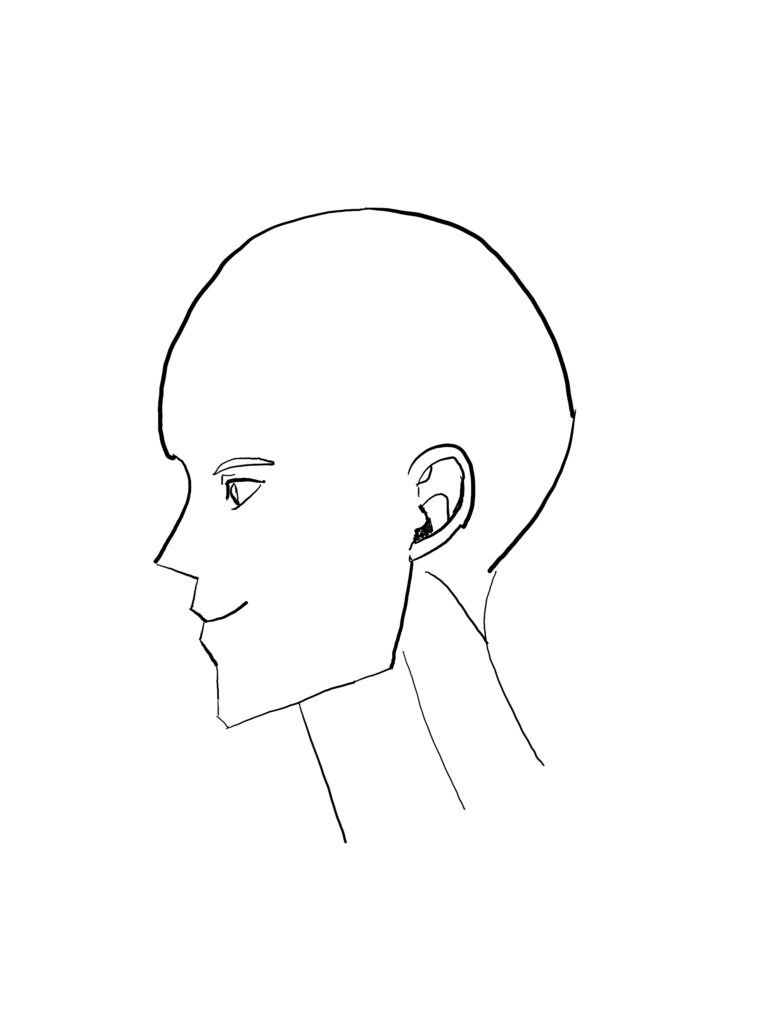
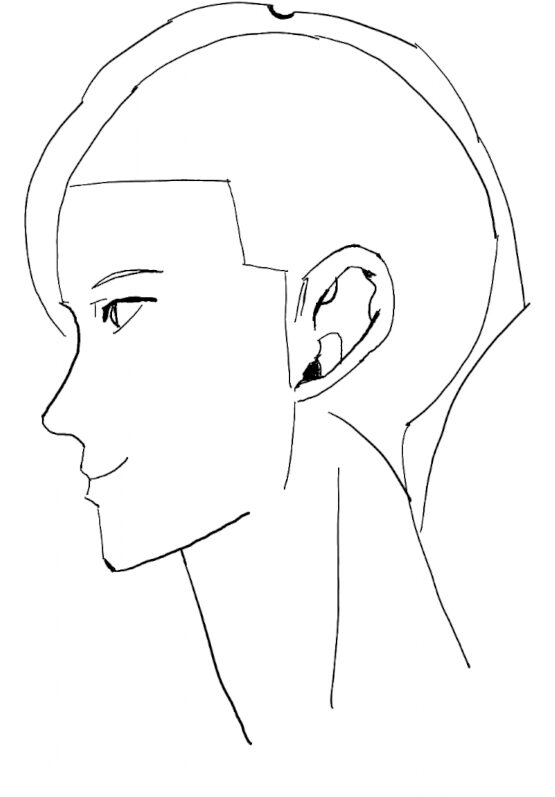
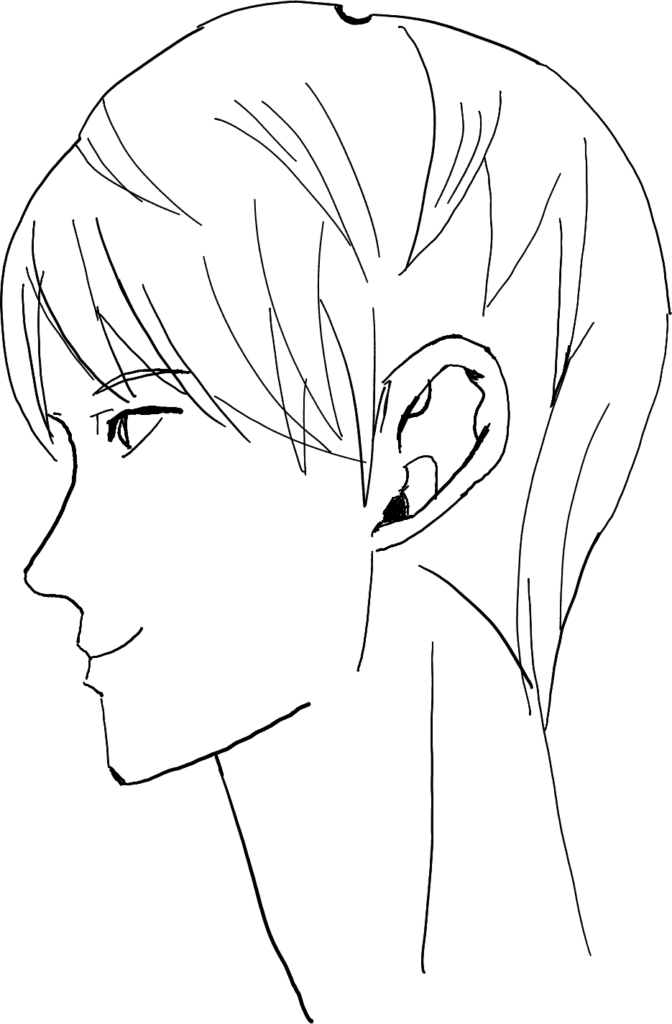
Finally, I worked on the hair and the jawline. Overall, I spent around 16 minutes on this. I was struggling with a few facetss of the hair, such as hair coming from behind other hair. But also, I still generally struggle with figuring out what the crucial lines should be, and how to add lines that aren’t a strand’s outline.

Here is the final result, with and without guidelines.

Day 13 – Final Drawing (With guidelines)
Day 13 – Final Drawing (No guidelines)

Conclusion

Overall, I know this drawing is far from perfect, but I’m generally happy with it. As a first attempt at a full-body drawing, I think it’s more than reasonable. The head isn’t fully detailed, but it’s still decent, especially considering that’s not the point of this exercise. I also think the proportions are generally fine. However, the drawing does look a little stiff. I also will need to figure out how to be more comfortable with drawing certain…aspects of it. As of the weakest component, I would say it’s the legs. There’s a long way ahead, but I think this is a good place to start.

I should note that I’m very surprised with how quickly drawing the wire-frame guidelines went. Especially with how important and involved they are. Moreover, I’m sure it’s going to get faster as I practice. Verdict: I see a lot of value in them, and think it would be unreasonable to skip them any time soon.

This whole session was definitely different from anything I’ve done before, but I think it was interesting, and refreshing. I’m looking forward to seeing where this leads me and how much I learn and improve over time. For the next day, the plan is to also go for a body sketch, but this time the male model.

Now, for the meta notes. As stated, drawing took me roughly 70 minutes. Meanwhile, writing this post took me approximately 85 minutes. The review process in turn took me about 55 minutes, for a total of around 210 minutes (3h30m). The drawing to blog writing/reviewing ratio is about 1:2, while the writing to reviewing ratio is roughly 3:2. I think one of the reasons why it took me so much time to write is because this is a new type of drawing and I had a lot of things to learn, and explain. There’s also more “individual” steps to highlight along the way. I expect that after a few sessions of exploring this topic, I’ll be able to go over these more quickly. Definitely a huge time investment here, with a lot more time spent on retrospection than actual action. With school resuming on Tuesday, I’m a little worried about how much time this might take me, but we’ll see. Let’s take it one step at a time.

Unfortunately, drawing and posting on different days was a pain, which I’ll want to avoid in the future. It’s not so much that I don’t remember what I drew and how it went, as much as having a tax to pay during the following day. However, I do think it’s good that I prioritized writing this before focusing on the next day’s drawing. This is an important step of my new process that should prevent me from getting behind like last time, while also forcing me to reflect on the previous drawing before moving on.

Regardless, this is a significant new step along this journey, which I’m happy to be taking. I hope you enjoyed this new exploration! Thanks for your time, and take care everyone!

This post is followed by Learning to Draw People Challenge – Day 14 (2024/03/04)

Learning to Draw People Challenge – Interlude

This was written March 04, 2024 as part of the 2024 Learning to Draw People Challenge

Yesterday, while I was walking around, I suddenly started thinking about all the things encompassed in a drawing, and what lays ahead of me in terms of learning to draw. Once I got to a cafe, I decided to take out my tablet and write some of those elements. I figured it might be a good idea to get a notion of what’s ahead and what I’ll eventually want to focus on. Here’s roughly what I noted, divided into sections, in no particular order. Note that this is not an exhaustive list and that is specifically related to drawing characters:

  • Head/Face:
    • Basic with accurate proportions and positions
    • Different Angles
    • Hair
    • Eyes
    • Ears
    • Mouth
    • Nose
    • Varieties (E.g.: different styles of hair, nose, mouth, eyes, ears, shapes, weight, etc..)
  • Body:
    • Basic with accurate proportions and positions
    • Different angles
    • Hands
    • Feet
    • Different poses
    • Varieties (different sizes/ages, weight, muscularity, etc..)
  • Misc:
    • Clothing and accessories
    • Shading
    • Coloring
    • Motion
    • Depth
    • Interactions with other people, objects or environment

So, taking a quick glance at this, it immediately feels daunting and overwhelming (At least to me). But that’s exactly the point of this post. While it’s useful to gauge these items to get a sense of what to work on, it’s important to not get bogged down by the details, and fall down a rabbit hole, or have your motivation wane. I could just focus on how long it could possibly take me to go through all of this, and whether it’s even worth it. But ultimately, my skills are still at their infancy, and getting good at a skill (let alone mastering it) requires a lot of time and effort. Thus, it’s important to take it one step at a time. Here is a related Youtube short that I think illustrates how to approach this well. (Note that it’s related to game development)

Moreover, while there are a lot of elements on this list, a lot of which include many different aspects (further branching out), it’s important to note that working on some of those will help build fundamentals that in turn help improve others. A lot of these are connected and interrelated. For example, working on different angles will help get a better understanding of 3d positioning and depth, which in turn should help with a few other elements on this list, such as poses. Moreover, working on more “global” elements, I get to practice smaller elements. For instance, while working on a head portrait, I already get some practice on the hair, ears and eyes. Similarly, while working on a full-body portrait, I get some practice on the hands, feet and even the head and its elements. However, I think having deep-dives are still valuable to better understand these element and improve these different aspects.

On that note, learning something is never easy, and usually requires a lot of time and effort. Yet, I think it still tends to be rewarding. I know for a fact I’m currently enjoying seeing my progress and am relatively proud of it, even if I definitely struggle from time to time. Don’t let yourself get overwhelmed by all the steps needed, just immediately start somewhere. There is no point waiting for the perfect time, since it’ll never come (I’ve been patiently “preparing” this kind of challenge and recording of the process for years, and I regret not just starting right away). Also, continuous practice goes a long way. If there’s something you’ve been meaning to try your hand at for a while, I urge you to just step away from the computer, take a deep breath, and take the first steps towards it. Feel free to share here afterwards!

And have a nice one everyone!

This post is followed by Learning to Draw People Challenge – Day 13 (2024/03/03)

Learning to Draw People Challenge – Day 12 (2024/03/01)

This was written March 01, 2024 as part of the 2024 Learning to Draw People Challenge

Introduction

Hello everyone and happy March! Today marks the end of my first week back (Reminder that I’m only planning to draw Monday through Friday now, as explained here). Unfortunately, today was a bit underwhelming. I started my session while extremely tired and under the weather, yet decided to undertake something challenging…while also cutting some corners. Definitely not a recipe for success. Thus, today will be a quick one.

Exercises

Nothing much to say about the exercises, other than I somewhat rushed through them. Still a good warm up, but not the best of results. All the same, they took me about 6m30s, which is shorter than usual. Here they are if you want to see them:

Day 12 – Lines exercise
Day 12 – Circles exercise
Day 12 – Wavy Lines exercise (Horizontal)
Day 12 – Wavy Lines exercise (Vertical)

Drawing

Today, I decided to go for an angled profile. I started by drawing the contour with some guidelines. However, I also cut corners and skipped a few of the guidelines, along with the neck’s cross-section.

Day 12 – Outline (With Guidelines)

Once that was done, I placed some eye holes, eyebrows, a nose and a mouth. Unfortunately, I believe that my eyes are a little too low here. Also, the eye on the left should be at a different angle, to account for the face’s angle.

Day 12 – Face elements outlines

Next, I took the first step to refine the eyes, and redrew the cranium, to try to account for poor placement of the eyes.

Day 12 – First eye refinement

For the next step, I added an ear with some detail, and also opted to modify the placement of the nose and mouth. Overall, I’m not too disappointed by the ear, I think it might be the best aspect of this drawing.

Day 12 – Ear added

As my last step for the face today, I refined the eyes further, and added a blush. There was a lot of erasing and redrawing for the eyes, especially the one on the left. And even then, I’m still unhappy with them. Their placement and proportions feel a little off. I definitely need to spend more time working on this in the future. This different angle is something I need to better understand.

Day 12 – Final face refinements

Finally, I added outlines for the hair. Here is the final result.

Day 12 – Final Drawing

Conclusion

Overall, I think it’s a disappointing result, likely due to a combination of my tired state and rushing through things (i.e.: cutting corners), while working on a more complex task than usual. This kind of angle is definitely less intuitive, and something I need to better study.

Beyond that, I’m glad I still managed to put something out today. Overall, this means I successfully drew and wrote a blog post every day this week, which has been the primary goal here. Thus, even though the week may have ended in a whimper, it was still successful, so I’ll take that as a victory! On that note, I hope you all have a lovely weekend, and a great month of March. See you next week.

This post is followed by Learning to Draw People Challenge – Interlude

Learning to Draw People Challenge – Day 11 (2024/02/29)

This was written February 29, 2024 as part of the 2024 Learning to Draw People Challenge

Introduction

Happy end of the month everyone, with the elusive February the 29th. Today, as stated in yesterday’s post, was a long day since I went on a field trip. Thus, I started drawing fairly late, while also exhausted. But I still went through with it, and am also writing this post!

Before getting into it, a silly note. While on the bus, I decided to try to read/translate a few lines from the (Chinese) drawing book I’m using as a reference…and there’s definitely a lot of value I’m losing by following visually and not reading. I will need to spend some time reading it.

Exercises

For the exercises, there isn’t much to say. Mainly two realizations:

  • When drawing multiple strokes in a row, I tend to leave my hand in place, only changing my wrist’s position slightly. This means I often end up in a very cramped position. After realizing this, I decided to try to move my arm after most strokes, and I think this was a little better. My hand wasn’t feeling as cramped as usual after the exercises.
  • While handling the wavy lines, I also realized I could move my whole arm, instead of just my wrist and my forearm. This means I raised my hand and arm, and let the stylus glide over the tablet. I suspect that might be what I did yesterday which led to that motion that felt so fluent. I also opted to use that technique for some of the larger circles, and tried it with a few strokes in the actual drawing. I think this has potential, though I might also need to explore it with different grips.
Beyond that, I still think these exercises are a great warm up, and I think there are a few areas in which I’m improving. It might be worth eventually looking back and comparing the progress here. Overall, it took me roughly 10 minutes to complete the exercises. Here are the results:
Day 11 – Lines exercise
Day 11 – Wavy lines exercise – Horizontal
Day 11 – Wavy lines exercise – Vertical
Day 11 – Circles exercise

Drawing

Today, I opted to revisit the profile angle. I started with some guidelines, as usual:

Day 11 – Drawing Guidelines

Once this was done, I continued with the front of the profile (nose, mouth and jaw). I also added a neck and redrew the “cranium”, following the guideline. It has a few flaws, but I think it’s not so bad. Plus, it’s just a temporary fixture. There two components I struggled with the most. First, the bridge of the nose (roughly where the eye sockets should be), often making it too deep. Then there’s also the chin, which I often draw too blocky. You can see the result so far with and without guidelines:

Day 11 – Outline (With Guidelines)
Day 11 – Outline (No Guidelines)

Next up, I added some guidelines for the eye. I drew a line from the neck to roughly where the eye should be, and added a circle for the eye. (No, it is not a monocle)

Day 11 – Eye Guideline
Once the guidelines were ready, I drew the eye’s outline, making sure to align it with the top of the nose this time. I also added an eyebrow and a smile. Being unhappy with the chin, I redrew it along with the jaw before adding the ear’s outline (since I wanted them to align properly). Here it is with and without the guidelines.
Day 11 – Face Components (With Guidelines)
Day 11 – Face Components (No Guidelines)

The next step was to add in the inner outline for the ear, and some details for the eye. I once again struggled with the ear.

Day 11 – First details added

Finally, the last details for the face were added: some highlights around the eye, a thicker eyebrow, and a more detailed ear. Also some plastic surgery, redrawing the jawline and the nose. I’m fairly happy with the image at this point, I also think it might be my best ear so far.

Day 11 – Final face details
If we compare this to the drawing I had on Monday (Day 08), I think it’s much better:
Day 08 – Final Drawing

Next, there were a few steps to handle for the hair, which I opted to draw this time. First, a general outline:

Day 11 – Hair Outline

Once that was done, I tried to add details for the hair, with different strands here and there. Though I once again struggled with the hair conceptually: what should be drawn where and in which orientation?

Day 11 – Adding details to hair

I then removed the cranium line and started trying to modify the hair a little. I noticed that the book, for some reason, removed some hair at this stage. I definitely struggled to better understand that. Here’s an intermediate stage I had, before refining it some more. Note that the back of the head was changed a bit, since I wasn’t convinced with its shape. The shape definitely appears smoother.

Day 11 – Intermediate Hair Stage

Ultimately, I learned a few things about drawing hair today:

  • Less is more. Having less detail and focusing on specific areas lends itself to better results.
  • Working on hair orientation is definitely important. Trying to make it flow “naturally” goes a long way, although I haven’t mastered this yet.
  • Having smooth strokes seems especially important for hair.
The drawing is not perfect by any means, but I think it’s my best so far, and I’m really happy with my progress. Here it is:
Day 11 – Final Drawing (With Guidelines)
Day 11 – Final Drawing

Conclusion

Overall, I think I’ve definitely made observable progress, and I’m ecstatic about it! I’m also glad that I’ve managed for the past two days to both draw and write my posts, despite being tired and exhausted. I think that’s the extremely valuable if I want to make this a long-term habit. As for the time spent on this, I spent around 90 minutes on drawing (10 minutes of exercises and one hour of drawing). Writing this post took me roughly 50 minutes, and reviewing it took about 25 minutes (a 2:1 ratio, definitely better than yesterday in terms of proportions). Overall, this is a huge time commitment at a total of 2h45mins (And that’s just drawing and writing, it doesn’t include transferring files, publishing the post and relevant updates, etc…). I’ll need to find a way to shorten it a bit by the time classes resume next week. But one step at a time.

I hope you enjoyed today’s post. Thank you for joining me and following my progress. Stay tuned to see how far I can get, and what other things I learn along the way!

This post is followed by Learning to Draw People Challenge – Day 12 (2024/03/01)

Learning to Draw People Challenge – Day 10 (2024/02/28)

This was written February 28, 2024 as part of the 2024 Learning to Draw People Challenge

Introduction

Since I got home a little late, and tomorrow I’ll be leaving early to go on a field trip, I opted for a shorter session. This time, I decided to pick things up where I dropped the ball last time, practicing eyes. Thus, I prepared my book and tablet, got a mug of water, and started to play some music.

Exercises

For the line exercise, I ended up realizing that for the “overhand” technique, the hand obscures what’s above (in retrospect, this is obvious), which means it can mess up spacing and flow. Otherwise, an unexpected result is that the “overhand” technique seems to result (for me) in thinner lines. The results of this exercise are soso, but still serve as a good primer.

Day 10 – Line exercise

For the wavy line exercise, I opted to go more slowly for the first line, and it seems to have been a little better. I then opted to go a little more slowly generally, and think I felt a more natural “flow” of the stylus against the tablet, almost as if the stylus were guiding me. Unfortunately, it’s hard to properly explain, but I think it helped a bit. Overall, the results are soso, but I think they’re still superior to previous days.

Day 10 – Wavy line exercise (Vertical)
Day 10 – Wavy line exercise (Horizontal)

Finally, for the circles exercise I decided to try to go a little more slowly at first, but I’m not sure how much it helped. I also decided to go for a new type of exercise, where I increased the size of the circle with each new row. I think this could be useful, since it makes me practice different kinds of arcs, making this exercise more versatile.

Day 10 – Circle exercise

Overall the exercises took 10 minutes, which ate a significant chunk of the 30 minutes I ended up being able to use.

Drawing

For the drawing, I ended up only using 20 minutes. I would have preferred to use more time, and sketch multiple sets of eyes, but ended up being short on time.

I flipped through the pages until I found the section on eyes. Once found, I decided to follow the steps highlighted there. It went as follows:

  1. Sketch a rough outline of the eyebrows, eye and iris. In retrospect, I really should have changed my pen mode to a thinner one. The lines I made here were way too thick. I also ended up erasing and redrawing the eye outline multiple times, not so much because I was struggling with drawing “satisfactory” circles (I feel like I definitely improved on that front), but because the symmetry kept being way off. The result I kept is still a little off, mostly unaligned along the vertical axis.
  2. Day 10 – Outline
  3. Once this was done, it was time to add eye lashes and volume in that area.
  4. Day 10 – Eye Lashes added
  5. The next step was to add some details with the iris and light reflection.
  6. Day 10 – Irises and Reflection added
  7. Next up was removing part of the outline and changing the bottom of the eyes a little bit.
  8. Day 10 – Changing Eyes bottom
  9. Afterwards, in a blink and you’ll miss it moment, I added a fold above each eye.
  10. Day 10 – Adding Eye Folds
  11. Finally, I thickened the eyebrows and added shading to the eye. With this portion, I learned that using an e-ink tablet can be very annoying, since what I see can stop reflecting the actual results (E.g.: seeing blank spots when there should be ink, or vice versa), requiring a refresh (This is because the pen can physically pull e-ink in either direction, without it being reflected in software). The other thing I found out was a purpose for different stroke orientations. When it comes to the shading, I find it that the right orientation can help stay within the outline’s borders.
  12. Day 10 – Eyes shaded and eyebrows thickened

For the final result, I was annoyed with the misalignment of the eyes, so I took a lasso tool and repositioned one of the eyes a bit (Though it’s still not perfectly aligned). I think it helped a bit. Overall, the result is ok. Not amazing, but not awful either. However, I would have liked to do a few more sketches. Here is the result: (Unlike previous days, I chose to crop this one, since otherwise it would just be a lonely set of eyes in the corner of the canvas).

Day 10 – Final Drawing (Cropped)

Conclusion

Overall, I’m a little underwhelmed with this day, mostly because I was lacking in time. But at least I did draw today, and wrote this blog post.

One helpful note about drawing, I find that reorienting the canvas (my tablet) can help with some strokes (Although it’s not the first time I realize this). It makes some of them feel a little more natural. p>

As for the time spent, I spent just over 30 minutes on drawing. As for writing the post, the first draft took 40 minutes, and the revision roughly 25 minutes. This means that writing the post took roughly twice as long as drawing. It also took more time than yesterday, though admittedly I was particularly tired throughout the process. I will definitely need to figure how to write posts more quickly. (Though hopefully practice will help)

As stated in the introduction, tomorrow I will be going on a field trip. I know I’m leaving early, and am unsure how late I’ll be get back. I’ll do my best to draw and post about it, but there is no guarantee I’ll manage to after getting back. Though maybe I’ll just manage to do it all while on a bus, with underwhelming results, hahaha. Stay tuned for more updates!

This post is followed by Learning to Draw People Challenge – Day 11 (2024/02/29)

Learning to Draw People Challenge – Day 09 (2024/02/27)

This was written February 27, 2024 as part of the 2024 Learning to Draw People Challenge

Introduction

Today was a fairly short day. Unfortunately I was both tired and fairly busy. However, I still went to a Cafe, put my head down, and started to draw, albeit for a shorter period than usual. As for writing this article, it was done in a separate session, but on the same day (Which means progress!). Let’s get into it!

Exercises

There isn’t a lot to say about the exercises. While going through the exercises, I was a little more stressed than usual and tried to rush a little, which definitely negatively affected the results. For the line exercise, I once again tried to practice different orientations (Although I almost forgot some of them). I also decided to practice both “overhand” and “underhand” for the horizontal line. You can additionally notice that I started annotating the exercises (Including UH and OH for underhand and overhand respectively).

Day 09 – Lines exercise

For the wavy lines exercise, I realized that I don’t approach “peaks” and “valleys” in the same way, which causes undesired asymmetry that gets in the way of the results. Sometimes, one of them doesn’t even form what I would call a curve. For this exercise, I will definitely need to go back to the drawing board (so to speak). I may try to rewatch the video these exercises come from for inspiration. One thing I’ll definitely want to try to do is to take the first wavy line slowly to start it off neatly.

Day 09 – Wavy lines exercise (Vertical)
Day 09 – Wavy lines exercise (Horizontal)

For the circle exercise, I decided to go for a smaller quantity than usual. Also, as noted on the sheet, the clockwise orientation definitely felt unnatural to me. Some of them also look more like “2”s than circles.

Day 09 – Circles exercise

Overall, I spent roughly 8 minutes and a half on the exercises.

Drawing

Following the previous day, I figured I might want to practice drawing ears. Thus, I looked through my reference book for the section on ears, and decided to practice it. The process contains five steps, which I’ll illustrate with what I consider my best overall attempt:

  1. Draw the general shape of the ear
  2. Day 09 – Ear Contour
  3. Draw the ear hole
  4. Day 09 – Ear hole
  5. Draw the inner contour of the ear (Yes, I redrew the ear hole here)
  6. Day 09 – Ear inner contour
  7. Connect the ear hole section to the inner contour
  8. Day 09 – Connecting ear hole
  9. Loop back the inner contour to connect with the last draw segment
  10. Day 09 – Ear final step

A few things to note:

  • I struggle with drawing an ear’s contour and will definitely have to practice this more.
  • I have difficulties with the ear hole portion. I find it difficult to gauge the orientation, proportions and the position of this component. This definitely deserves more practice.

Overall, I spent roughly 25 minutes on the ear sketches. Here are all four sketches I drew today. My favorite one is the second one, due to its ear hole’s position seeming more natural than for the other ones, even though some of my lines have confidence, thickness and consistency issues. Ears are definitely something I will need to revisit in the future. One other thing I might want to explore is how to give these lines more of a depth effect, with some segments seeming to be behind others. Right now it seems to lack any depth. I suspect it is based off of thickness of lines and some other tricks, and will require some experimentation.

Day 09 – Ear sketches

Conclusion

Overall, the results are not spectacular, but I think it’s still worthwhile to zoom in once in a while to better understand some of the components. And this dive was definitely not sufficient. However, one step at a time for now, which involved getting into the habit of both drawing and writing the blog posts. Speaking of, writing this blog post took me roughly 48 minutes, including reviewing it, which took around 20 minutes. (Overall, I spent a lot more time on this post than on drawing).

Thanks for joining me, and I hope you found this interesting. Have a nice one everyone!

This post is followed by Learning to Draw People Challenge – Day 10 (2024/02/28)

Learning to Draw People Challenge – Day 08 (2024/02/26) – Time Skip

This was written February 26, 2024 as part of the 2024 Learning to Draw People Challenge

Introduction

Hello everyone and thank you for your patience. I’m finally back with the drawing challenge (with a revenge!). But although today was my first day back and I should have felt energized, I did struggle with motivation due to some other personal issues. Nonetheless, I pushed myself to start and once I got started, things flew reasonably well. I did end “early” because I saw that I was going to spend a lot of extra time on the next phase of drawing, but not because I had exhausted my drive.

A few notes before diving into my drawing session. First, since I had been having some issues with my tablet’s stylus (the tip would quickly degrade and make it harder to draw), I recently purchased a new stylus to use exclusively for drawing, the wacom one pen (I did a small research and this felt like a good compromise between people’s recommendations, and cost). Under my current circumstances, the cost felt steep for a stylus, and I would prefer to avoid such expenses. However, I’m hoping this purchase encourages me to draw through the sunk-cost fallacy.

A few things about the process itself I would like to highlight today:

  • In order to limit annoyances with my palm touching the tablet, I attempted to use a light glove. However, the result was too annoying, so I abandoned it quickly and disabled hand motion on the tablet instead. I may have to try using a “drawing glove” such as this one, although this would once again be a purchase.
  • While the new stylus has a fairly nice grip, and has a button with an erase functionality, I should have realized I would encounter an issue. The button on the side is placed in such a location that I often hit it with my middle finger while drawing. I’d already encountered this issue a long time ago while playing rhythm games such as “osu!”, and I should have remembered it. Hopefully, I will get accustomed to it. It might also serve as a motive to try different grips, such as suggested in this video. (As an aside, I think exploring other grips could also be useful for drawing Chinese characters)
  • I have a few regrets about using a Chinese book while still not fluent in the language, since I’m discouraged from reading everything and fully understanding. While it’s an interesting approach to learning the language, it puts both goals at odds, instead of building synergy between them.

Exercises

As usual, I started with the exercises. Today, they took almost 12 minutes. For some reason, the line exercises were particularly slow, at around 6 minutes and a half on their own. A few small things about the exercises:

  • I realized that for diagonal lines in this orientation: “/”, I feel more comfortable starting from the bottom than from the top. This seemed odd at first, but I believe this is actually a consequence of my handwriting. When writing, I tend to prioritize going from left to right. Thus, my forward slash goes from the bottom-left to the top-right. (For this same reason, I have a non-standard way of writing the letter S, also going from the bottom-left to the top-right). I hadn’t quite realized how much of an influence writing had on drawing, though it makes intuitive sense. (Related video about the relationship between writing and drawing: How your handwriting is the key to drawing better )
  • As noted in my exercise’s notes, I realized that horizontal lines could be drawn with either your hand above or below the line, using two distinct wrist rotations. This seems to only really apply to horizontal lines, likely because they’re at roughly a 90° angle with your hand’s natural position. It also seems like having my hand under gave me better results.
  • I struggled with keeping the diagonal lines aligned horizontally. It seems like their skewed nature made me want to skew their row as well. I will have to pay attention to this in the future.
  • At this point, I struggle tremendously with the wavy line exercise. However, one issue with it is that it’s biased towards the earlier lines being drawn properly. Whenever one of them is drawn poorly, it makes the subsequent ones either harder, or pointless as an exercise.
  • For the circles exercise, I still struggle with consistency of placement and size. But being more aware of it seems to have helped a bit this time.
  • It is clear how unnatural the clockwise circles were to me. I will definitely need to practice those a bit more. In some cases, they didn’t really look like circles.
Here are the pictures of the exercises:
Day 08 – Lines exercise
Day 08 – Circles exercise
Day 08 – Wavy Lines exercise (Horizontal 2)
Day 08 – Wavy Lines exercise (Horizontal 1)
Day 08 – Wavy Lines exercise (Vertical)

Drawing

Today, I opted for a different kind of drawing, going for a profile shot. I started by drawing guidelines and then used the circle tool to add a guideline for the shape of the head (After multiple failed attempts of drawing it by hand). I then added some guidelines for the jaw, as per the book. Here is what the guidelines looked like at this stage:

Day 08 – Initial guidelines

Once this was done, I sketched the silhouette. I decided to redraw the head’s circle by hand, following the existing “guideline”. I struggled a bit with the nose portion of it, and also with the mouth portion. Overall, I think it’s not too bad at this stage.

Day 08 – Silhouette with Guidelines
Day 08 – Silhouette

Once this was done, I added a circular guideline for the eye, and started sketching the eye, eyebrows, a smile, an extended jawline, and a rough ear. Here, I actually struggled with the smile, and had to redraw the mouth portion of the silhouette multiple times to get something I was more satisfied with. Unfortunately, I think the eye was poorly placed. They’re a little too low, which means two things: It isn’t aligne with where the eye socket should be (top of the nose bridge), and it makes the top of the head look a little too big.

Day 08 – Rough Face Elements added with Guidelines
Day 08 – Rough Face Elements added

Once this was done, it was time to add a little bit of detail to the eye and ear. The eye wasn’t too bad in this case, though I’m not sure about the lines placed right in front of it. The ear, however, was extremely challenging for me. First, the book shows the outer portion as becoming a little more block-y. I actually tried to redraw that portion many times, and eventually just decided to go back to the previous form because I thought I wasn’t making any progress. The inner portion is also something I struggled a lot with and made many changed to. I will have to approach it more carefully in the future and focus more on drawing ears to try to improve that skill. Right now, I struggle with properly understanding them and their different elements. It might be worthwhile to look at a real ear’s anatomy to better analyze this. Overall, I spent roughly 20 minutes on the ear, and most of it was undone.

Once this phase was completed, I got ready to draw the hair, but realized it would take me a while, and so opted to call it a day and start writing the blog post.

Here is the final result. Overall, there’s definitely improvements to be made, but I think compared with what I was able to do on the first day, it still feels like I’ve improved, despite not drawing in a month and a half. I was really worried I’d have lost a lot more than I did. And while this drawing has issues, I am aware of what to focus on and try to improve in the future.

Day 08 – Final Drawing with Guidelines
Day 08 – Final Drawing

Conclusion

Well, the first day back wasn’t too bad, and I managed to also write my blog post on the same day. However, it did take me quite a bit of time to write it (I believe roughly 2 hours), so I’ll probably have to figure out a solution for this. Although, some of that time was spent on generic insights or notes that might not be recurring in the future (e.g.: everything in the introduction, and a lot of notes related to the exercises). Still, I might want to use a stopwatch to time how long I spend on the writing process and evaluate how I could improve it/make it more efficient.

Finally, as a miscellaneous note, I realized how much I rely on looking at the samples for drawing. While this is normal for a day like today, where I’m learning a new type of drawing, I think I will have to learn to move away from this in the future. Thus, I think I’ll want some days where I try to draw without the book, and then evaluate how things turned out, comparing with the book to see what I may have missed or forgotten.

On that note, I hope you all have a lovely day and that you found this post interesting. Stay tuned for the next ones!

This post is followed by Learning to Draw People Challenge – Day 09 (2024/02/27)

Learning to Draw People Challenge – Take Two

This was written February 23, 2024 as part of the 2024 Learning to Draw People Challenge

So, I’ve tried my challenge, held it for roughly a week, then had to abandon it. Moreover, I took over a month before documenting it and getting back to it. All the same, I don’t think this was a failure, since I believe I’ve learned from this. But now what? Well, I’ve been thinking a lot about that first attempt, what caused me to stop, what the main friction points were, and what could be improved. Here are my thoughts:

First of all, not writing the posts right away and lagging behind really dragged me down and caused a lot of stress. I felt like I was lagging behind and couldn’t catch up (Incidentally, this also what happened with my photography challenge). I think this is the first thing I need to address: I need to change my “definition of done” for a day’s work to not only encompass drawing, but also documenting the process through a blog post. I expect this to have two consequences:

  • In order to not overwork myself, I’ll have to limit the “reviewing process”. In the past, I would write a post, and review it at a later time before publishing it. I don’t think this will be viable here. I’ll have to review as the final step of my writing session instead.
  • Since writing the blog post itself is also time consuming (including not only writing, but also transferring files and sifting through a recording), I may have to shorten length of my drawing sessions.

The second issue I’ve struggled with is the daily and inflexible nature of the challenge, which partially gets in my way and adds some counter-productive stress. The last two days I drew had some motivational issues because I was traveling, and didn’t have any leeway (The consequences are especially apparent with my last day). Similarly, my Chinese classes also have some more intensive periods, such as around exams. For this reason, I thought I could approach this a little more like work. Accordingly, my new goal is to draw from Monday to Friday, instead of every single day. However, I will also allow myself to draw on the weekend in exchange for a “credit”, allowing me on a future date to take a day off. Thus, if I know I have upcoming engagements during the week, I can prepare during the weekend accordingly. Similarly, if I plan to go on a vacation, I could prepare some extra credit days accordingly. The one caveat is that I need to be careful to avoid using those credits when I’m “lazy” and feeling unmotivated. Usually, those feelings clear up when I get started, and I believe pushing through during those days is critical to building habits.

For clarity, here’s how I plan to approach those. I plan to release blog posts in sequential order. I also plan to only release them from Monday to Friday (Unless I know I will be physically unable to handle that, since I currently do all of this manually). Therefore, if during my first week I were to draw on Saturday (but not on Sunday), I would only release the associated post on Monday. Meanwhile, Monday’s drawing post would be shifted to Tuesday and so forth. Friday’s in turn would be shifted to the following week’s Monday. However, the post would still specify on which day I had drawn it, so you would be able to see if something was done during a weekend as opposed to a weekday.

With this, I plan to start the next phase this upcoming Monday, February 26, 2024. Once again, I also plan to evaluate how this went and see whether I should make any adjustments at the end of the first week.

One final note before I leave, which I wasn’t sure where to plug. One thing that’s happened during the first week (and also since then) is that I’ve been watching more (YouTube) videos about drawing. I think it helps me think more about the process, what to try out, and what to consider. Ultimately, it also feels like it helps integrate it as part of my life. While not perfect, I think it could serve as a proxy for being part of a club or enrolling in classes, where you have a lot of peers that share your interests and with whom you can strive towards a common goal, which seems to be a valuable part of building habits, and improving skills.

Thank you for following me, and wish me success with this new attempt!

This post is followed by Learning to Draw People Challenge – Day 08 (2024/02/26) – Time Skip

Learning to Draw People Challenge – Day 07 (2024/01/14)

This was written February 09, 2024 as part of the 2024 Learning to Draw People Challenge

Exercises

Ah, the final day of my week. Unfortunately this was a bad day for drawing. I was traveling and felt a little pressed on time, so I ended up handling this in a restaurant while waiting for them to take my order, and waiting for the food.

I ended up spending more time on the exercises than usual. I also realized that I should also practice other orientations, for example starting from the bottom instead of the top on certain strokes. This would allow me to train a wider variety of movements, and I figure there are likely scenarios where such strokes could be useful. I also tried drawing circles in both directions (clockwise and counter-clockwise). Here are the results, I definitely am not quite used to some of these movements yet:

Day 07 – Straight line exercises
Day 07 – Wavy line exercises vertical – 1
Day 07 – Wavy line exercises vertical – 2
Day 07 – Wavy line exercises vertical – 3
Day 07 – Wavy line exercises horizontal
Day 07 – Wavy line exercises diagonal
Day 07 – Circles exercises – 1
Day 07 – Circles exercises – 2

Drawing

As for drawing, I opted to start trying to draw eyes, but ended up having to stop pretty quickly, so the result is fairly underwhelming. Overall, not a great day.

Day 07 – Eyes drawing

This is how my initial trial week ended, on a soul-crushingly disappointing note, followed by a long hiatus. However, now that my semester is almost over and I’m getting a little more control over things, I’m planning to get back into it, although tweaking some of the parameters of this challenge. Stay tuned for an update on this. Also, if you missed my initial evaluation of how this week went, you can find it here: Learning to Draw People Challenge – Week One Evaluation (Pause Announcement)

This post is followed by Learning to Draw People Challenge – Take Two

Learning to Draw People Challenge – Day 06 (2024/01/13)

This was initially written February 21, 2024 as part of the 2024 Learning to Draw People Challenge

Exercises

As with other days, I decided to start with the line confidence exercises. Overall, it took me roughly 10 mins. I also came to two realizations:

  • I could practice drawing my lines and circles in both orientations, not just the one that feels most natural.
  • I might as well use this time to fulfill other goals. Since I’m currently learning Chinese, I started counting my lines/circles in Chinese. (Combining different goals and synergizing them seems like it could be useful generally)
On this day, I think my straight lines aren’t that great: their lengths vary too much, there’s a lot of them that aren’t parallel to the others, and quite a few of them hook at the end.
Day 05 – Straight Lines exercise
The wavy lines exercise was ok. At least the overall direction remains similar from one to the next, though I still think I should start by focus on the line shape before trying to vary line thickness (pen pressure).
Day 05 – Wavy Lines exercise
The circles exercise was not so great. Some of the circles are not that round, and they’re also all over the place. I wasn’t that consistent with spacing and size.
Day 05 – Circles Lines exercise

Drawing

On this day, I decided I wanted to move on to a different exercise and try something else. I opted for a view from an angle. Do note that on this day, I couldn’t find my ruler, so everything was done by hand. I started by drawing the head’s outline with some guidelines (In this case, all on the same layer).

Day 06 – Face outline with guidelines
Once that was done, I tried to add a neck, but struggled quite a bit. I eventually ended up updating the head’s outline a bit to account for the jaw, before adding a neck and a plane for where the neck intersects with the head. Finally, I updated some of my guidelines according to the new information on the drawing. Since this is a new type of drawing from a new angle with new techniques, I definitely struggled quite a bit here, and had to erase and redraw lines quite a few times. I still have to build my intuition for this kind of perspective, which will require practice.
Day 06 – Head outline with updated jawline
Day 06 – Head outline with neck
Day 06 – Head outline with updated guidelines

Once this was done, I added some thickness to the top guidelines as per the book (As of yet, I do not know its purpose, but it’ll come as I continue to learn). I also added some face elements.

Day 06 – Head outline with added face elements

Finally, I refined the jawline, and added some eyes and eyebrows to the drawing before calling it a day.

Day 06 – Final drawing

Overall, it makes for an interesting exercise and I’ll definitely need to work on different angles and perspectives. The result is not mind blowing, but for a first attempt, it seems reasonable. Obviously, I didn’t add in any details, so this lack of refinement is definitely noticeable, but that’s not the point of a sketch at this level. I must say, one of the most challenging things for me about this kind of exercise is the lack of the usual symmetry. For example, the eyes are at different “distances” from the canvas, and thus they’re not the same size, nor are they the same distance from their “midpoint” on the guideline. I’ve also been struggling with placement of the guidelines, including the neck. This will definitely require more training (and investigation).

This post is followed by Learning to Draw People Challenge – Day 07 (2024/01/14)