Learning to Draw People Challenge – Day 06 (2024/01/13)

This was initially written February 21, 2024 as part of the 2024 Learning to Draw People Challenge

Exercises

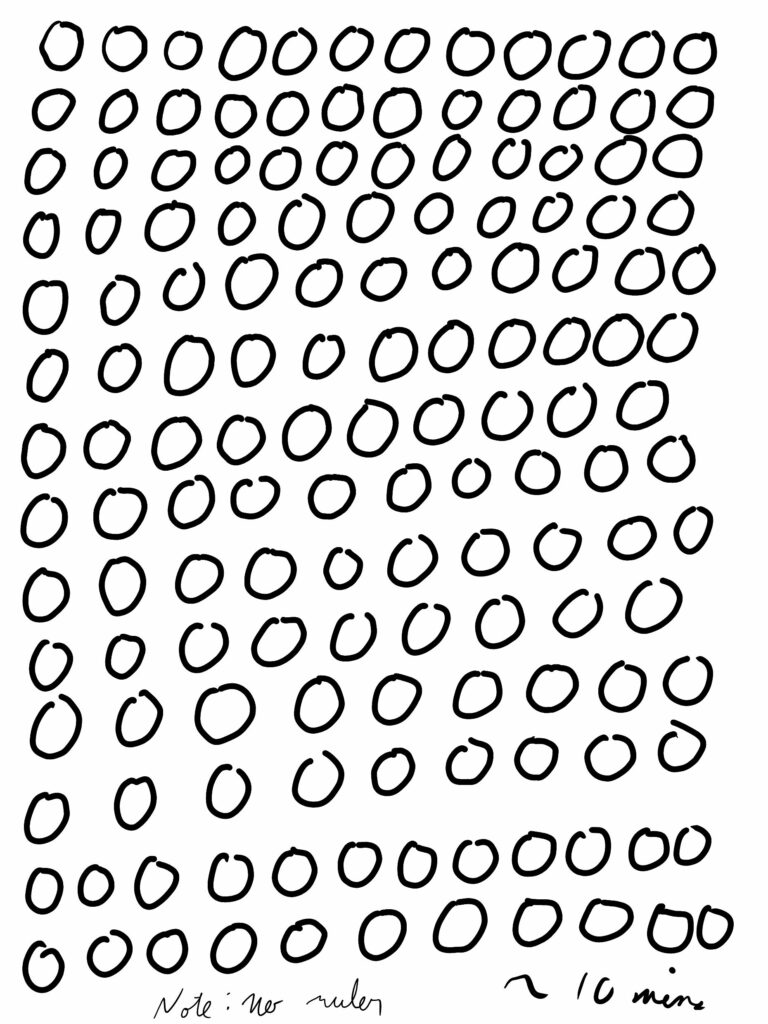
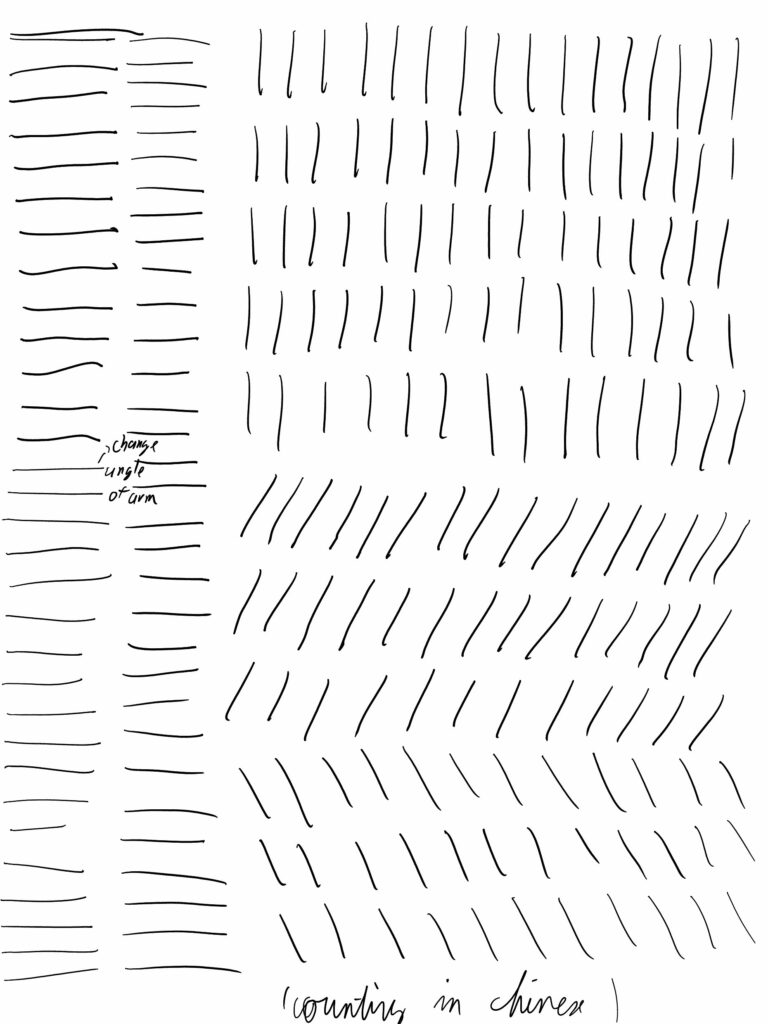
As with other days, I decided to start with the line confidence exercises. Overall, it took me roughly 10 mins. I also came to two realizations:

  • I could practice drawing my lines and circles in both orientations, not just the one that feels most natural.
  • I might as well use this time to fulfill other goals. Since I’m currently learning Chinese, I started counting my lines/circles in Chinese. (Combining different goals and synergizing them seems like it could be useful generally)
On this day, I think my straight lines aren’t that great: their lengths vary too much, there’s a lot of them that aren’t parallel to the others, and quite a few of them hook at the end.
Day 05 – Straight Lines exercise
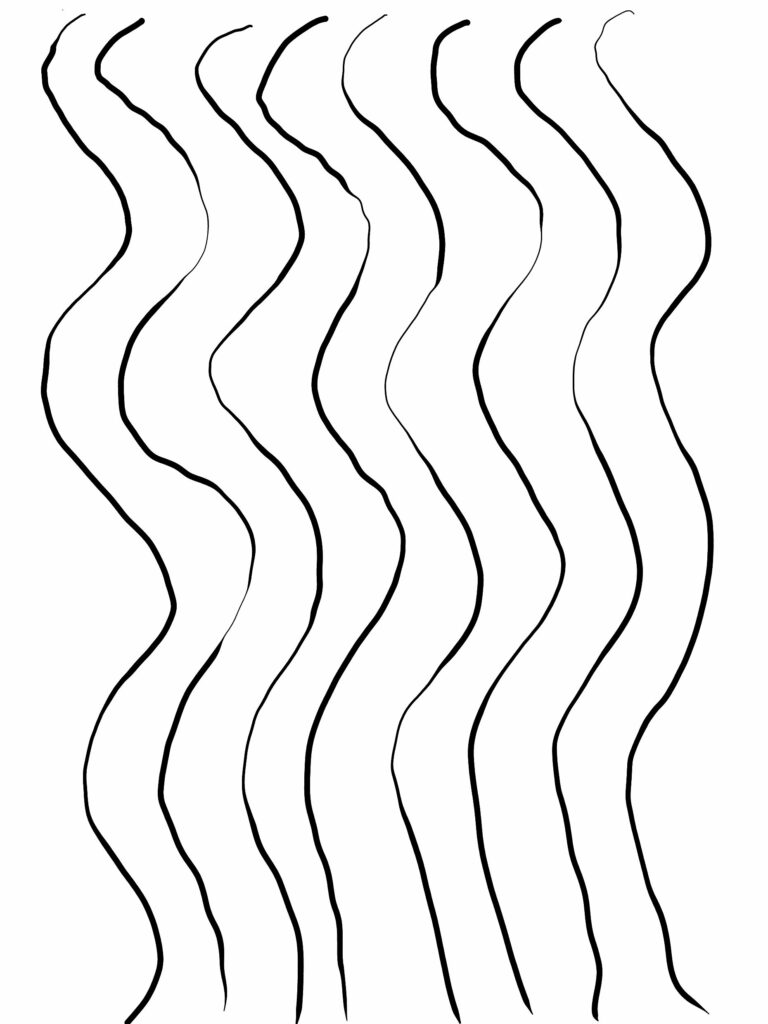
The wavy lines exercise was ok. At least the overall direction remains similar from one to the next, though I still think I should start by focus on the line shape before trying to vary line thickness (pen pressure).
Day 05 – Wavy Lines exercise
The circles exercise was not so great. Some of the circles are not that round, and they’re also all over the place. I wasn’t that consistent with spacing and size.
Day 05 – Circles Lines exercise

Drawing

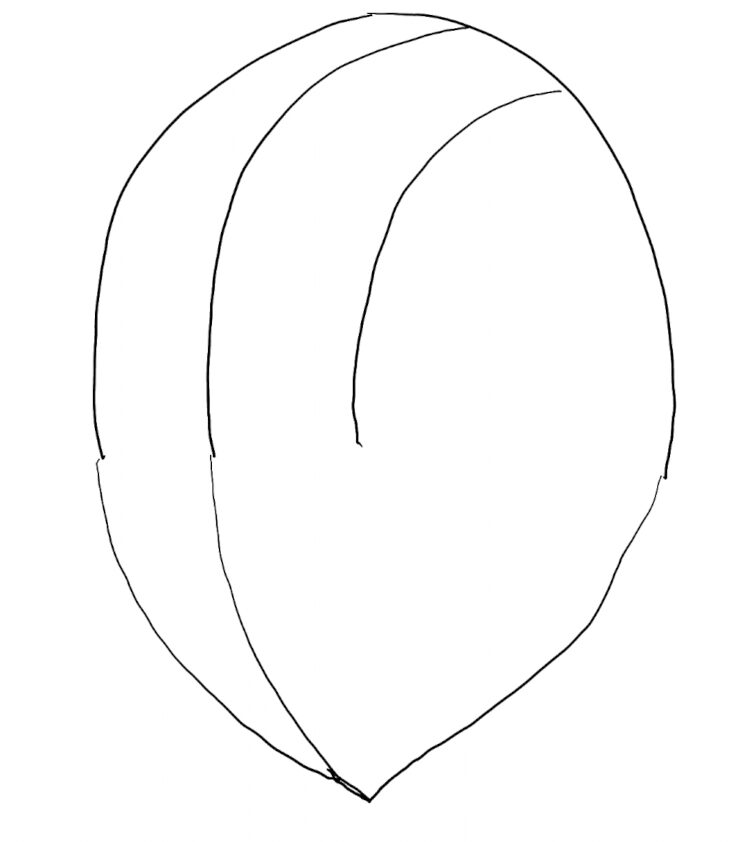
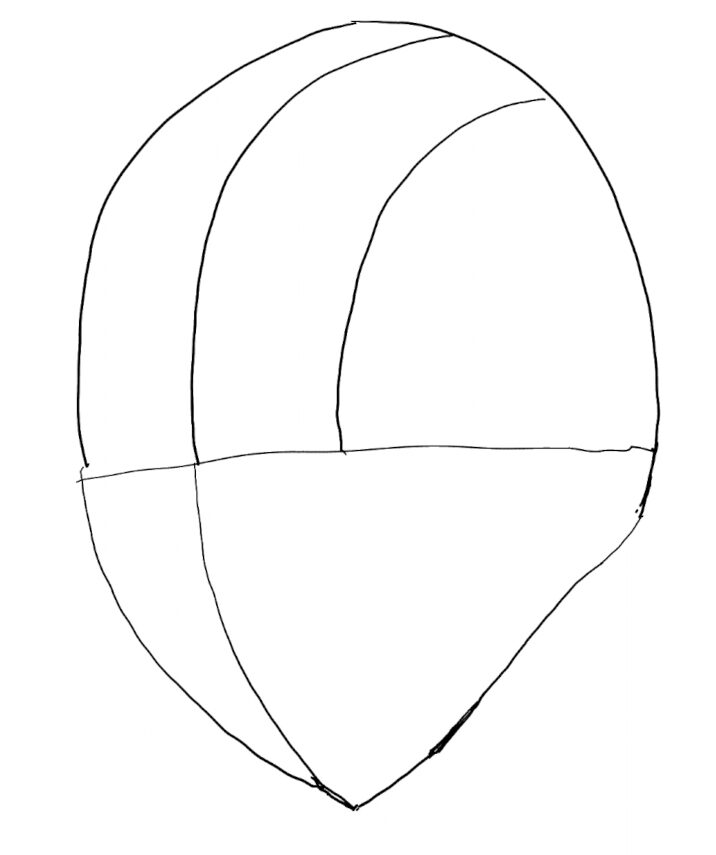
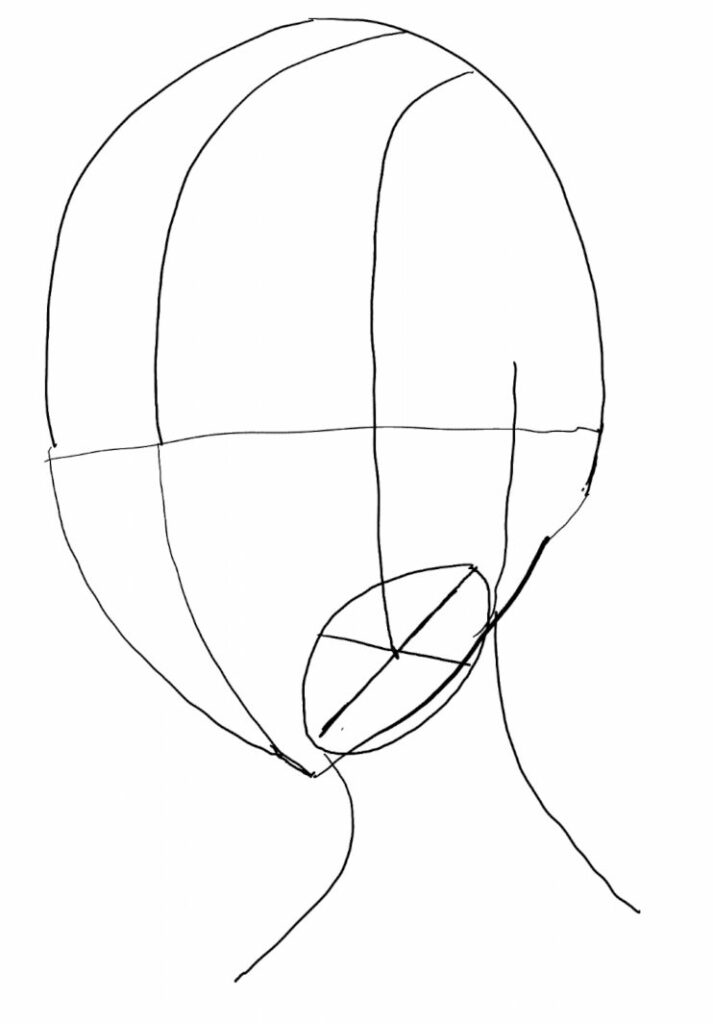
On this day, I decided I wanted to move on to a different exercise and try something else. I opted for a view from an angle. Do note that on this day, I couldn’t find my ruler, so everything was done by hand. I started by drawing the head’s outline with some guidelines (In this case, all on the same layer).

Day 06 – Face outline with guidelines
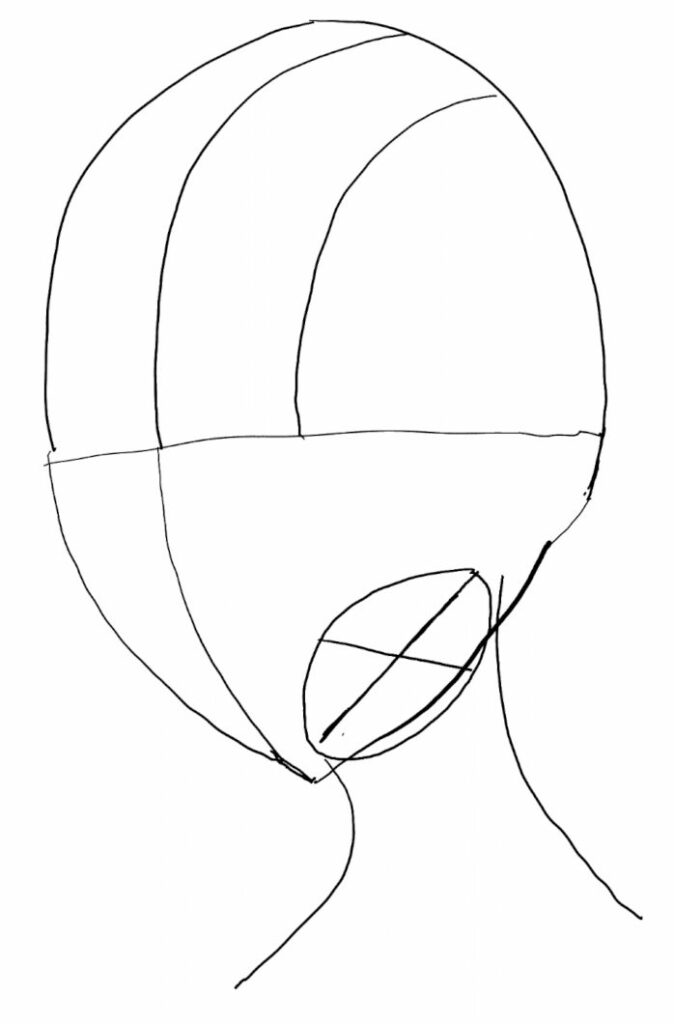
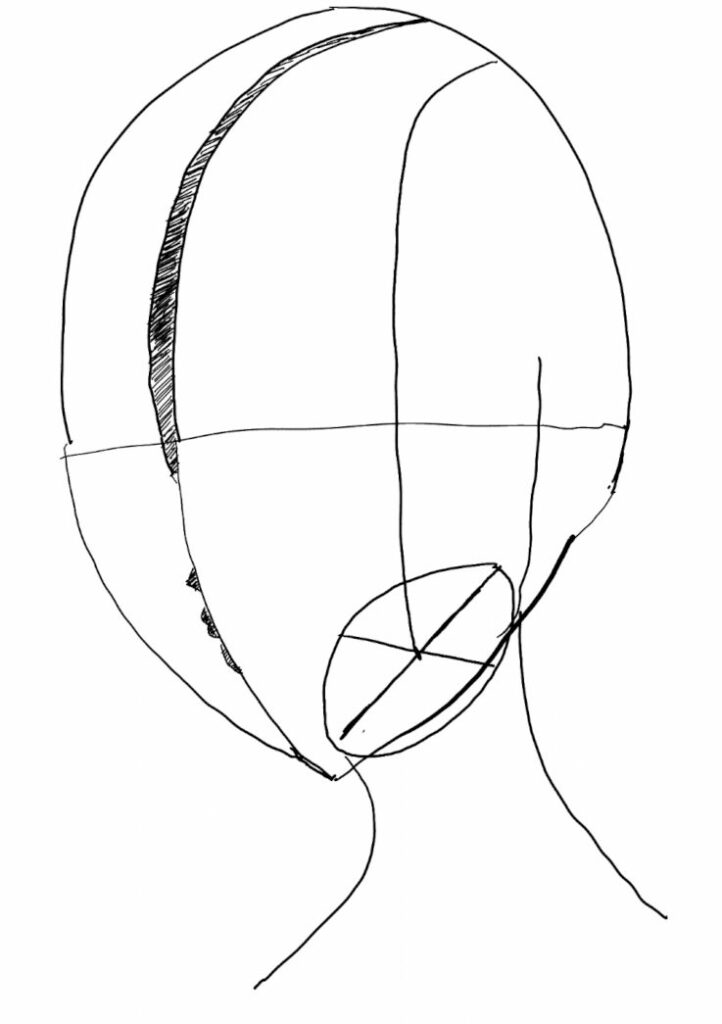
Once that was done, I tried to add a neck, but struggled quite a bit. I eventually ended up updating the head’s outline a bit to account for the jaw, before adding a neck and a plane for where the neck intersects with the head. Finally, I updated some of my guidelines according to the new information on the drawing. Since this is a new type of drawing from a new angle with new techniques, I definitely struggled quite a bit here, and had to erase and redraw lines quite a few times. I still have to build my intuition for this kind of perspective, which will require practice.
Day 06 – Head outline with updated jawline
Day 06 – Head outline with neck
Day 06 – Head outline with updated guidelines

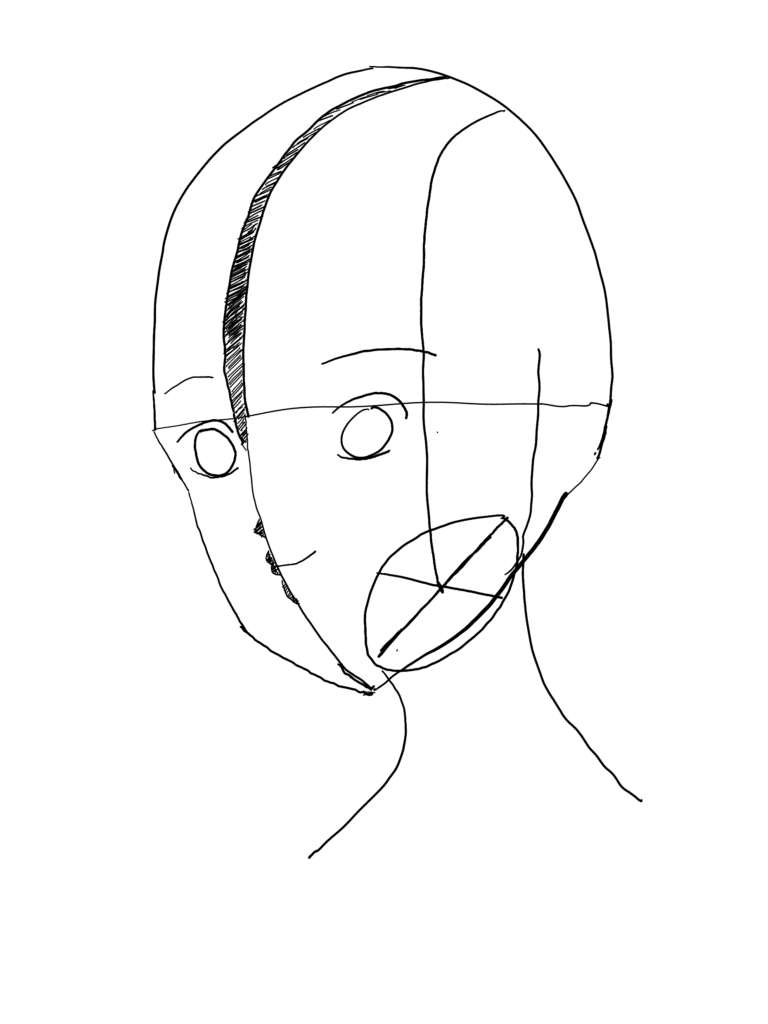
Once this was done, I added some thickness to the top guidelines as per the book (As of yet, I do not know its purpose, but it’ll come as I continue to learn). I also added some face elements.

Day 06 – Head outline with added face elements

Finally, I refined the jawline, and added some eyes and eyebrows to the drawing before calling it a day.

Day 06 – Final drawing

Overall, it makes for an interesting exercise and I’ll definitely need to work on different angles and perspectives. The result is not mind blowing, but for a first attempt, it seems reasonable. Obviously, I didn’t add in any details, so this lack of refinement is definitely noticeable, but that’s not the point of a sketch at this level. I must say, one of the most challenging things for me about this kind of exercise is the lack of the usual symmetry. For example, the eyes are at different “distances” from the canvas, and thus they’re not the same size, nor are they the same distance from their “midpoint” on the guideline. I’ve also been struggling with placement of the guidelines, including the neck. This will definitely require more training (and investigation).

This post is followed by Learning to Draw People Challenge – Day 07 (2024/01/14)

Learning to Draw People Challenge – Day 05 (2024/01/12)

This was initially written February 20, 2024 as part of the 2024 Learning to Draw People Challenge

Exercises

First and foremost, I started with the line confidence exercises. Overall, it took me just over 6 minutes. As noted in the final sheet itself, my hands felt cramped by the end of it.

First in line is the straight line exercise (pun intended). The main things to note here is that I need to improve consistency of spacing and lengths, along with my angles. For example, some of my “vertical lines” are definitely slanted. And my diagonal lines are definitely not parallel all the way through. Moreover, some of my “straight lines” end in a curve or hook. I don’t think it’s that bad of an issue, but it’s still something to note and be mindful of in future exercises.

Day 05 Straight Lines exercise

The wavy lines exercise is definitely the one I struggle with the most. I’ll have to spend more practice on it in the future. One thing to consider might be to focus on the accuracy of the wavy lines before trying to vary the thickness.

Day 05 Wavy Lines exercise

Then, there’s the circles exercise. I don’t think it’s that bad, but I need to improve consistency of the size and spacing. And while the circles themselves don’t improve in terms of their shape, I do think the line confidence itself somewhat improved throughout the exercise, and made with a more “continuous” stroke.

Day 05 Circles exercise

Drawing

The first step of the drawing was to sketch the general shape of the head, including the jaw. This time, I didn’t use specific measurements in order to build my intuition a bit, only using guidelines for separation. (I may have used my ruler on the tablet without marking it, but unfortunately cannot recall). I did struggle a bit with some of those strokes, in particular the bottom half of the face and the jaw. We can see some asymmetry present, with the both sides having strokes starting at different points.

Head outline with jaw, guidelines included

Once the general outline was ready, it was time to place elements on the face: the eyes, the nose and the mouth. Unfortunately, I did struggle a bit with my guidelines. We can see here they’re not quite parallel.

Eyes guidelines
I still moved on with the eyes, nose and mouth. I struggled a lot with the eyes placement and getting the general shape I wanted. Especially at such an angle, it doesn’t feel like a super natural shape to draw yet, especially if I have to replicate it symmetrically. But fortunately, there aren’t constraints on the number of times I can redraw components, especially since it’s a digital drawing.
Day 05 – Rough face elements sketched
Indeed, it is fortunate that I can just redraw components. After the eyes were in place, the nose and mouth felt off, so I opted to redraw them, along with eyebrows, a neck and shoulders. For now, I do struggle quite a bit with the neck and shoulders, but it’s not the main focus here, so it’s ok, especially at this stage.
Day 05 – Rough face with elements repositioned

Once this was done, I refined the eyes. This meant adding eyelashes and detail within the eye (pupil, iris, reflection, etc), skipping the intermediary stepp I’d previously followed. I feel like I struggled quite a bit with where to place the reflection on both eyes for consistency. I also added some details to the ears, along with redrawing the mouth one more time. Here’s the result, I’m generally happy with the eyes at this stage, though I do see some improvements that could be made. For example, the bottom white part of the eye on the left could be reshaped a bit for consistency.

Day 05 – Details added to the eyes

Once that was done, it was time to move on to the hair, which I dreaded. First in line, was the general hair outline.

Day 05 – Hair outline
Once that was done, I added some detail to the hair. I think this worked out better than on the previous days, though I’m not sure why. I was curious and decided to check how long this step took me. Overall, roughly 12 minutes.
Day 05 – Details added to the hair

Finally, once this was completed, I decided to fix a few details, such as the jaw and the upper body. Note that I decided to try to “correct” some issues with some lines along the jaw by making them thicker, which is definitely not professional, but helped me with my confidence in this instance, and helped a bit. Overall, I’m fairly happy with the result, especially with this only being my 5th day at it. There are definitely some issues here and there, but I think it’s not too shabby.

Day 05 – Final drawing (With guidelines)
Day 05 – Final drawing (No guidelines)

This post is followed by Learning to Draw People Challenge – Day 06 (2024/01/13)

Learning to Draw People Challenge – Day 04 (2024/01/11)

Day 04 – 2024/01/11

This was written February 09, 2024 as part of the 2024 Learning to Draw People Challenge

On this day, I had a few technical issues. The canvas ended up in the wrong orientation, and unfortunately, I didn’t manage to record the process. Since it was over a month ago at the time of writing, I do not remember a lot, so let’s keep it short.

First of all, at this point, I had started to watch videos related to drawing, and stumbled upon this video about line confidence. If you’re interested, I recommend giving it a watch. Following this, I opted to start with some of the recommended exercises. As noted on the final one, overall it took me roughly 8 minutes, which isn’t too bad. Here are the results of the exercises:

Day 04 – Straight line exercises
Day 04 – Circle exercises
Day 04 – Wavy line exercises

Let’s now consider the drawing session. Overall, I spent roughly 70 minutes (including 8mins of exercises). I also felt a little more confident with my lines (according to a note I left myself). However, I’m not sure whether this is related to starting the exercises, or having a little more experience following the previous three days. However, the result is still questionable. I think the hair turned out better than on day 03, but I think there are definitely some spatial issues with the overall proportions and the placement of some elements, in particular the eyes. (Although this could probably be fixed quickly with some editing tools). And despite the increased line confidence, some of the lines have issues, such as with the jaw line. But overall, it’s not too bad, especially compared to day 01. Here is the drawing:

Day 04 – Drawing with guidelines
Day 04 – Drawing without guidelines

This post is followed by Learning to Draw People Challenge – Day 05 (2024/01/12)

Learning to Draw People Challenge – Day 03 (2024/01/10)

This was initially written February 19, 2024 as part of the 2024 Learning to Draw People Challenge

On this day, I spent just over an hour drawing. I started with the initial measurements based on the reference material in the book. However, I’ve actually been struggling with getting those measurements right and this will require further investigation. Once I had my guildelines, I spent some time trying to get the head’s outline in place, this time immediately including the jaw. I had a lot of insecurity and issues getting it in place, so there are a lot of “scratch marks” present. And it’s not even perfect anyway.

There are two things I learned during this stage:

  • There are natural pivot points that can be used with your arm (your elbow, you wrist, etc…). These can be used to help draw some curves more naturally. Obviously, it will require more experimentation, but keeping that in mind can be useful.
  • Unfortunately, due to the nature of drawing, symmetric things are sometimes not trivial to draw. Because I’m using my right hand, there some stroke orientations/directions are more natural to me than others. This means if I try to draw the four quarters of a circle separately, each will have a different level of difficulty. This can be alleviated by re-orienting the canvas, but that still won’t accomplish proper symmetry…only a rotation.
Head outline with jaw, guidelines included

Once the head’s shape was sketched, I sketched the eyes, nose and mouth. At this stage, the results seem disappointing and unnerving, but that’s ok. It’s meant for rough placement.

Head with rough eyes, nose and mouth. (Guidelines included)
Head with rough eyes, nose and mouth. (No Guidelines)

The next step was to refine the eyes, eyebrows, eye lashes and ears, along with a little blush for effect. One very notable thing with this step is that I spent a lot of time adjusting things. For example, deleting parts of the eyes that existed in the previous part, and trying to fix them, better center them, etc.. A lot of learning at this stage, which eventually should be replaced by intuition if I gain enough experience. Two important lessons I’ve learned here:

  • It’s ok if parts of the rough sketch are not perfect, they can be adapted later. Early on, “good enough” is sufficient
  • Some detail imperfections can get masked by thicker lines in some situations, especially when it comes to having the “perfect curve” (Though I will have to learn more about thickness of line and their proper purpose in the future)
Eyes, lashes and ears with more detail

Once these part of the face were “ready”, I moved on to the hair (also adding a neck and shoulders). Here there was a lot of erasing and retries, in particular with the neck and shoulders. As for the hair, I followed the book, first with an outline of where the hair would lie:

Preparing hair spacing
Finally, I tried to add detail to the hair. I definitely struggled a bit with this one, and realized how unintuitive hair placement feels to me. A few issues I’ve dealt with are:
  • The actual orientation of the hair to make it more natural
  • What individual lines represent. Ultimately, we’re representing the general shape of the hair, rather than individual strands. However, I struggled to make sense of when to connect strands of hair, and when to simply add unconnected lines.
Here is the final result, with and without guidelines. It’s definitely no masterpiece, and isn’t as good as the model I’m following, but for my third day, I think it’s not too shabby. (There was an extra step I could have followed, but I opted to stop there for the day.)
Day 03 final drawing (With Guidelines)
Day 03 final drawing (No guidelines)

This post is followed by Learning to Draw People Challenge – Day 04 (2024/01/11)

Learning to Draw People Challenge – Day 02 (2024/01/09)

This was initially written January 9, 2024 and completed February 21, 2024 as part of the 2024 Learning to Draw People Challenge

As discussed in Learning to Draw People Challenge – Week One Evaluation (Pause Announcement), I had to take a break for a while. Now it’s time to at least follow up on that first week.

On day 02, I ended up spending roughly 45 minutes drawing. Not because I felt like I wanted to stop, but because I actually had something scheduled that forced me to stop. Similar to the previous challenge, I did face some motivation issues with getting started. However, once I did start, I did fully immerse myself in the drawing. This time, I also ended up drawing in my room.

Following some issues I had on the previous day, I also decided to disable “hand touch” on my tablet this time. It seems to have resulted in less unexpected behavior, although wanting to zoom in did become more annoying.

As on day 01, I started from scratch. I started with drawing guidelines. After looking at the reference model, I believe for the initial head shape, the vertical line follows a 3:2 ratio, and the horizontal lines are 2:2. (I.e.: They’re the same length as the the lower part of the vertical line). However, despite these measurements, I miscalculated and used a 2:1 ratio for a vertical length of 9cm. (6cm:3cm).

Day 02 – Guidelines
Afterwards, I moved on to draw the general shape of the head, and opted to immediately add a jaw line. Note that the jaw line adds verticality to the face (I.e.: It goes lower than the guidelines initially did). I must say, the shape of the head does leave to be desired, especially the top of it. Although funnily enough, it reminds of super-intelligent super villains in cartoons, where their brain bulges out.
Day 02 – Head outline

Once that was done, I went back to drawing more guidelines for eye and nose placement. At this point, according to the reference material, I had to split the vertical line (including the jaw) in four equal lengths. With the jaw, the length was 10cm, so four equal lengths of 2.5cm. The center now should serve for the top of the eyes, while the bottom 1/4th mark serves for the nose. The length of the eyes I measured as roughly 1/8, so the bottom of the eyes should be roughly halfway between the top of the eyes and the nose. Those guidelines didn’t end up as horizontal (or parallel to one-another) as they should have been. (Future note: I am not convinced about those exact ratios, so please do not take those to heart)

Day 02 – Eyes guidelines

Unsurprisingly, once these guidelines were in place, I moved on to draw a rough version of the eyes, nose and mouth. At this stage, the eyes were just one big circle each.

Day 02 – Rough Face Elements added

The next step was to add eyebrows, ears and initial detail to the eyes. This meant adding pupils and a circle to represent the eyeball itself. Meanwhile, the initial circle of the eye was partially erased. On the previous day, this was where I stopped.

Day 02 – First Eye refinement

Finally, I opted to continue with the next steps. This means I refined the eyes and added a blush under the eyes. I also changed the placement of the eyebrows a little, and tried to fix the shape of the head. (Although I now realize that this could be partially addressed while adding hair in a future step anyway). Here, I most struggled with the eyes. I redrew chunks of them quite a few times! Here are the results:

Day 02 – Final drawing (With Guidelines)
Day 02 – Final drawing (No Guidelines)

I think this drawing isn’t that bad. I’d even say there was some improvement when compared to the previous day. One thing I’ve also realized is that a lot of the early steps just need to be “good enough” and not perfect, since a lot of it ends up being drawn over and removed as more refinements are added. Obviously, it’s important to have adequate proportions, and if it’s not “good enough” things will go on looking off all the way through, potentially skewing the outcome. However, perfection definitely does not seem necessary in those early stages. Looking forward to see how tomorrow goes, and whether I continue improving a bit. I’m also planning to add an extra stage to my drawing, with some hair.

Before I leave you, one final note of embarrassment. I’ve mostly been following the drawings themselves, skipping over the Chinese comments due to a lack of time and the fact I’m still unfamiliar with a lot of the vocabulary present.

This post is followed by Learning to Draw People Challenge – Day 03 (2024/01/10)

Learning to Draw People Challenge – Week One Evaluation (Pause Announcement)

This article was written January 15, 2024

Hello everyone,
I’ve now completed a week of drawing daily. As promised, it’s time to evaluate whether this challenge makes sense for me or not.

As you may have noticed, I haven’t posted a lot of content this past week (as of writing this, only the first day has been published). Does this mean the habit didn’t stick? Not quite, I have been drawing every day. I’m actually really happy with the progress I’ve made and what I’ve been able to accomplish. It’s nothing out of this world, but I’ve still managed results that are better than I would have expected.

Unfortunately, while drawing has been going well, I haven’t been able to keep up with the blog posts. There are a few factors behind this:

  • I tend to review my posts at a later time (usually the next day), which means more work, and an extra task left incomplete for an extended period of time (a mental “loose end”). And I do catch a lot of mistakes in that review step (I’m also sure there are plenty left afterwards)
  • Since I’m drawing on the tablet, but writing my posts on a computer, I need to export and transfer the files (a recording and my drawings), adding extra friction. Moreover, the software I’m using has a few kinks with its export feature.
  • Things have been really exhausting and stressful for me lately, and I’ve been getting further and further behind, adding to my stress

So, based on this, what’s the verdict? I think I’m going to pause this challenge for a bit to get my life back on track. I’ve been struggling a bit with my language classes lately, and I also have to go through an alien resident application (which I find stressful). Therefore, I want to spend one or two weeks handling these. Afterwards, I plan to focus on catching up with the posts I haven’t completed yet. Since it’s my impressions that the content is much better if I can write it while the drawing experience is still fresh in my mind, I’d rather get up-to-date first and have a fresh start, instead of trying to catch up to this constantly moving goal post. Once I’m back on track, I plan to re-attempt this challenge, starting once again with a one week trial period.

So, would I say this experiment was a failure? Not exactly, I’d just say it was poorly timed. If this habit had already been formed, I don’t think I’d be struggling so much (after all, my daily reading doesn’t really feel like an issue here). For anyone that’s following me, I’m sorry about this set back, but unfortunately I had to re-prioritize things. I’d like to use this opportunity to remind everyone of the important of taking care of your mental health!

Thank you everyone who has been following me, and I hope to be back soon re-invigorated and re-energized, even better equipped to tackle this challenge. Have a nice one!

Learning to Draw People Challenge – Day 01 (2024/01/08)

This article was written January 8, 2024 as part of the 2024 Learning to Draw People Challenge

Here is the outcome of my first day of the drawing challenge. I ended up spending almost 1h25mins on it, so my first day was quite productive from that point of view. Also, I apologize in advance: I tried to make some gifs out of the process, but had some major issues the gif’s colors. Also, it turns out the app I use does not add a line until it’s completed and the pen is raised. This isn’t an issue while drawing, since the e-ink physically appears as the pen passes. However, it makes for an underwhelming viewing experience.

Before starting my drawing session, I decided to make a detour to purchase a small ruler. I figured that being able to make small measurements and to draw straight lines might be useful. It turns out this was the a good decision.

After this purchase, I went to a Cafe and started to check the book. After looking at the “lesson” I was to follow, I realized I should probably start with some basic exercises. For this reason, I started by drawing an ellipse and trying to trace over it for a while. I’m…not great at tracing an ellipse.

First attempt at an ellipse

After some time, I decided it might be a little easier to divide the task. Instead of drawing a full ellipse, I added the two straight lines (guidelines for the face shape), and split the task in four, independently drawing the sections in each quadrant. (I also added a neck to better follow the book). I also tried to make a few fixes here and there to the shape.

Second attempt at an ellipse (with a neck)

Once that was done, I looked at the first few examples demonstrating the shape of a head, and decided to start over and practice this step once more. I once again drew two perpendicular lines, took measurements from the book, and added a few annotations to show the head’s oval should be aligned, roughly. This time, I made a lot of corrections to it to try to get an acceptable result. Once that was done, I erased everything and started over once more. (My goal was to practice after all)

Third attempt at an ellipse (with a neck)

On my next attempt, I drew the guidelines, and then started with the shape of the head. This time, once I got a passable result, I decided to move on with the next exercise. With this one, I added a few markers and guidelines as shown in the book to mark where the eyes and nose should be. (I may actually have gotten the wrong measurements here). Then I attempted to draw the basic shapes of eyes, nose, mouth and ears. Once that was completed, I went on with the next part, adding simple eyebrows and some complexity to the eyes. The final result is definitely not great, but for a first attempt, it’s not that bad.

First Attempt with Guidelines and Marks
First Attempt

Once done, I once again started from scratch. This time, once I got a general oval shape, I tried to update the shape to get more of a jaw-line, as shown in the book. Unfortunately, this didn’t go too well at this stage, so I reverted my changes. I then moved on to add marks and guidelines, before drawing some extra features (I did waste some time on the guidelines, since I got a little confused about the ratios and measurements. I’ll have to look at this more closely tomorrow). Finally, I decided to re-attempt to sketch a jawline. Unfortunately, this second drawings seems worse than the first one. I think this is due to a measurement error with the guidelines, resulting the eyes looking too small. I’ll definitely pay closer attention to this tomorrow. This final sketch is where I stopped on my first day.

Second Attempt
Second Attempt with Guidelines and Marks

A few extra notes:

  • I have a few qualms about using my tablet for drawing. In particular, it often detects my hand while I sketch, resulting in unexpected/unwanted “touches”, sometimes messing things up
  • It turns out that drawing symmetrical things is a rather tricky endeavor. Because I use a single hand to draw, it means that when drawing the mirror image of a stroke, my motion itself isn’t actually a mirror image, and so one direction tends to be trickier than the other. Hopefully, this is something that gets better with practice.
  • I need to train myself to better gauge and draw angles, symmetry and ratios, along with accurate placement of different elements.
  • I’m probably going to go on with this sort of simple exercise for some time, since I don’t have proper foundations. Maybe add a few elements over time, but still repeating these very basic aspects to train these skills

That’s it for Day 01, see you on Day 02.

Note that this was originally followed by Learning to Draw People Challenge – Week One Evaluation (Pause Announcement)

Learning to Draw People Challenge – Introduction

This article was written January 7, 2024 as part of the 2024 Learning to Draw People Challenge

With the speed reading challenge complete, it’s time to start a new one. My goal would be to spend 12 weeks learning to draw (roughly 3 months). If my count is correct, starting on January 08 would mean ending on March 31. However, do note that committing to 3 months at this point would be foolhardy, especially with no experience or clarity on the amount of effort involved. For this reason, I’m planning to have a one-week trial period, during which I plan to draw every day, and to write a daily blog post. After that, I’ll should be better positioned to evaluate whether this makes sense, or whether I should go back to the…drawing board (pun intended).

A few notes on the specifics. First, I’m planning to use a book to guide me, and to follow it like I would a course. As a bonus challenge, it’s a book I purchased in Taiwan, and is entirely in Chinese.

The book I’m planning to use for learning
But I’m willing to take this challenge, and I think it’ll be a useful way to also practice my Chinese. Also, the focus of this book is drawing people accurately.

As for the equipment I’m planning to use, I’ll go with my e-ink color tablet. It does mean that there are some limitations I’ll be facing, but it also means I should be able to do this from anywhere, without requiring supplemental material (I’m already bringing it everywhere with me). I’m also planning to use the built-in note-taking app. It’s definitely not the best software for drawing, but it’s well optimized for this tablet (including the limited palette choice).

Thanks for partaking in this adventure with me, and I hope you find the ride entertaining and insightful. Wish me luck!

You can find the first post here: Learning to Draw People Challenge – Day 01

December in Photography – Retrospective

This article was written January 7, 2024

For the month of December, my primary goal was to spend some time daily (ideally at least 30 minutes) taking pictures with my DSLR camera. This goal I did accomplish. However, I was also planning to make weekly videos on my YouTube channel documenting my journey. This was a massive failure (Spoilers, I did not release a single video beyond the initial announcement of December in Photography). Afterwards, once I’d finally set up this blog, I planned to release one post per day. This also hasn’t been going so great (By the time of writing this, I’m at two blog posts for December in Photography, and each of those took me multiple day, each with multiple hours of effort). With this out of the way, let’s discuss what went well, what didn’t go so well, what I’ve learned, and what’s in reserve for the future.

What went well?

Let’s start with what went well. I did manage to put time aside every single day for Photography. It wasn’t exactly easy: there were many days where it felt like a complete chore to get started. Honestly, I got worried at some point that I wouldn’t manage to complete it. However, I still pulled through, although my wavering motivation resulted in often taking pictures after dark, which is definitely a more complicated task.

On the plus side, despite the fact that I often had trouble motivating myself, once I actually got out and got my camera ready, things went smoothly. I was enjoying myself. I found the process fun, interesting, and even relaxing at times. I definitely never regretted doing it once it was underway.

Another thing I think went well: it pushed me to create this blog and start making posts, somewhat regularly. Granted, I don’t have a lot of posts out yet, but I think it’s still a good start that I should be happy with. It got a new habit in place.

What didn’t go well?

As mentioned earlier, I had a lot of trouble releasing videos or posts. But why is that? Unfortunately, I massively underestimated how much effort it would be to look through a bunch of pictures to review and analyze them. Turns out that it’s easy to take a lot of different pictures in a short time, but going through all of them and actually trying to analyze them is a lot more time-consuming. Ultimately, I think this might have been the wrong challenge to start with, considering how disproportionate the effort needed for retrospection is.

Another thing that didn’t go too great was keeping up with my reading material, Understanding Exposure by Bryan Peterson. Things were ok initially, but as the month dragged on, I eventually stopped reading it, and missed out on useful information that could have been valuable, only learning these things after the end of the month while finishing the book (If you’re interesting in photography, I definitely recommend the book).

Along a similar vein, I believe not reviewing my pictures until after the end of the challenge stifled my learning experience. I think retrospection is an important part of learning, and so is being able to apply what the lessons of the retrospection afterwards, to iterate. And as with most such processes, a shorter feedback loop is ideal.

What I’ve learned

Obviously, I did learn a few things about photography. However, I think I’ll leave a lot of this out for a dedicated post. My main takeaways are about exposure, framing and my own personal preferences.

Next, I now realize how important continually retrospecting is, but also how much effort that can be in itself for some projects (in particular for photography). Because of this, I better understand the importance of accountability and of tackling more manageable chunks. I also realize it’s important to have a notion of how complex and time-consuming tasks will be, while also acknowledging it’s hard to assess without first-hand experience. My initial goal of weekly videos was definitely unreasonable in retrospect, but I did not initially realize the scope of such and undertaking.

If I were to tackle a photography challenge again, I would probably adapt it in one of two ways:

  • Limiting the amount of pictures I review and present (Maybe have a limit of x good pictures and y bad pictures to analyze)
  • Diminish the frequency to have more time for the the retrospection. For example, taking picture every other day, maybe using the extra day to learn photography post-processing as well. Then I’d have more time to analyze the pictures.
A combination of both might also be a good idea.

I also think it might be useful for my learning to be more “guided”. For example, I could try to focus on a specific aspect of the skill each week. When trying to learn a new skill, there are usually many different things to tackle. For example, in this case I could have approached either different kinds of subjects (Indoors, buildings, nature, traffic, night, etc…) or different techniques (Framing, exposure, aperture vs shutter speed, focus, flash photography, etc…). This would probably have helped limit the scope of the daily blog posts as well.

For future projects, I think it’ll important to have an initial trial period to see how much effort is involved with each part, possibly a week, and then adapt accordingly.

The future

So, what about the missing days of December in Photography? Currently, my thoughts are that I want to start with my next project, for which I will have a separate post. My biggest goal for December in Photography at this point is to complete December 30 and 31. After that, I might go through the remaining days, although with a more limited scope, possibly only keeping the best pictures (and also interesting ones even if they’re not great), and limiting in-depth conversations to interesting topics I haven’t covered yet. But as I don’t want to tie myself down too much at this point (it would only end in disappointment and stress), I’m not making any promises.

Final Thoughts

Despite the fact that multiple aspects of this could be considered a failure, I think it was still a great learning experience for me and I’m glad I tackled this challenge. I also had a lot of fun doing it, although there was definitely some stress involved. I hope you enjoyed my thoughts on this, and the existing posts.
Learning Speed Reading – One week after

This article was written 2024/01/07

So, I’ve now spend a week learning to speed read. Here are my thoughts about this experiment.

The resource I used presents two different exercises (For proper explanations about the process, I recommend reading it yourself).
*Edit 2024/01/09: In order to avoid plagiarism, I opted not to fully reiterate what the exercises are. For this reason, it is advised to at least skim the sections “Second – Trackers and Pacers” and “Third – Perceptual Expansion” from the original article”
The first exercise, labelled as “trackers and pacers”, consists of two incremental steps. The goal is to focus on “maintaining consistent speed and decreasing fixation duration” by using a tracer (e.g.: a pencil) to go through each line at a consistent speed (first 1sec and then 1/2sec). The second exercise focuses on “perceptual expansion” and contains three incremental steps. The goal being not to go back and forth to the very beginning and very end of the line, reducing travel time.

Each day, I proceeded by:

  1. Taking an initial baseline speed test on swiftread.com
  2. Going through the five steps of the exercise reading a copy of Frankenstein on my e-ink tablet (I chose Frankenstein because I’d already read it before, and it’s public domain)
  3. Taking a speed test after the fact
The whole process usually took roughly 15-20 minutes.

First thing to note: from the second day onward, I was already using the “distance” of 3 words from each end of a line, as per the last perceptual expansion exercise. Even for the Trackers and Pacers exercises. Thus, I wasn’t really focusing on perceptual expansion anymore.

Next, while doing these exercises, I was usually having trouble understanding what I was “reading”, even if I was in the moment. The exercises do state that it’s fine not to be able to comprehend your reading during the exercise, but I thought it was still noteworthy. As I progressed through the week, I got a little more comfortable with understanding what I was reading during the slower exercises, but not from the faster ones.

I also think that ideally, I should always have conducted these tests in a quite and comfortable environment. For instance, on one of the days (01/03), I was in a library surrounded by loud people that kept making the table I was using shake. This didn’t feel like the best of environments for something like this.

Also worth noting, during the last few days, it seemed like my eyes were moving on their own while taking the final speed test. I’m not sure about the actual implications of this, but I found it interesting all the same.

Finally, it turns out that wanting to get a baseline of my reading speed felt kind of stressful. And since I worried more about the speed than the comprehension, I tended to be worried about how going back to read things I missed would affect my speed. Moreover, thinking about these concerns also took away from my concentration. However, there were some days where I was more confident about quickly rechecking a few details, and I feel like going through the speed tests themselves I also learned a little about how they worked and how to take them, even though I still got nervous and often didn’t get perfect comprehension.

Now, the results:

Day 01/01 01/02 01/03 01/04 01/05 01/06 01/07
Before: Speed 223 WMP 407 WMP 327 WMP 399 WMP 389 WMP 361 WMP 329 WMP
Before: Comprehension 50% 33% 100% 100% 67% 67% 67%
After: Speed 505 WMP 453 WMP 472 WMP 429 WMP 590 WMP 604 WMP 467 WMP (482 WMP)
After: Comprehension 75% 100% 67% 100% 100% 67% 33% (100%)

First, let me explain an oddity in the results. For the last day, there are two “after” results displayed. This is because the first one I got was a much longer text than usual, and I figured the added stress impacted my results, and thus decided to run a second one.

So, what are some of the result. First of all, my baseline seems to have been increased from what it was the first day, although it’s hard to tell how much of an outlier my first test could have been.

Next, while there is a lot of fluctuation from day to day, it seems like after the exercise, I was always reading significantly faster, without really sacrificing comprehension.

Based on this, what are my thoughts? Well, I think that while it did increase my baseline a bit, it doesn’t seem to be a “permanent” fix. Thus, I think this might be a valuable exercise to do before a reading session, when intending to speed read. Call it a “primer” of sorts. However, I probably wouldn’t do the entire exercise as is, especially since I’m not really doing any perceptual expansion anymore. Instead, I would probably do 2 minutes quickly (~1sec per line), and two minutes even faster (~1/2sec per line). (Also note that this speed metric is fairly arbitrary, since it depends a lot on the font). Moreover, I don’t think speed reading is something I want to bring to all of my reading. I think there are times where it’s reasonable for me to slow down, and either enjoy or think a bit more deeply about what I’m reading. However, I do think there are still some good uses to speed reading, such as a quick overview of an article or paper, or going more quickly through a boring or annoying section of a book/article. But as the exercise’s blog post itself highlighted, when using speed reading for studying, it’s better to read multiple times for added exposure and recall improvement.